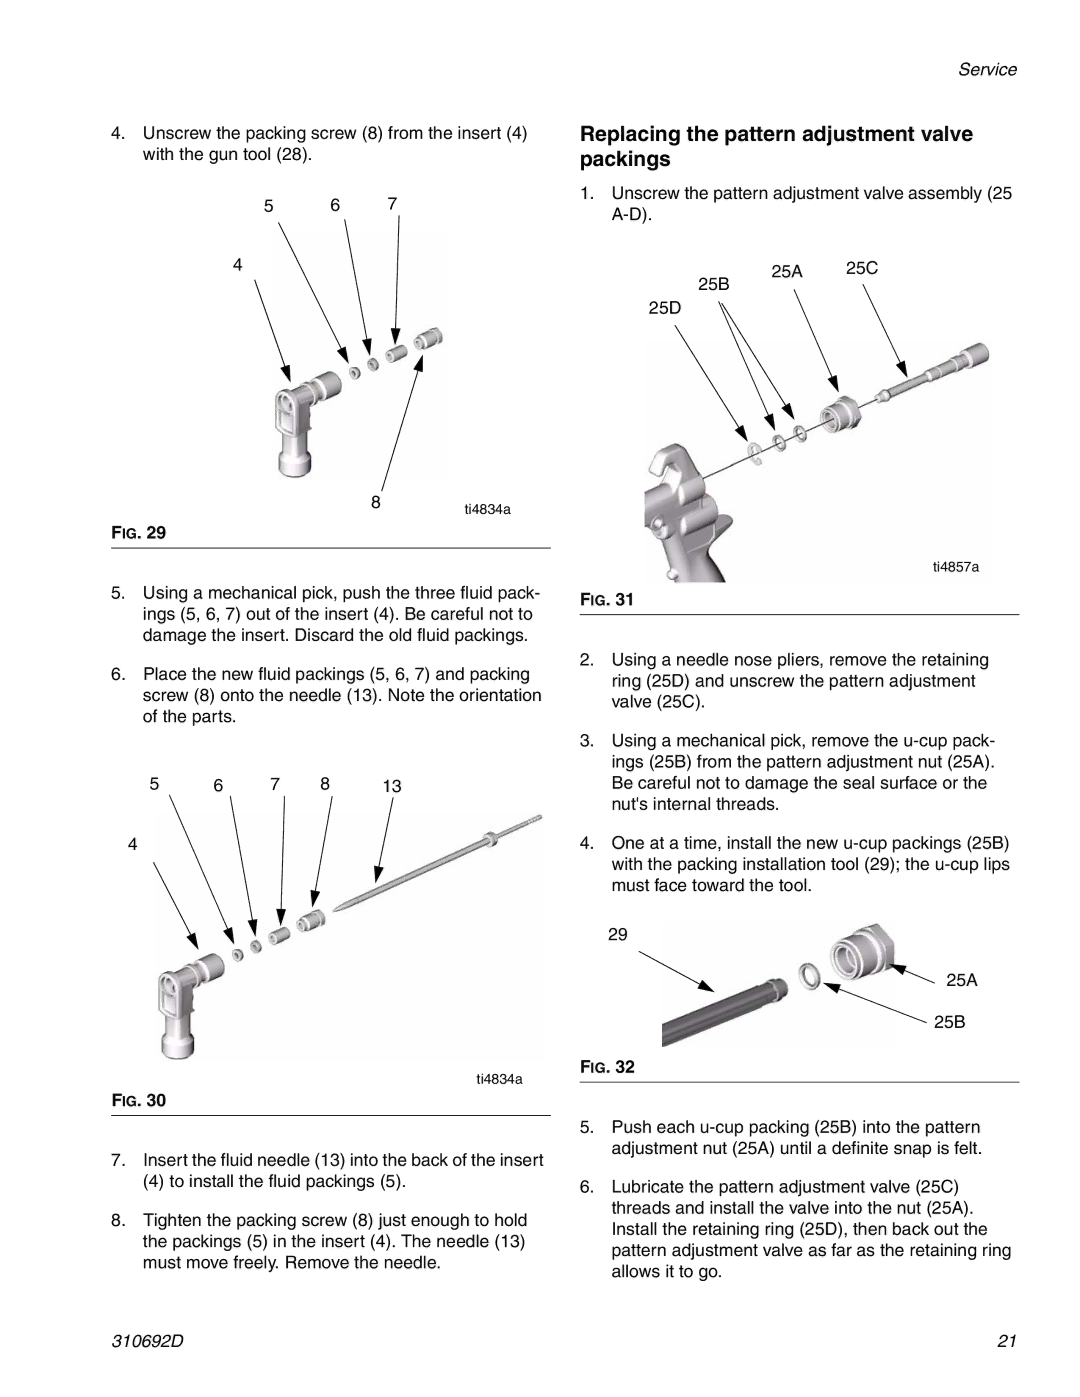
4.Unscrew the packing screw (8) from the insert (4) with the gun tool (28).
5 6 7
4
Service
Replacing the pattern adjustment valve packings
1.Unscrew the pattern adjustment valve assembly (25
25A 25C
25B
25D
8 ti4834a
FIG. 29
5.Using a mechanical pick, push the three fluid pack- ings (5, 6, 7) out of the insert (4). Be careful not to damage the insert. Discard the old fluid packings.
6.Place the new fluid packings (5, 6, 7) and packing screw (8) onto the needle (13). Note the orientation of the parts.
5 | 6 | 7 | 8 | 13 |
4
ti4834a
FIG. 30
7.Insert the fluid needle (13) into the back of the insert
(4) to install the fluid packings (5).
8.Tighten the packing screw (8) just enough to hold the packings (5) in the insert (4). The needle (13) must move freely. Remove the needle.
ti4857a
FIG. 31
2.Using a needle nose pliers, remove the retaining ring (25D) and unscrew the pattern adjustment valve (25C).
3.Using a mechanical pick, remove the
4.One at a time, install the new
29
![]() 25A
25A ![]() 25B
25B
FIG. 32
5.Push each
6.Lubricate the pattern adjustment valve (25C) threads and install the valve into the nut (25A). Install the retaining ring (25D), then back out the pattern adjustment valve as far as the retaining ring allows it to go.
310692D | 21 |
