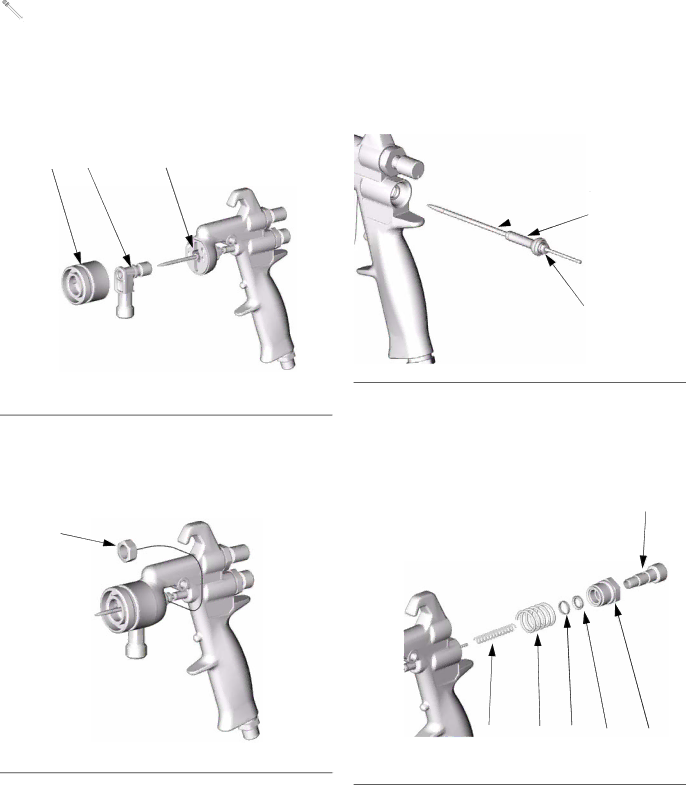
Reassembling the gun
![]() To ensure proper alignment of the parts, assemble parts in the exact order given in the following steps.
To ensure proper alignment of the parts, assemble parts in the exact order given in the following steps.
1.Slide the insert (4) into the spray housing (2A), and install them onto the gun body (1). Align the housing with the slot and lip (A) on the gun body.
Service
sary. If replacing needle tip, use low strength thread adhesive on needle tip threads.
4.Lubricate the outside of the new air valve assembly (26) and place it on the fluid needle (13), against the nut (B). See FIG. 38.
5.Install the fluid needle (13) and the air valve assem- bly (26) into the back of the gun.
2A 4 | A |
ti4830a
FIG. 36
2.Tighten the hex nut (9) onto the insert (4)
9
ti4978a
FIG. 37
13
![]() 26
26
B
ti4853a
FIG. 38
6.With
21
23 | 22 | 37 | 20 | 19 |
ti4850a
FIG. 39
3.Check the fluid needle (13) for damage or excessive wear. Replace needle tip or entire needle if neces-
7.Install needle spring (23). Install fluid adjustment knob (21).
310692D | 23 |
