Operation
Operation
Pressure Relief Procedure | 4. Open the fluid drain valve (installed on the |
| system) to relieve all fluid pressure. Have a |
Follow the Pressure Relief Procedure | container ready to catch the drainage. |
whenever you see this symbol. |
|
This equipment stays pressurized until pressure is relieved manually. To help prevent serious injury from pressurized fluid, such as splashing in the eyes or on skin, follow the Pressure Relief Procedure when you stop pumping and before you clean, check, or service the equipment.
1.Shut off the air supply to the pump.
2.Open the dispensing valve, if used.
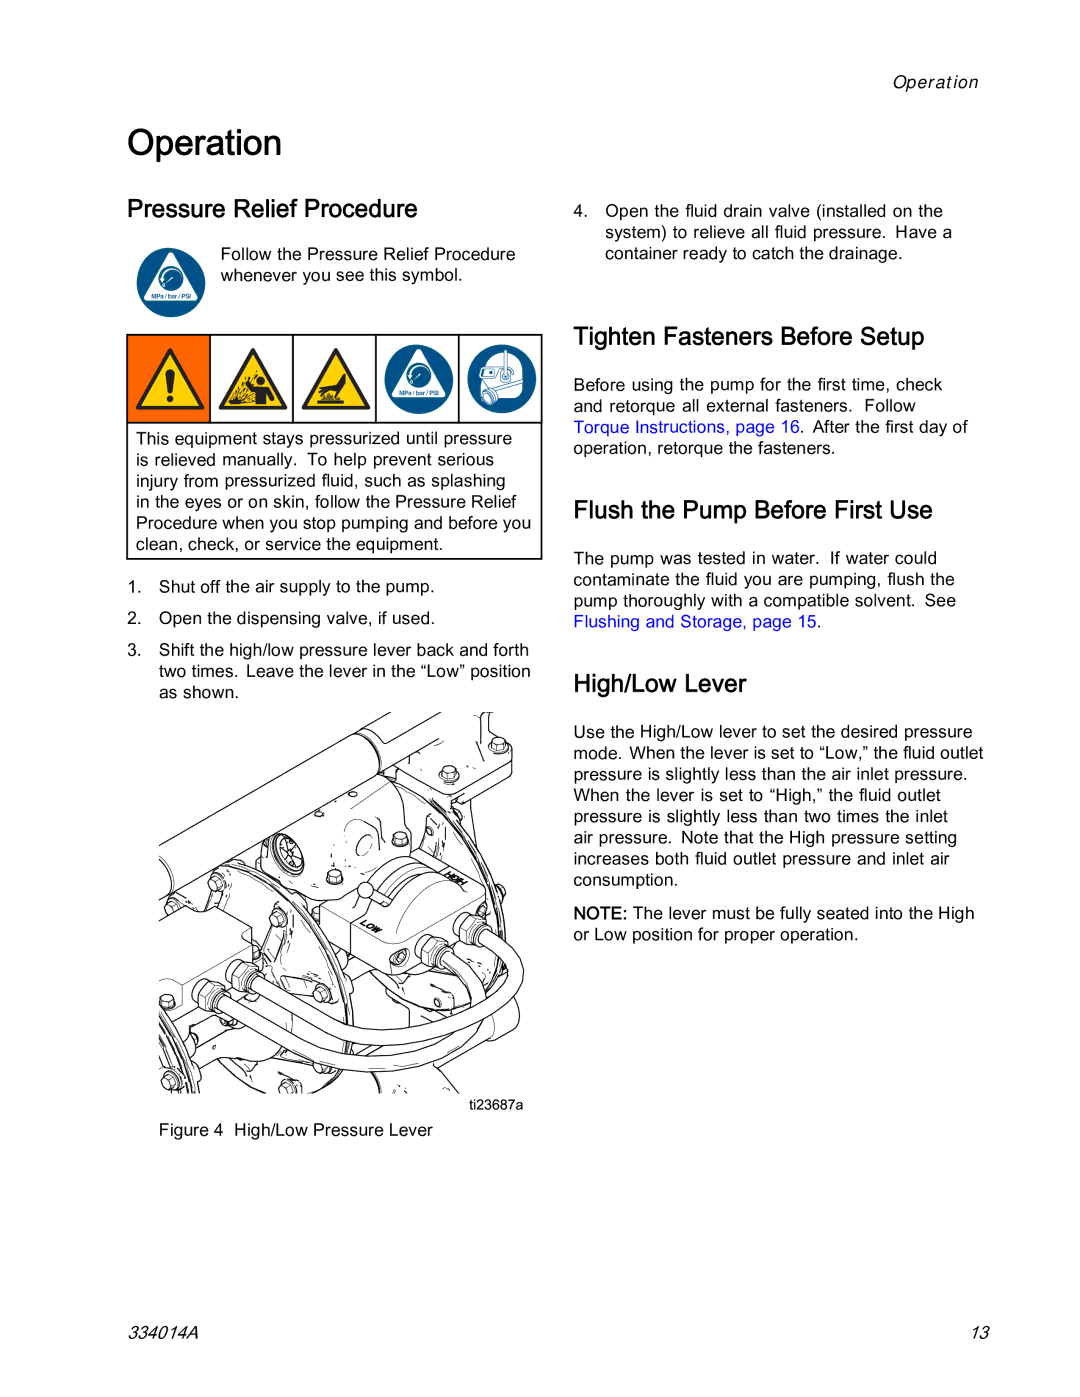
3.Shift the high/low pressure lever back and forth two times. Leave the lever in the “Low” position as shown.
Figure 4 High/Low Pressure Lever
Tighten Fasteners Before Setup
Before using the pump for the first time, check and retorque all external fasteners. Follow Torque Instructions, page 16. After the first day of operation, retorque the fasteners.
Flush the Pump Before First Use
The pump was tested in water. If water could contaminate the fluid you are pumping, flush the pump thoroughly with a compatible solvent. See Flushing and Storage, page 15.
High/Low Lever
Use the High/Low lever to set the desired pressure mode. When the lever is set to “Low,” the fluid outlet pressure is slightly less than the air inlet pressure. When the lever is set to “High,” the fluid outlet pressure is slightly less than two times the inlet air pressure. Note that the High pressure setting increases both fluid outlet pressure and inlet air consumption.
NOTE: The lever must be fully seated into the High or Low position for proper operation.
334014A | 13 |
