Cleanup / Nettoyage / Limpieza / Reinigung / Reinigen


ti5277a


ti2895a


FLUSH


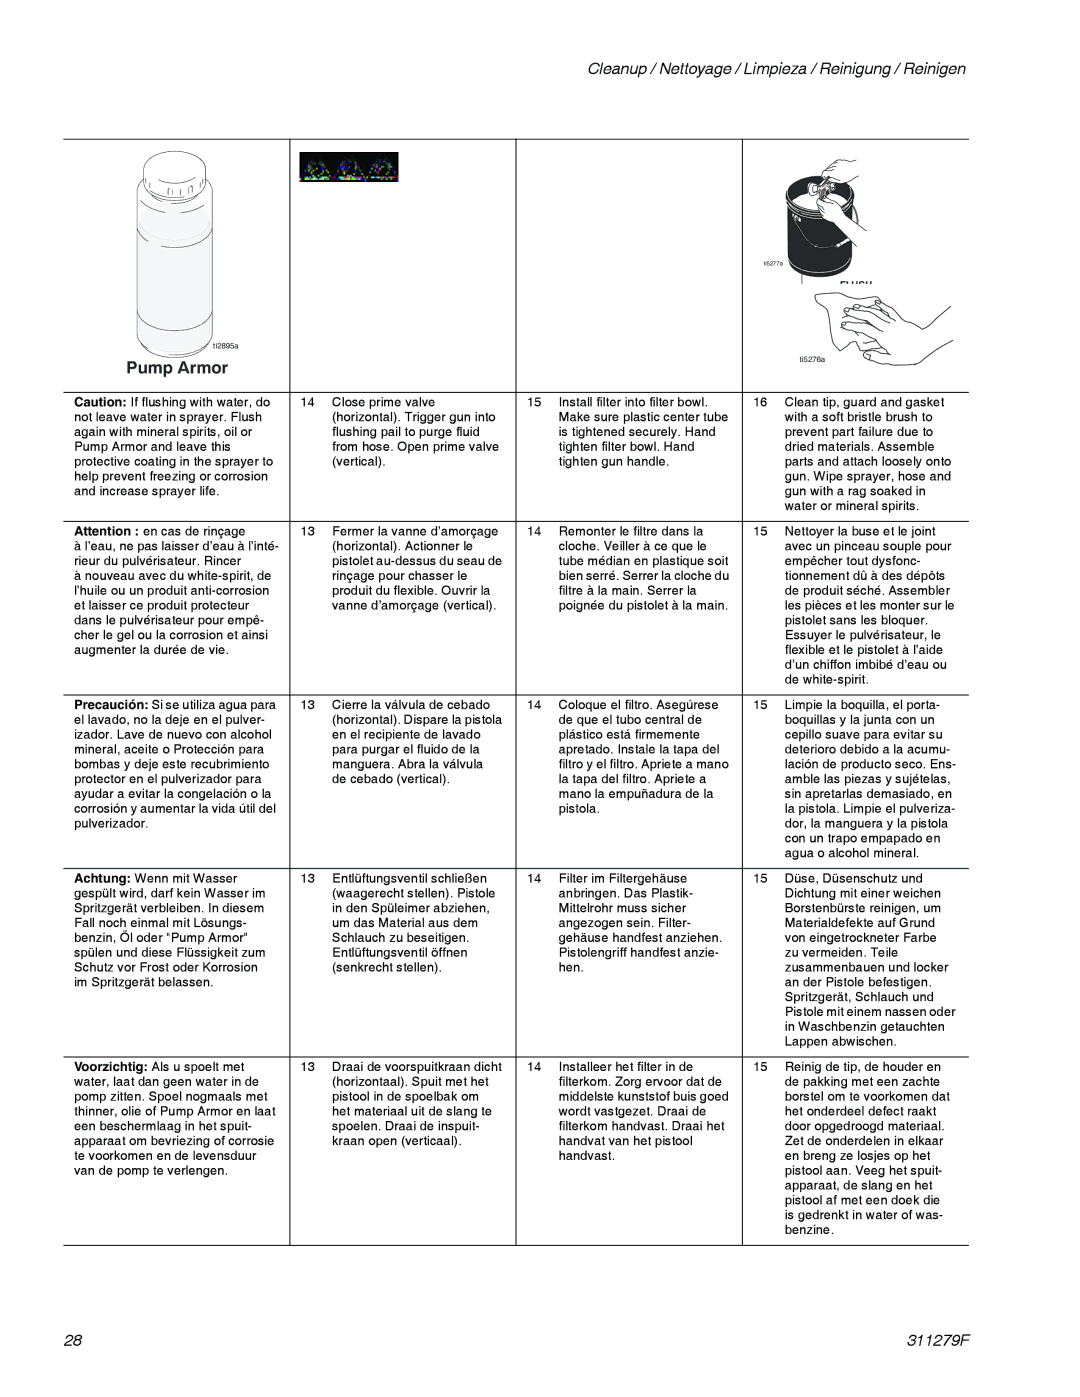
Pump Armor


ti5276a


Caution: If flushing with water, do

14

Close prime valve

15 Install filter into filter bowl.

16 Clean tip, guard and gasket

not leave water in sprayer. Flush


(horizontal). Trigger gun into

Make sure plastic center tube

with a soft bristle brush to

again with mineral spirits, oil or


flushing pail to purge fluid

is tightened securely. Hand

prevent part failure due to

Pump Armor and leave this


from hose. Open prime valve

tighten filter bowl. Hand

dried materials. Assemble

protective coating in the sprayer to


(vertical).

tighten gun handle.

parts and attach loosely onto

help prevent freezing or corrosion


gun. Wipe sprayer, hose and

and increase sprayer life.


gun with a rag soaked in


water or mineral spirits.


Attention : en cas de rinçage


13 Fermer la vanne d’amorçage

14 Remonter le filtre dans la

15 Nettoyer la buse et le joint

à l’eau, ne pas laisser d’eau à l’inté-


(horizontal). Actionner le

cloche. Veiller à ce que le

avec un pinceau souple pour

rieur du pulvérisateur. Rincer


pistolet au-dessus du seau de

tube médian en plastique soit

empêcher tout dysfonc-

à nouveau avec du white-spirit, de


rinçage pour chasser le

bien serré. Serrer la cloche du

tionnement dû à des dépôts

l’huile ou un produit anti-corrosion


produit du flexible. Ouvrir la

filtre à la main. Serrer la

de produit séché. Assembler

et laisser ce produit protecteur


vanne d’amorçage (vertical).

poignée du pistolet à la main.

les pièces et les monter sur le

dans le pulvérisateur pour empê-


pistolet sans les bloquer.

cher le gel ou la corrosion et ainsi


Essuyer le pulvérisateur, le

augmenter la durée de vie.


flexible et le pistolet à l’aide


d’un chiffon imbibé d’eau ou


de white-spirit.


Precaución: Si se utiliza agua para


13 Cierre la válvula de cebado

14 Coloque el filtro. Asegúrese

15 Limpie la boquilla, el porta-

el lavado, no la deje en el pulver-


(horizontal). Dispare la pistola

de que el tubo central de

boquillas y la junta con un

izador. Lave de nuevo con alcohol


en el recipiente de lavado

plástico está firmemente

cepillo suave para evitar su

mineral, aceite o Protección para


para purgar el fluido de la

apretado. Instale la tapa del

deterioro debido a la acumu-

bombas y deje este recubrimiento


manguera. Abra la válvula

filtro y el filtro. Apriete a mano

lación de producto seco. Ens-

protector en el pulverizador para


de cebado (vertical).

la tapa del filtro. Apriete a

amble las piezas y sujételas,

ayudar a evitar la congelación o la


mano la empuñadura de la

sin apretarlas demasiado, en

corrosión y aumentar la vida útil del


pistola.

la pistola. Limpie el pulveriza-

pulverizador.


dor, la manguera y la pistola


con un trapo empapado en


agua o alcohol mineral.


Achtung: Wenn mit Wasser

13

Entlüftungsventil schließen

14 Filter im Filtergehäuse

15 Düse, Düsenschutz und

gespült wird, darf kein Wasser im


(waagerecht stellen). Pistole

anbringen. Das Plastik-

Dichtung mit einer weichen

Spritzgerät verbleiben. In diesem


in den Spüleimer abziehen,

Mittelrohr muss sicher

Borstenbürste reinigen, um

Fall noch einmal mit Lösungs-


um das Material aus dem

angezogen sein. Filter-

Materialdefekte auf Grund

benzin, Öl oder "Pump Armor"


Schlauch zu beseitigen.

gehäuse handfest anziehen.

von eingetrockneter Farbe

spülen und diese Flüssigkeit zum


Entlüftungsventil öffnen

Pistolengriff handfest anzie-

zu vermeiden. Teile

Schutz vor Frost oder Korrosion


(senkrecht stellen).

hen.

zusammenbauen und locker

im Spritzgerät belassen.


an der Pistole befestigen.


Spritzgerät, Schlauch und


Pistole mit einem nassen oder


in Waschbenzin getauchten


Lappen abwischen.


Voorzichtig: Als u spoelt met


13 Draai de voorspuitkraan dicht

14 Installeer het filter in de

15 Reinig de tip, de houder en

water, laat dan geen water in de


(horizontaal). Spuit met het

filterkom. Zorg ervoor dat de

de pakking met een zachte

pomp zitten. Spoel nogmaals met


pistool in de spoelbak om

middelste kunststof buis goed

borstel om te voorkomen dat

thinner, olie of Pump Armor en laat


het materiaal uit de slang te

wordt vastgezet. Draai de

het onderdeel defect raakt

een beschermlaag in het spuit-


spoelen. Draai de inspuit-

filterkom handvast. Draai het

door opgedroogd materiaal.

apparaat om bevriezing of corrosie


kraan open (verticaal).

handvat van het pistool

Zet de onderdelen in elkaar

te voorkomen en de levensduur


handvast.

en breng ze losjes op het

van de pomp te verlengen.


pistool aan. Veeg het spuit-


apparaat, de slang en het


pistool af met een doek die


is gedrenkt in water of was-


benzine.


28

311279F

Page 28
Image 28
Graco 833 important safety instructions Pump Armor

833 specifications

The Graco 833 is a powerful and versatile airless paint sprayer designed for professionals and DIY enthusiasts alike. This machine is specifically engineered to deliver high-quality finishes on a wide variety of surfaces, making it an invaluable tool for painting, staining, and sealing projects.

One of the standout features of the Graco 833 is its powerful motor, which provides consistent pressure and enables a smooth spray pattern. The machine is capable of handling thick materials, which means it can be used for both oil-based and latex paints without any issues. Its robust construction ensures durability and longevity, even under heavy use.

The Graco 833 comes equipped with a patented ProConnect system that allows for quick and easy pump replacement. This feature significantly reduces downtime, enabling users to maintain productivity on the job. Additionally, the easy-to-follow design of the sprayer allows for fast set-up and clean-up, making it user-friendly for both experienced painters and novices.

Another important characteristic is the adjustable pressure control, which gives users the ability to customize the sprayer’s output based on the specifics of their project. This feature is particularly useful for achieving different spray patterns and finishes, from fine details to larger areas. The integrated pressure gauge allows users to monitor settings in real-time, ensuring optimal performance throughout the painting process.

The Graco 833 also benefits from smart technology that improves efficiency and reduces waste. The machine is designed to minimize over-spray, which not only conserves paint but also leads to cleaner, more professional results. The sprayer is compatible with a range of spray tips, allowing for easy interchangeability and versatility in application techniques.

Furthermore, the lightweight and portable design of the Graco 833 makes it easy to transport and maneuver on job sites. This feature is especially beneficial for exterior painting projects where accessibility can be a challenge.

In summary, the Graco 833 is a reliable and efficient airless paint sprayer that combines advanced technology with user-friendly features. Its power, durability, and versatility make it an ideal choice for anyone looking to achieve professional-quality finishes in their painting projects. Whether you are a seasoned contractor or a weekend warrior, the Graco 833 is designed to meet your needs and exceed your expectations, delivering exceptional results every time.