Care and Maintenance 


Disconnect all units and remove all batteries before cleaning. Clean the exterior surface of the units with a soft dry or slightly damp cloth. Do not spray with cleaning products or solvents.
Do not submerge in water or any other liquid.
During long periods of
Troubleshooting


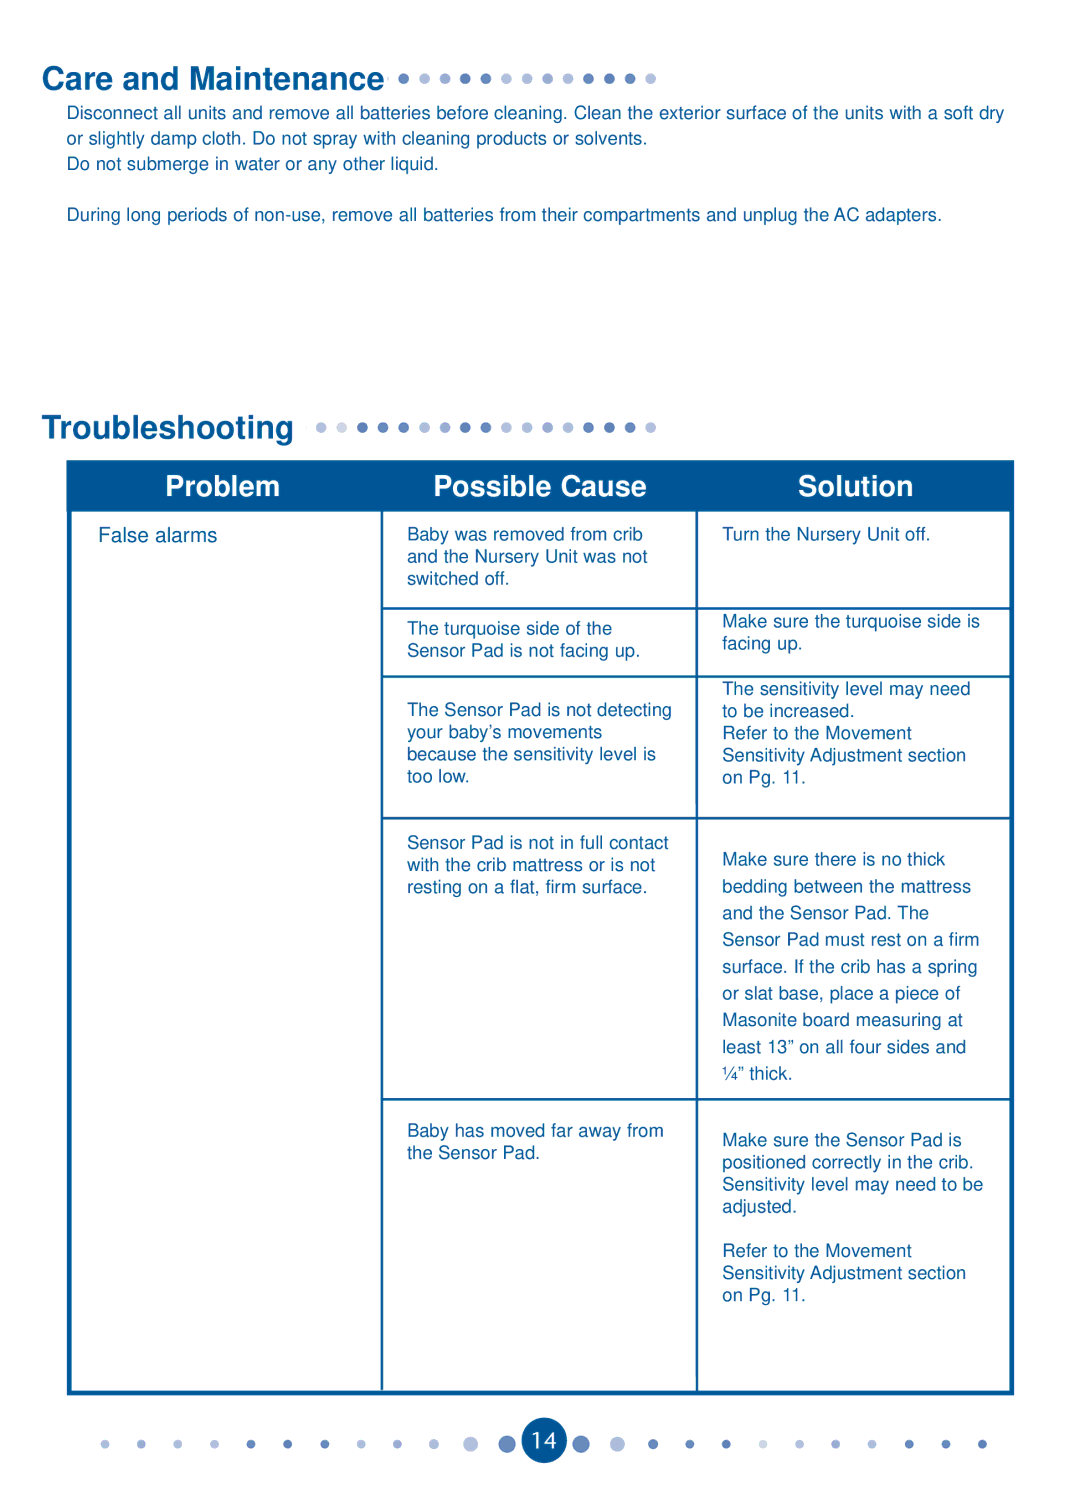
Problem
False alarms
| Possible Cause | Solution |
| ||
| Baby was removed from crib | Turn the Nursery Unit off. |
| and the Nursery Unit was not |
|
| switched off. |
|
|
|
|
| The turquoise side of the | Make sure the turquoise side is |
| facing up. | |
| Sensor Pad is not facing up. | |
|
| |
|
|
|
| The Sensor Pad is not detecting | The sensitivity level may need |
| to be increased. | |
| your baby’s movements | Refer to the Movement |
| because the sensitivity level is | Sensitivity Adjustment section |
| too low. | on Pg. 11. |
|
|
|
| Sensor Pad is not in full contact | Make sure there is no thick |
| with the crib mattress or is not | |
| resting on a flat, firm surface. | bedding between the mattress |
|
| and the Sensor Pad. The |
|
| Sensor Pad must rest on a firm |
|
| surface. If the crib has a spring |
|
| or slat base, place a piece of |
|
| Masonite board measuring at |
|
| least 13” on all four sides and |
|
| ¼” thick. |
|
|
|
| Baby has moved far away from | Make sure the Sensor Pad is |
| the Sensor Pad. | |
| positioned correctly in the crib. | |
|
| |
|
| Sensitivity level may need to be |
|
| adjusted. |
|
| Refer to the Movement |
|
| Sensitivity Adjustment section |
|
| on Pg. 11. |
|
|
|
|
|
|
14