Removing and Replacing Hopper, Front and Back Covers
Removing and Replacing Hopper, Front and Back Covers
Before performing any service on sprayer always:
Front Cover
•Read all warnings, page 3.
•Read operating instructions manual, page 2.
•Relieve Pressure, page 7.
•Turn main power switch (A) OFF.
•Unplug sprayer from outlet.
•Remove air and material hoses.
•Clean sprayer. See Operation Manual 310624 or 310625.
Hopper
Removing Hopper
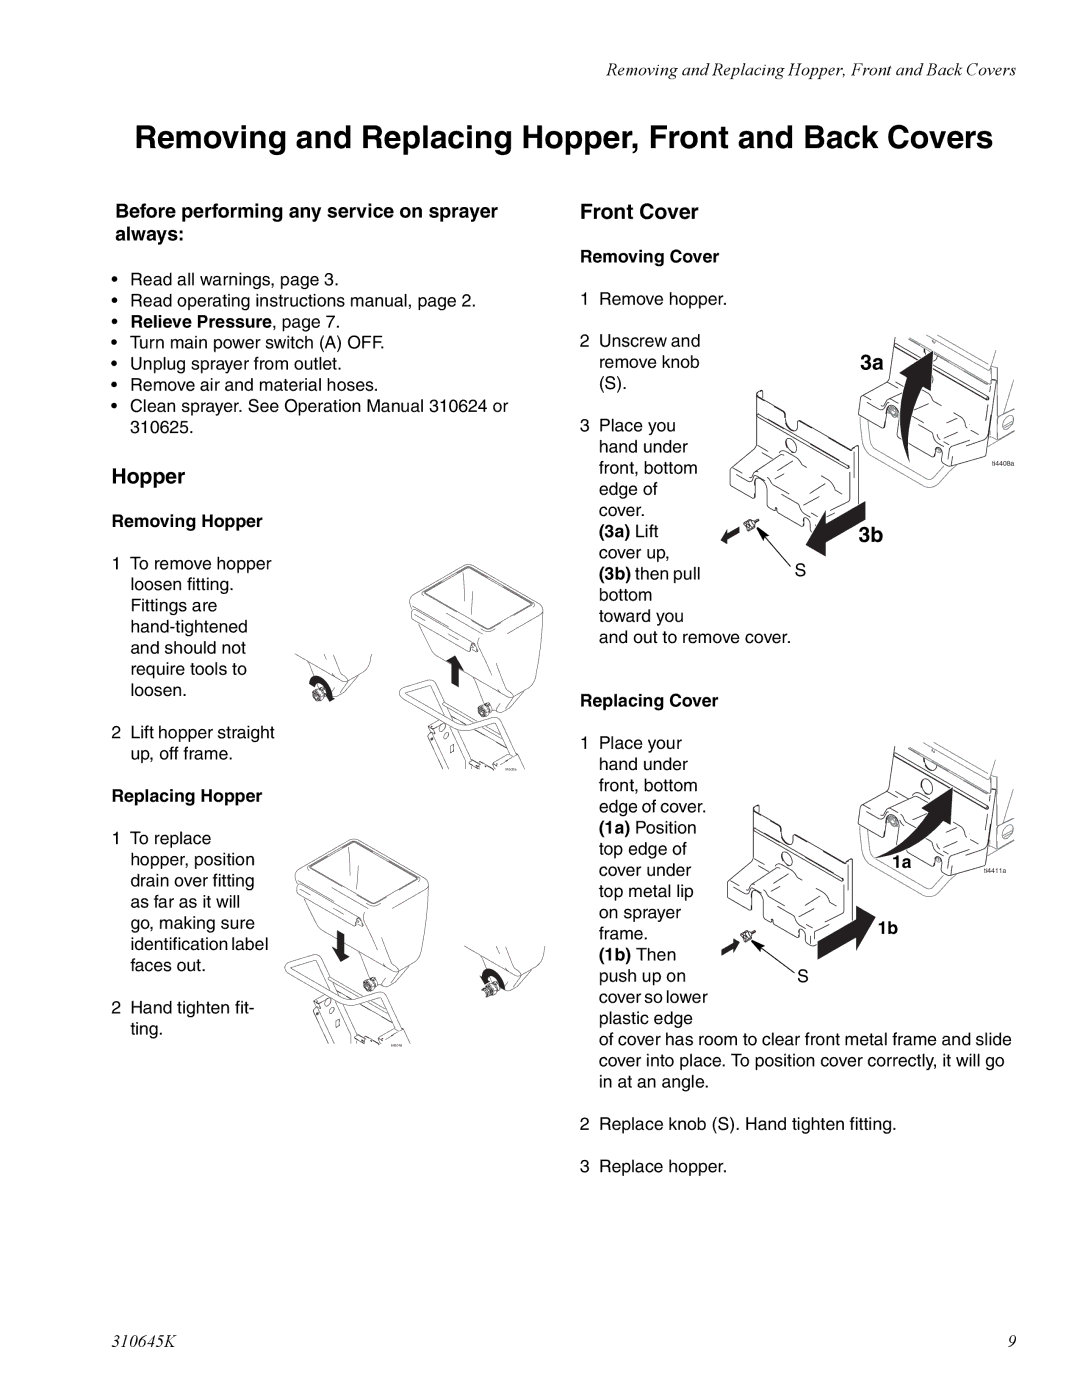
1To remove hopper loosen fitting. Fittings are
Removing Cover
1Remove hopper.
2Unscrew and remove knob
(S).
3Place you hand under front, bottom
edge of |
|
cover. |
|
(3a) Lift |
|
cover up, | S |
(3b) then pull | |
bottom |
|
toward you |
|
and out to remove cover. |
|
Replacing Cover |
|
3a
ti4408a
3b
2Lift hopper straight up, off frame.
ti4503a
Replacing Hopper
1To replace hopper, position drain over fitting as far as it will go, making sure identification label faces out.
2Hand tighten fit- ting.
ti4504a
1Place your hand under front, bottom edge of cover. (1a) Position top edge of
cover under | 1a | |
ti4411a | ||
| ||
top metal lip |
| |
on sprayer | 1b | |
frame. | ||
| ||
(1b) Then |
| |
push up on | S | |
cover so lower |
| |
plastic edge |
|
of cover has room to clear front metal frame and slide cover into place. To position cover correctly, it will go in at an angle.
2Replace knob (S). Hand tighten fitting.
3Replace hopper.
310645K | 9 |
