Maintenance
Needle & Pin Reassemble Procedure
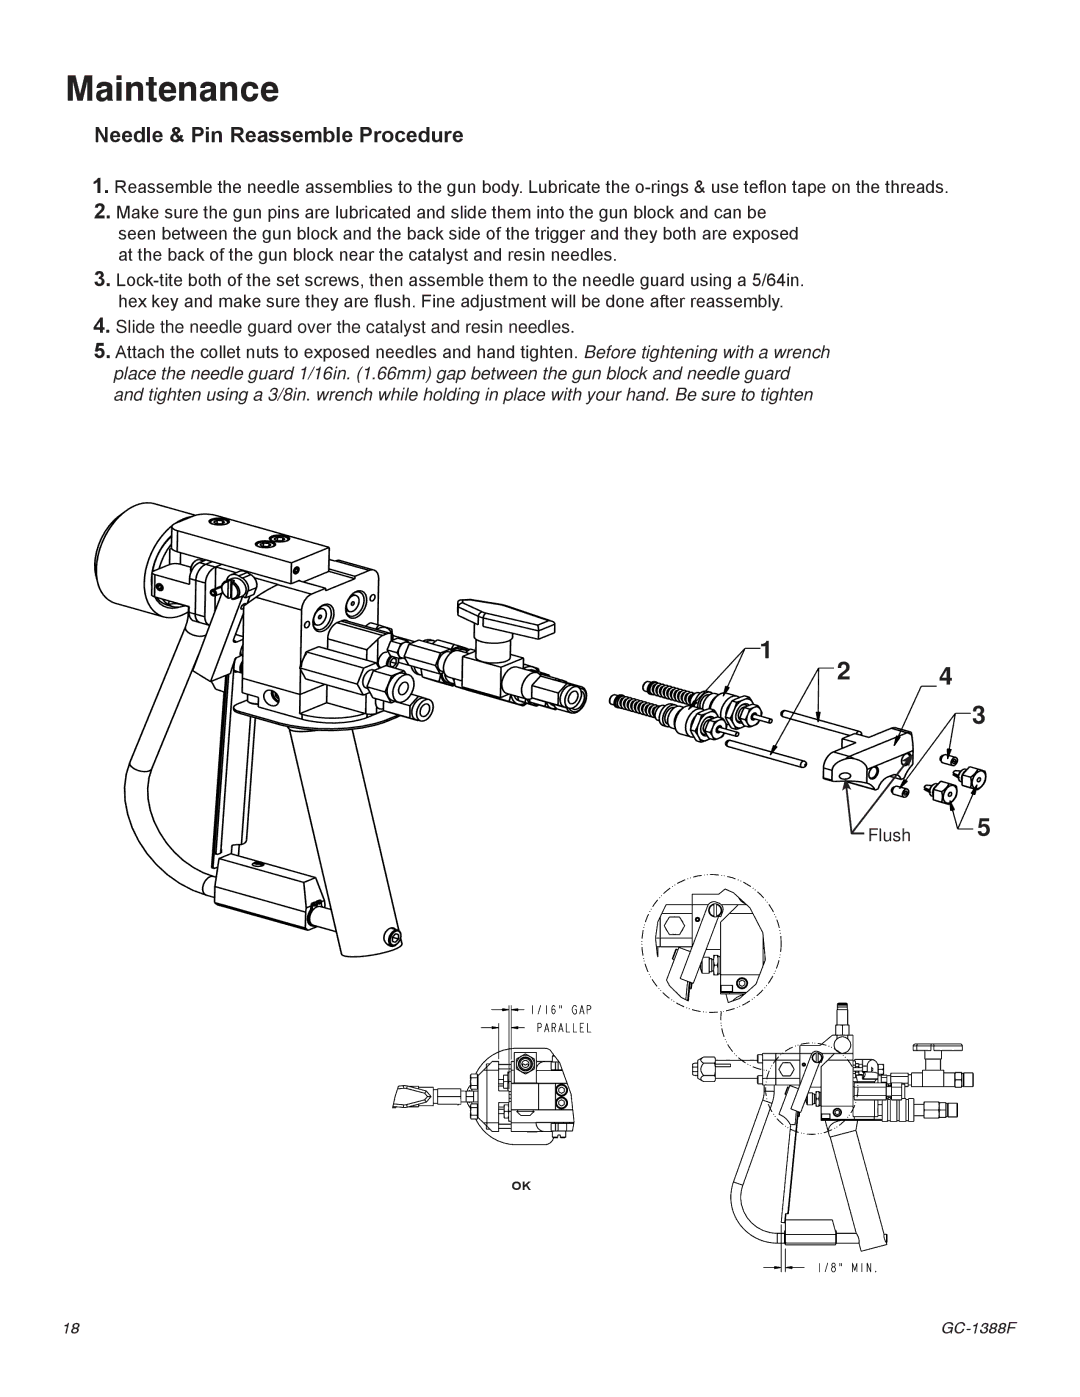
1.Reassemble the needle assemblies to the gun body. Lubricate the
2.Make sure the gun pins are lubricated and slide them into the gun block and can be
seen between the gun block and the back side of the trigger and they both are exposed at the back of the gun block near the catalyst and resin needles.
3.
4.Slide the needle guard over the catalyst and resin needles.
5.Attach the collet nuts to exposed needles and hand tighten. Before tightening with a wrench place the needle guard 1/16in. (1.66mm) gap between the gun block and needle guard and tighten using a 3/8in. wrench while holding in place with your hand. Be sure to tighten
1
OK![]()
2 4
| 3 |
Flush | 5 |
18 |