SERVICE ENGINE
IMPORTANT: Avoid Damage! Change the oil more often if the machine is used in extreme conditions: Extremely dusty conditions.
Frequent slow or
1.Clean area around dipstick cap and filter.
2.Start engine and run until it reaches normal operating temperature.
3.Park machine safely. (See Parking Safely in the SAFETY section.)
�
�
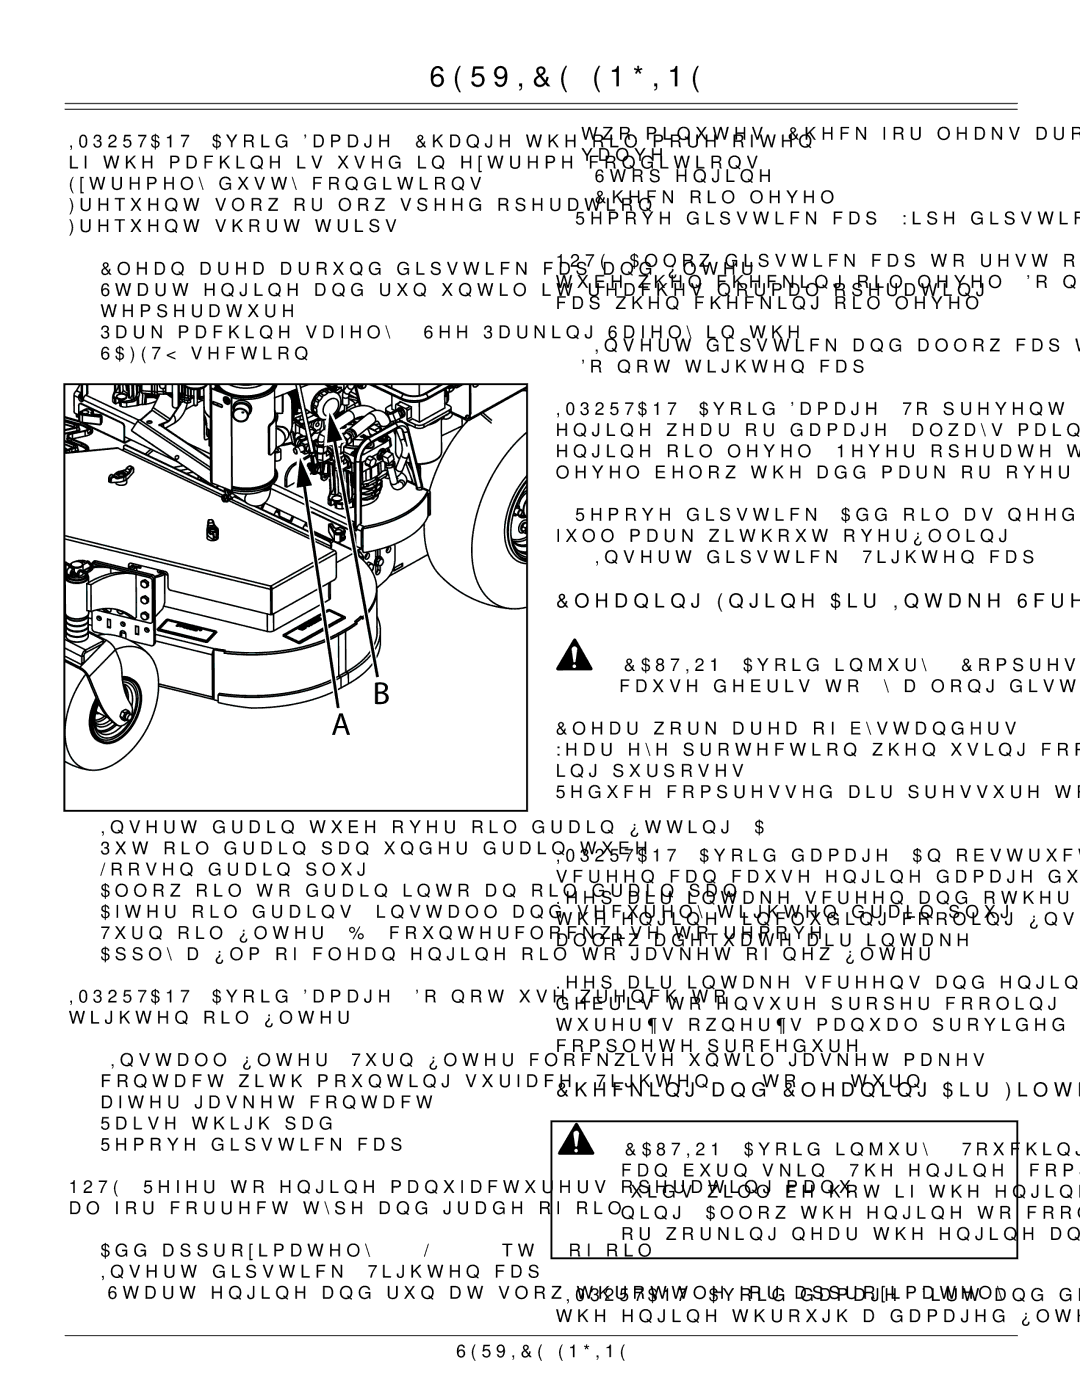
4.Insert drain tube over oil drain fitting (A)
5.Put oil drain pan under drain tube.
6.Loosen drain plug.
7.Allow oil to drain into an oil drain pan.
8.After oil drains, install and securely tighten drain plug.
9.Turn oil filter (B) counterclockwise to remove.
10.Apply a film of clean engine oil to gasket of new filter.
IMPORTANT: Avoid Damage! Do not use wrench to tighten oil filter.
11.Install filter. Turn filter clockwise until gasket makes contact with mounting surface. Tighten 1/2 to 3/4 turn after gasket contact.
12.Raise thigh pad.
13.Remove dipstick cap.
NOTE: Refer to engine manufacturers operating manu- al for correct type and grade of oil.
13.Add approximately 1.7 L (1.75 qt.) of oil.
14.Insert dipstick. Tighten cap.
15.Start engine and run at slow throttle for approximately
two minutes. Check for leaks around filter and drain valve.
16.Stop engine.
17.Check oil level:
• Remove dipstick cap. Wipe dipstick clean.
NOTE: Allow dipstick cap to rest on threads of filler tube when checking oil level. Do not tighten dipstick cap when checking oil level.
•Insert dipstick and allow cap to rest on threads of filler. Do not tighten cap.
IMPORTANT: Avoid Damage! To prevent extensive engine wear or damage, always maintain the proper engine oil level. Never operate the engine with the oil level below the add mark or over the full mark.
•Remove dipstick. Add oil as needed to bring level to the full mark without overfilling.
18. Insert dipstick. Tighten cap.
Cleaning Engine Air Intake Screen and Fan
CAUTION: Avoid injury! Compressed air can cause debris to fly a long distance.
Clear work area of bystanders.
Wear eye protection when using compressed air for clean- ing purposes.
Reduce compressed air pressure to 210 kPa (30 psi).
IMPORTANT: Avoid damage! An obstructed air intake screen can cause engine damage due to overheating. Keep air intake screen and other external surfaces of the engine, including cooling fins, clean at all times to allow adequate air intake.
Keep air intake screens and engine cooling fins clear of debris to ensure proper cooling. See the engine manufac- turer’s owner’s manual provided with your machine for the complete procedure.
Checking and Cleaning Air Filter Elements
CAUTION: Avoid injury! Touching hot surfaces can burn skin. The engine, components, and fluids will be hot if the engine has been run- ning. Allow the engine to cool before servicing or working near the engine and components.
IMPORTANT: Avoid damage! Dirt and debris can enter the engine through a damaged filter element:
SERVICE ENGINE- 21
