SERVICE ELECTRICAL
CAUTION: Avoid injury! Battery electrolyte contains sulfuric acid. It is poisonous and can cause serious burns:
•Wear eye protection and gloves.
•Keep skin protected.
•If electrolyte is swallowed, get medical attention immediately.
•If electrolyte is splashed into eyes, flush immediately with water for
•If electrolyte is splashed onto skin, flush immediately with water and get medical attention if necessary.
The battery produces a flammable and explosive gas. The battery may explode:
•Do not smoke near battery.
•Wear eye protection and gloves.
•Do not allow direct metal contact across battery posts.
•Remove negative cable first when disconnecting.
•Install negative cable last when connecting.
Checking the Battery (Sealed Batteries)
NOTE: Do not attempt to open, add fluid or service bat- tery. Any attempt to do so will void warranty.
•Keep battery and terminals clean.
•Keep battery bolts tight.
•Keep small vent holes open.
IMPORTANT: Avoid Damage! The battery comes fully charged. If the machine is not used by the service expi- ration date indicated on the battery, charge the battery.
Recharge, if necessary, at
Removing and Installing Battery
Removing:
1.Park machine safely. (See Parking Safely in the SAFETY section.)
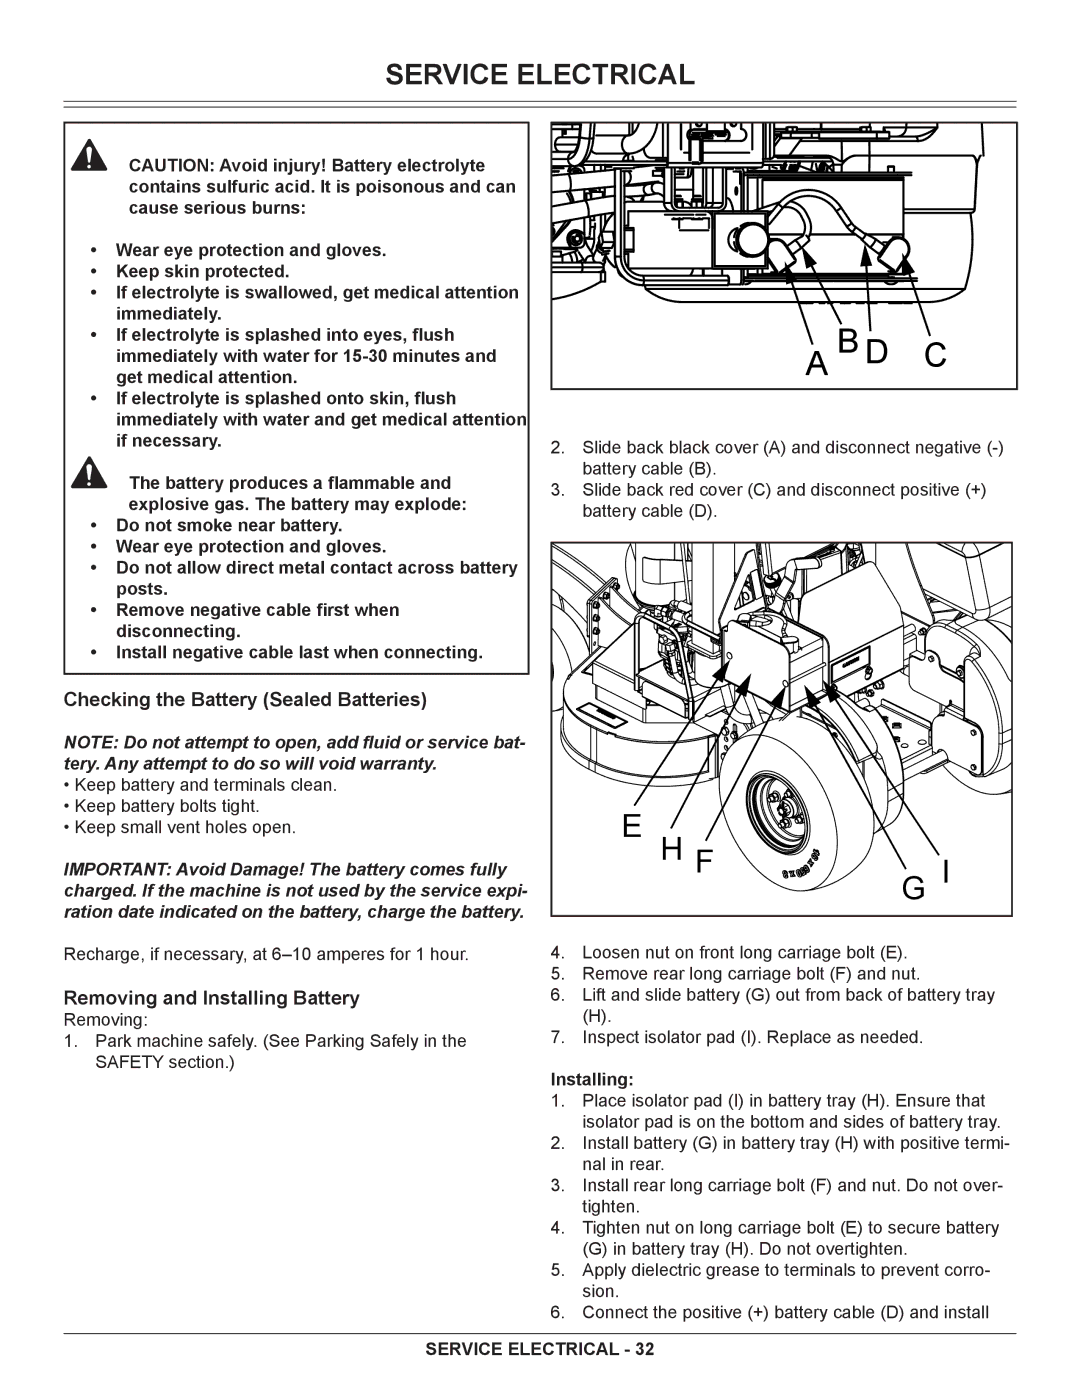
A B D C
2.Slide back black cover (A) and disconnect negative
3.Slide back red cover (C) and disconnect positive (+) battery cable (D).
E | H |
|
|
|
|
| |
| F | G | I |
|
| ||
|
|
|
4.Loosen nut on front long carriage bolt (E).
5.Remove rear long carriage bolt (F) and nut.
6.Lift and slide battery (G) out from back of battery tray
(H).
7.Inspect isolator pad (I). Replace as needed.
Installing:
1.Place isolator pad (I) in battery tray (H). Ensure that isolator pad is on the bottom and sides of battery tray.
2.Install battery (G) in battery tray (H) with positive termi- nal in rear.
3.Install rear long carriage bolt (F) and nut. Do not over- tighten.
4.Tighten nut on long carriage bolt (E) to secure battery
(G) in battery tray (H). Do not overtighten.
5.Apply dielectric grease to terminals to prevent corro- sion.
6.Connect the positive (+) battery cable (D) and install
SERVICE ELECTRICAL - 32