Consistency Control -Overview (cont.)
WASH (D3) - Illuminated when the mode switch is in the wash or "Clean" position.
FREEZE (D4) - Illuminated when the mode switch is in the "Freeze" mode.
DISPENSE (D5) - Illuminated when the dispensing valve is open calling for both the compressor and drive motor to operate.
GREEN CONSISTENCY (D6) - Off when the motor and compressor are off. Illuminated when the compressor and dasher are bringing product to preset consistency. Blinks as preset consistency is achieved and then goes out.
RED CONSISTENCY (D7) - Blinks as preset product consistency is approached. Glows steadily when preset consistency is achieved and then goes out.
COIL (D8) - Compressor contactor energized
COIL (D9) - Drive motor coil energized
COIL (D10) - Hopper refrigeration solenoid coil energized
COIL (D11) - Freezing cylinder refrigeration solenoid coil energized
Product Consistency Adjustment
1.Remove the Front electrical box cover.
2.If the product in the cylinder has been frozen for more than 30 minutes, draw out 16 ounces (1/2 liter) before checking consistency.
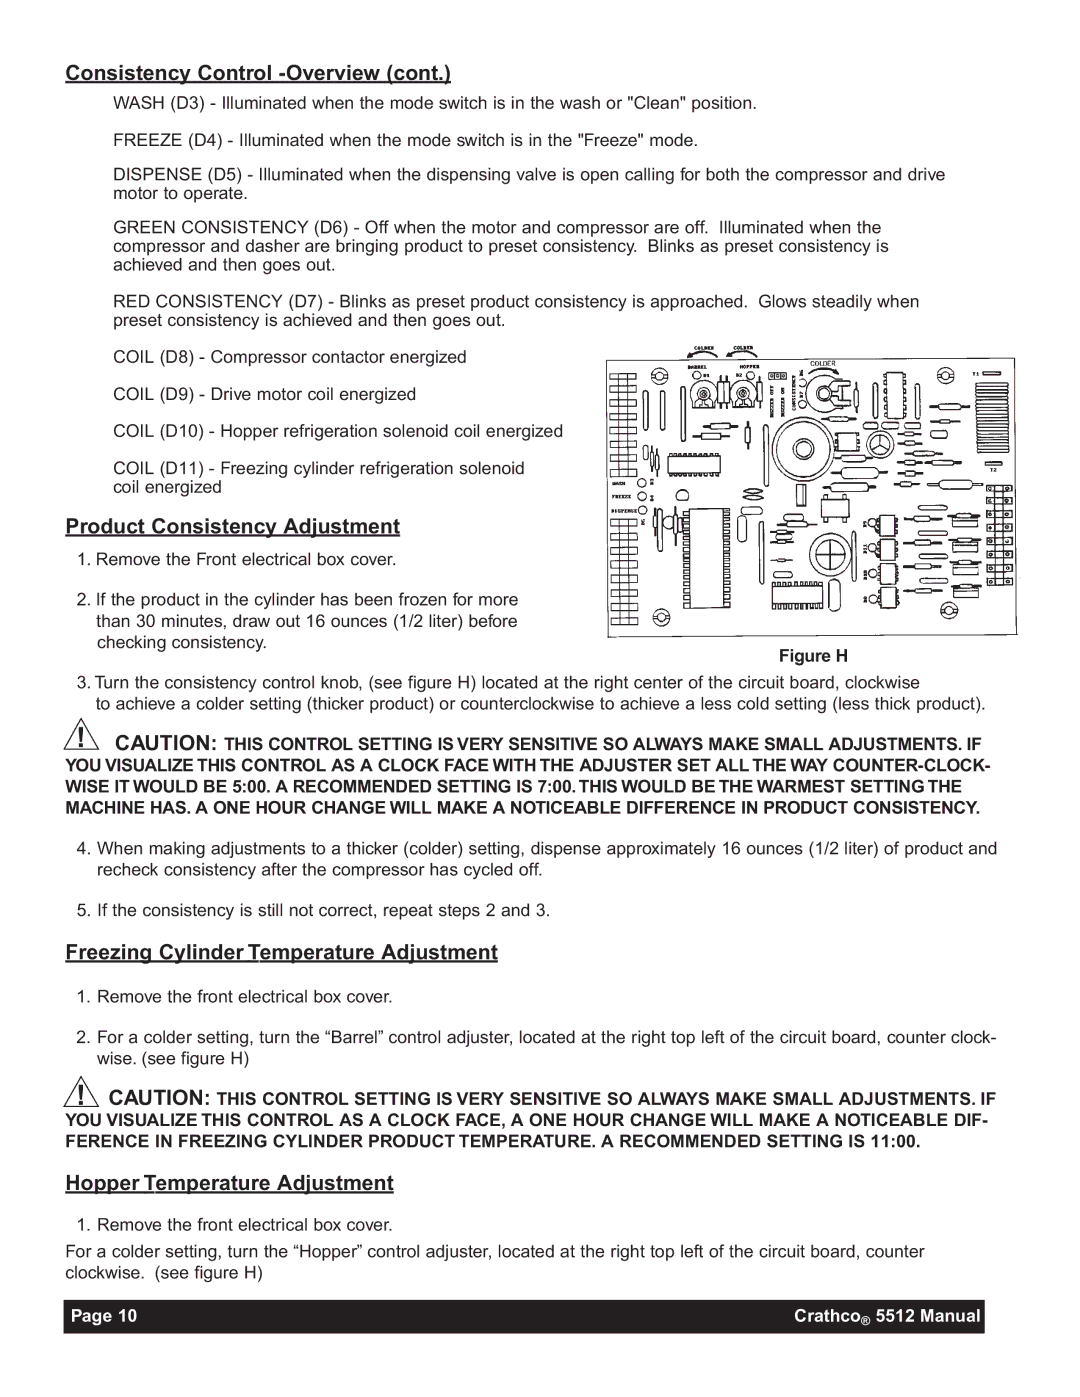
Figure H
3.Turn the consistency control knob, (see figure H) located at the right center of the circuit board, clockwise
to achieve a colder setting (thicker product) or counterclockwise to achieve a less cold setting (less thick product).
!![]() CAUTION: THIS CONTROL SETTING IS VERY SENSITIVE SO ALWAYS MAKE SMALL ADJUSTMENTS. IF YOU VISUALIZE THIS CONTROL AS A CLOCK FACE WITH THE ADJUSTER SET ALL THE WAY
CAUTION: THIS CONTROL SETTING IS VERY SENSITIVE SO ALWAYS MAKE SMALL ADJUSTMENTS. IF YOU VISUALIZE THIS CONTROL AS A CLOCK FACE WITH THE ADJUSTER SET ALL THE WAY
4.When making adjustments to a thicker (colder) setting, dispense approximately 16 ounces (1/2 liter) of product and recheck consistency after the compressor has cycled off.
5.If the consistency is still not correct, repeat steps 2 and 3.
Freezing Cylinder Temperature Adjustment
1.Remove the front electrical box cover.
2.For a colder setting, turn the “Barrel” control adjuster, located at the right top left of the circuit board, counter clock- wise. (see figure H)
! CAUTION: THIS CONTROL SETTING IS VERY SENSITIVE SO ALWAYS MAKE SMALL ADJUSTMENTS. IF YOU VISUALIZE THIS CONTROL AS A CLOCK FACE, A ONE HOUR CHANGE WILL MAKE A NOTICEABLE DIF- FERENCE IN FREEZING CYLINDER PRODUCT TEMPERATURE. A RECOMMENDED SETTING IS 11:00.
Hopper Temperature Adjustment
1. Remove the front electrical box cover.
For a colder setting, turn the “Hopper” control adjuster, located at the right top left of the circuit board, counter clockwise. (see figure H)
Page 10 | Crathco® 5512 Manual |
|
|