!CAUTION: THIS CONTROL SETTING IS VERY SENSITIVE SO ALWAYS MAKE SMALL ADJUSTMENTS. IF YOU VISUALIZE THIS CONTROL AS A CLOCK FACE, A ONE HOUR CHANGE WILL MAKE A NOTICEABLE DIFFERENCE IN HOPPER PRODUCT TEMPERATURE. A RECOMMENDED SETTING IS 11:00.
Care & Cleaning
NOTE: Each time the freezer is disassembled, all internal freezer components must be thoroughly washed, scoured
and sanitized using procedures recommended by your local health department. In lieu of local health department rec-
ommendations, use a three compartment sink; one compartment to wash parts in detergent, one compartment to
rinse, and one to sanitize.
Drain and Rinse
1.If the freezer is empty, proceed to Cleaning Following Complete Disassembly of Unit or Daily Cleaning Procedure. If the freezer is full of product, turn the mode switch to “CLEAN”.
2.On freezers using the optional electric pump and tank assembly and optional Remote Fill Control, turn the switch on the Remote Fill Control to “OFF” and unplug the pump.
3.On freezers using the optional Remote Fill Control and Proportioning Pump, turn off the water valve on the Proportioning pump, using the valve next to the inlet pressure regulator.
4.Open the front dispensing valve and drain all product from the freezer. Close the dispensing valve and turn freez- er switches to “OFF”.
NOTE: Use approximately
5.Remove the carb tubes and pour water into the storage hopper. Allow the water to fill the freezing cylinders.
6.Turn the freezer panel switches to “CLEAN” for 5 minutes. Open the dispensing valves and drain the water from the freezer.
Daily Cleaning Procedure
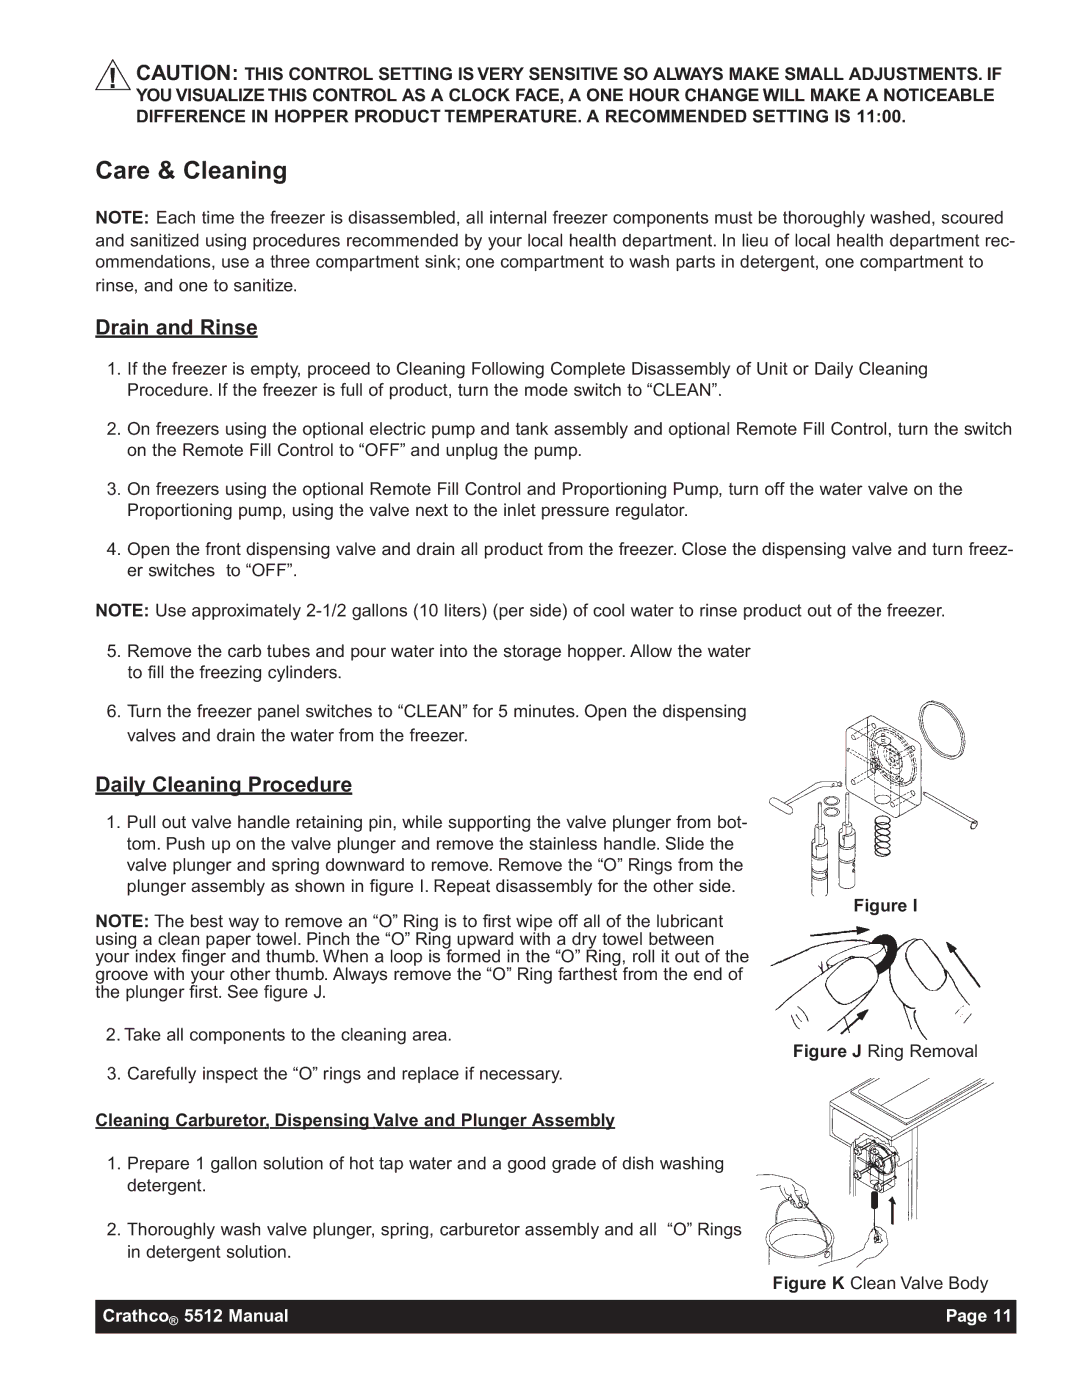
1.Pull out valve handle retaining pin, while supporting the valve plunger from bot- tom. Push up on the valve plunger and remove the stainless handle. Slide the valve plunger and spring downward to remove. Remove the “O” Rings from the plunger assembly as shown in figure I. Repeat disassembly for the other side.
Figure I
NOTE: The best way to remove an “O” Ring is to first wipe off all of the lubricant using a clean paper towel. Pinch the “O” Ring upward with a dry towel between your index finger and thumb. When a loop is formed in the “O” Ring, roll it out of the groove with your other thumb. Always remove the “O” Ring farthest from the end of the plunger first. See figure J.
2. Take all components to the cleaning area.
Figure J Ring Removal
3. Carefully inspect the “O” rings and replace if necessary.
Cleaning Carburetor, Dispensing Valve and Plunger Assembly
1.Prepare 1 gallon solution of hot tap water and a good grade of dish washing detergent.
2.Thoroughly wash valve plunger, spring, carburetor assembly and all “O” Rings in detergent solution.
Figure K Clean Valve Body
Crathco® 5512 Manual | Page 11 |
|
|