Power Cord
Before installing the power cord, read through SECTION 2: CIRCUIT REQUIREMENTS to check that your setup follows the safety and circuit requirements, and the power cord and power disconnect that you have chosen meet the requirements for this machine.
Components and Hardware Needed: | Qty |
Power Cord (Not Included) | 1 |
To connect the sander to the power source:
1.Remove the screws securing the control panel and lift off the face plate.
Figure 13. G0449 control panel wiring.
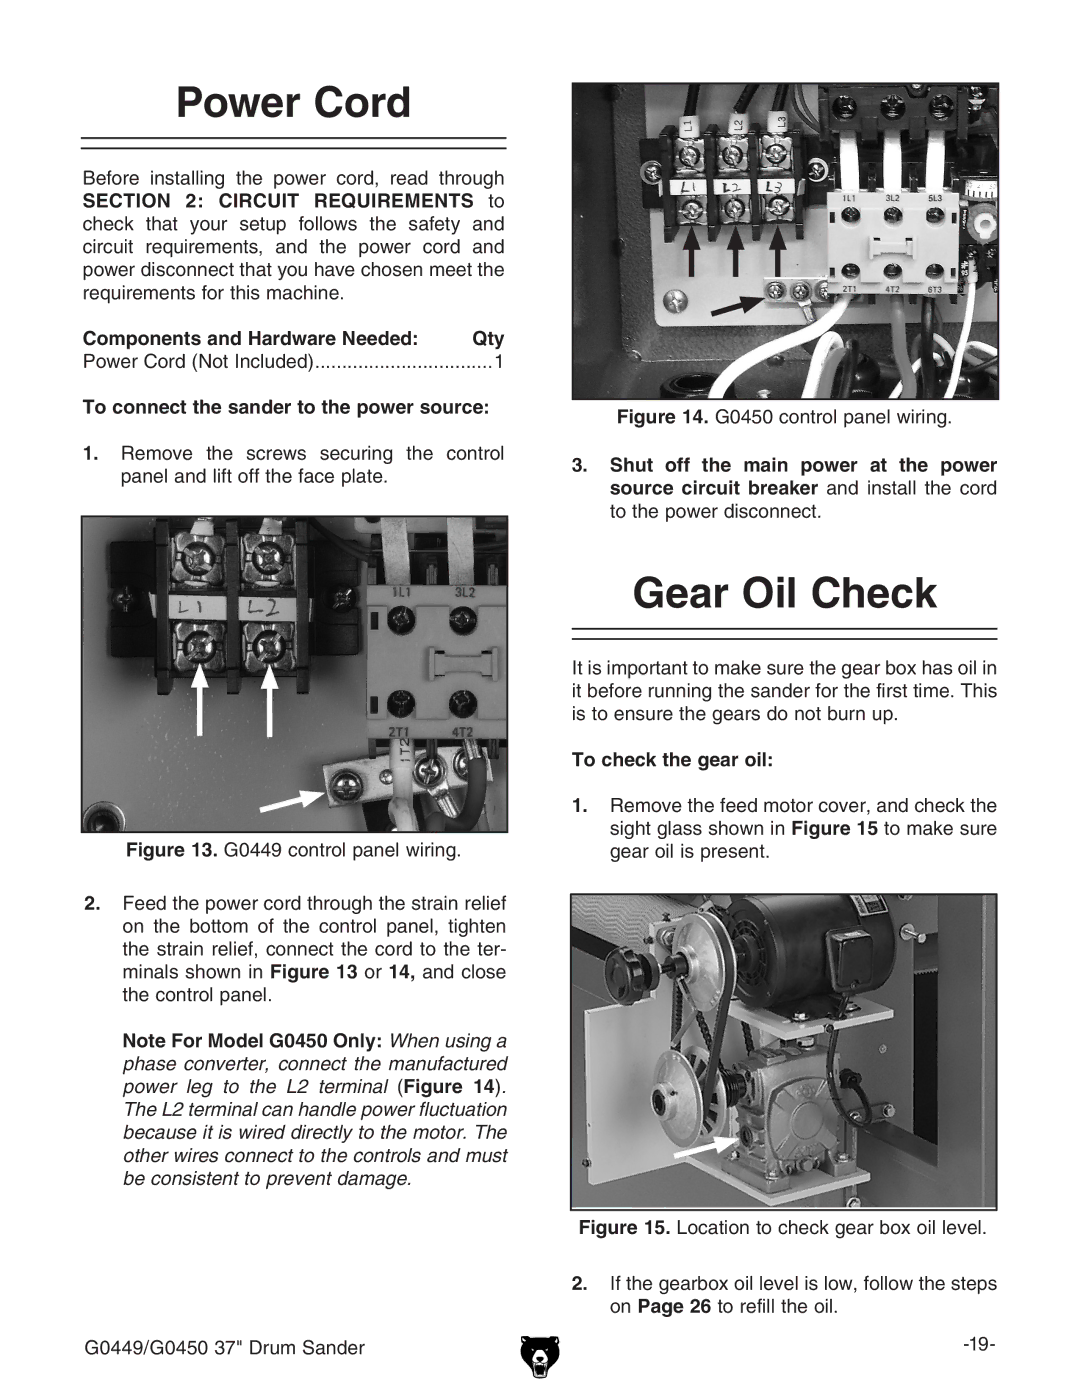
2.Feed the power cord through the strain relief on the bottom of the control panel, tighten the strain relief, connect the cord to the ter- minals shown in Figure 13 or 14, and close the control panel.
Note For Model G0450 Only: When using a phase converter, connect the manufactured power leg to the L2 terminal (Figure 14). The L2 terminal can handle power fluctuation because it is wired directly to the motor. The other wires connect to the controls and must be consistent to prevent damage.
G0449/G0450 37" Drum Sander
Figure 14. G0450 control panel wiring.
3.Shut off the main power at the power source circuit breaker and install the cord to the power disconnect.
Gear Oil Check
It is important to make sure the gear box has oil in it before running the sander for the first time. This is to ensure the gears do not burn up.
To check the gear oil:
1.Remove the feed motor cover, and check the sight glass shown in Figure 15 to make sure gear oil is present.
