Assembly
To prevent the dust collection bag from hanging free and stretching, the bottom must be support- ed. Also for adequate motor cooling, the motor fan intake must not be restricted by a wall or cabinet.
To assemble and mount the dust collector:
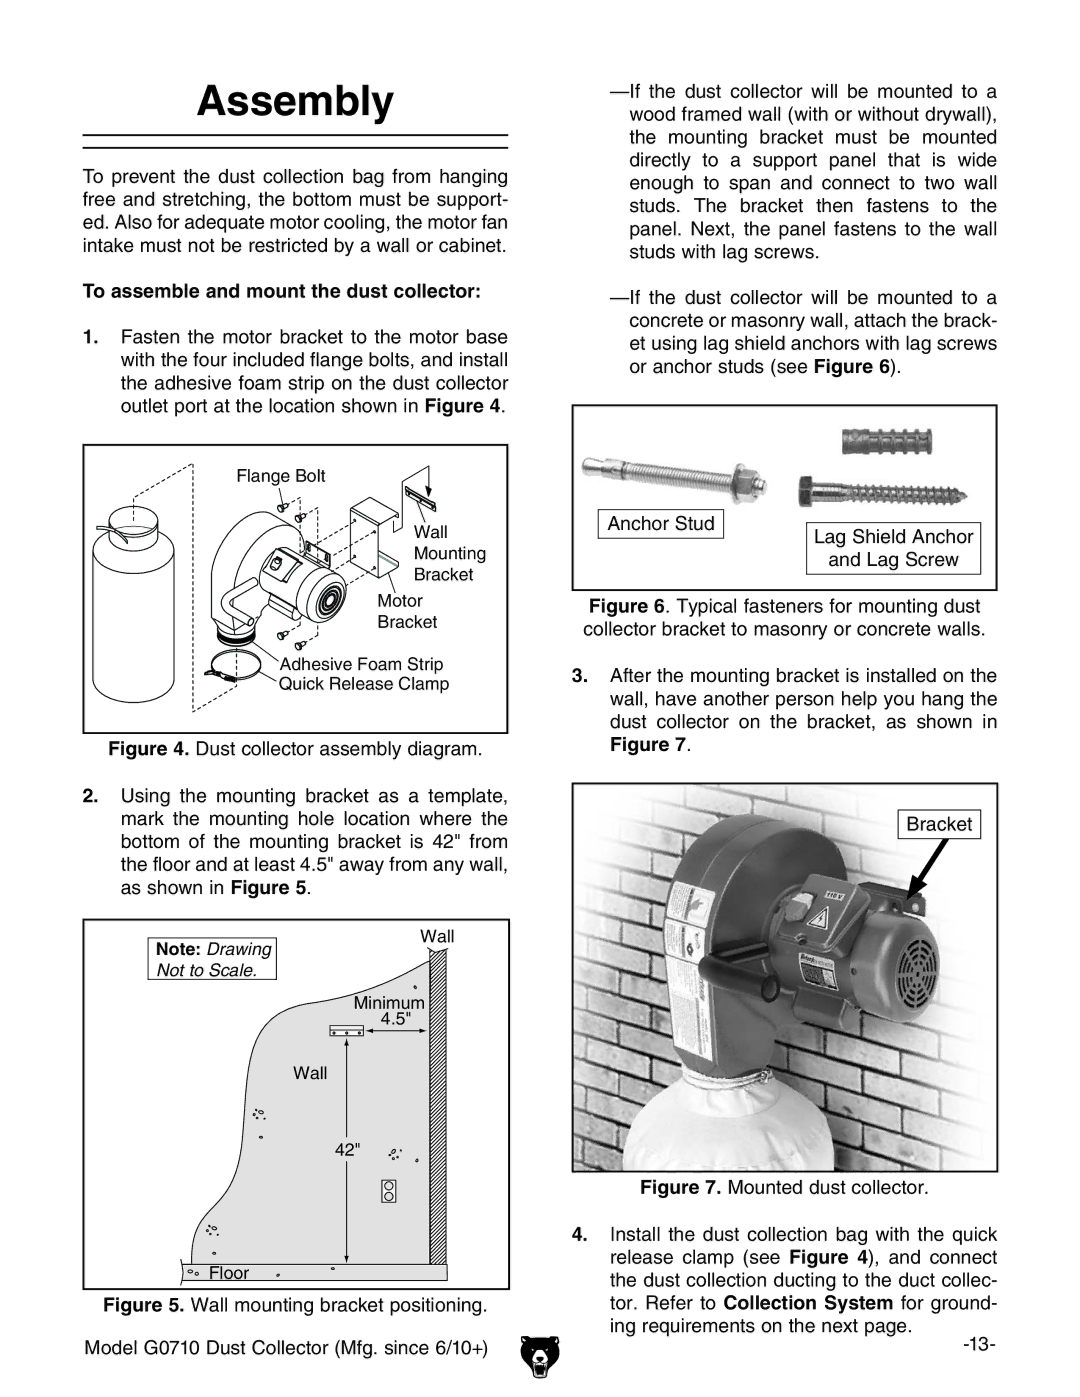
1.Fasten the motor bracket to the motor base with the four included flange bolts, and install the adhesive foam strip on the dust collector outlet port at the location shown in Figure 4.
Flange Bolt |
Wall |
Mounting |
Bracket |
Motor |
Bracket |
Adhesive Foam Strip |
Quick Release Clamp |
Figure 4. Dust collector assembly diagram.
2.Using the mounting bracket as a template, mark the mounting hole location where the bottom of the mounting bracket is 42" from the floor and at least 4.5" away from any wall, as shown in Figure 5.
—If the dust collector will be mounted to a wood framed wall (with or without drywall), the mounting bracket must be mounted directly to a support panel that is wide enough to span and connect to two wall studs. The bracket then fastens to the panel. Next, the panel fastens to the wall studs with lag screws.
—If the dust collector will be mounted to a concrete or masonry wall, attach the brack- et using lag shield anchors with lag screws or anchor studs (see Figure 6).
|
|
|
|
|
| Anchor Stud |
|
|
|
|
|
|
| |
|
|
| Lag Shield Anchor | |
|
|
|
| |
|
|
| ||
|
|
|
| and Lag Screw |
|
|
|
|
|
Figure 6. Typical fasteners for mounting dust collector bracket to masonry or concrete walls.
3.After the mounting bracket is installed on the wall, have another person help you hang the dust collector on the bracket, as shown in
Figure 7.
Bracket
Note: Drawing Not to Scale.
Wall
Minimum 4.5"
Wall
42"
Figure 7. Mounted dust collector.
Floor