VII. Assembly
E. Table
Before installing the table and guards, peel off the blue, protective plastic.
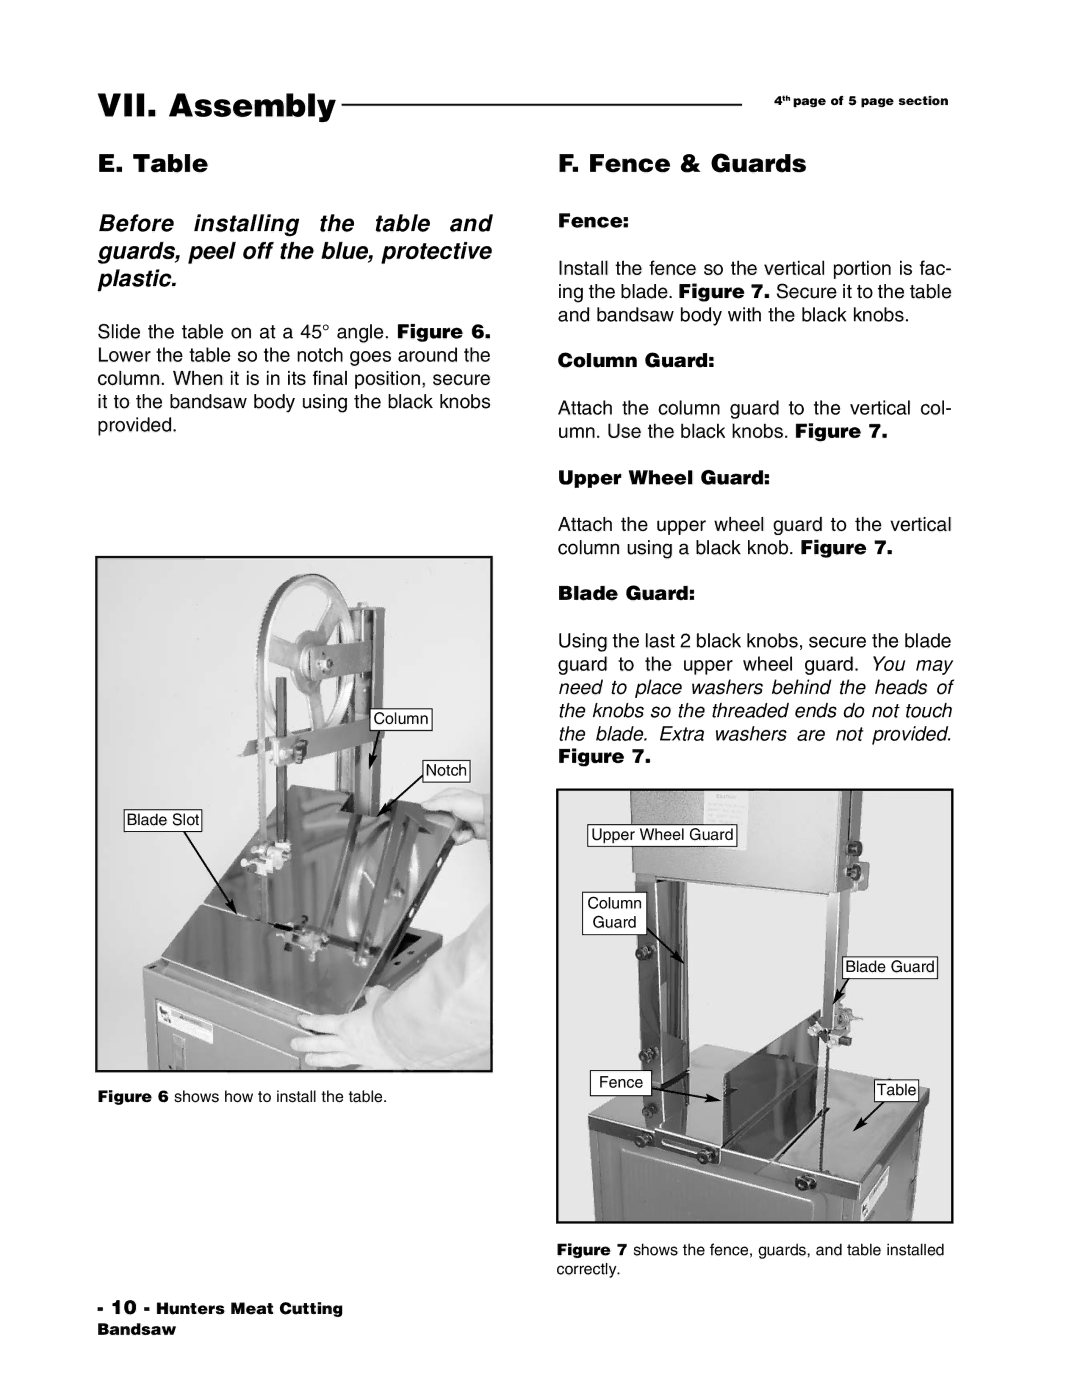
Slide the table on at a 45° angle. Figure 6. Lower the table so the notch goes around the column. When it is in its final position, secure it to the bandsaw body using the black knobs provided.
Column
Notch
Blade Slot
Figure 6 shows how to install the table.
-10 - Hunters Meat Cutting Bandsaw
4th page of 5 page section
F. Fence & Guards
Fence:
Install the fence so the vertical portion is fac- ing the blade. Figure 7. Secure it to the table and bandsaw body with the black knobs.
Column Guard:
Attach the column guard to the vertical col- umn. Use the black knobs. Figure 7.
Upper Wheel Guard:
Attach the upper wheel guard to the vertical column using a black knob. Figure 7.
Blade Guard:
Using the last 2 black knobs, secure the blade guard to the upper wheel guard. You may need to place washers behind the heads of the knobs so the threaded ends do not touch the blade. Extra washers are not provided.
Figure 7.
Upper Wheel Guard
Column
Guard
Blade Guard
Fence | Table |
|