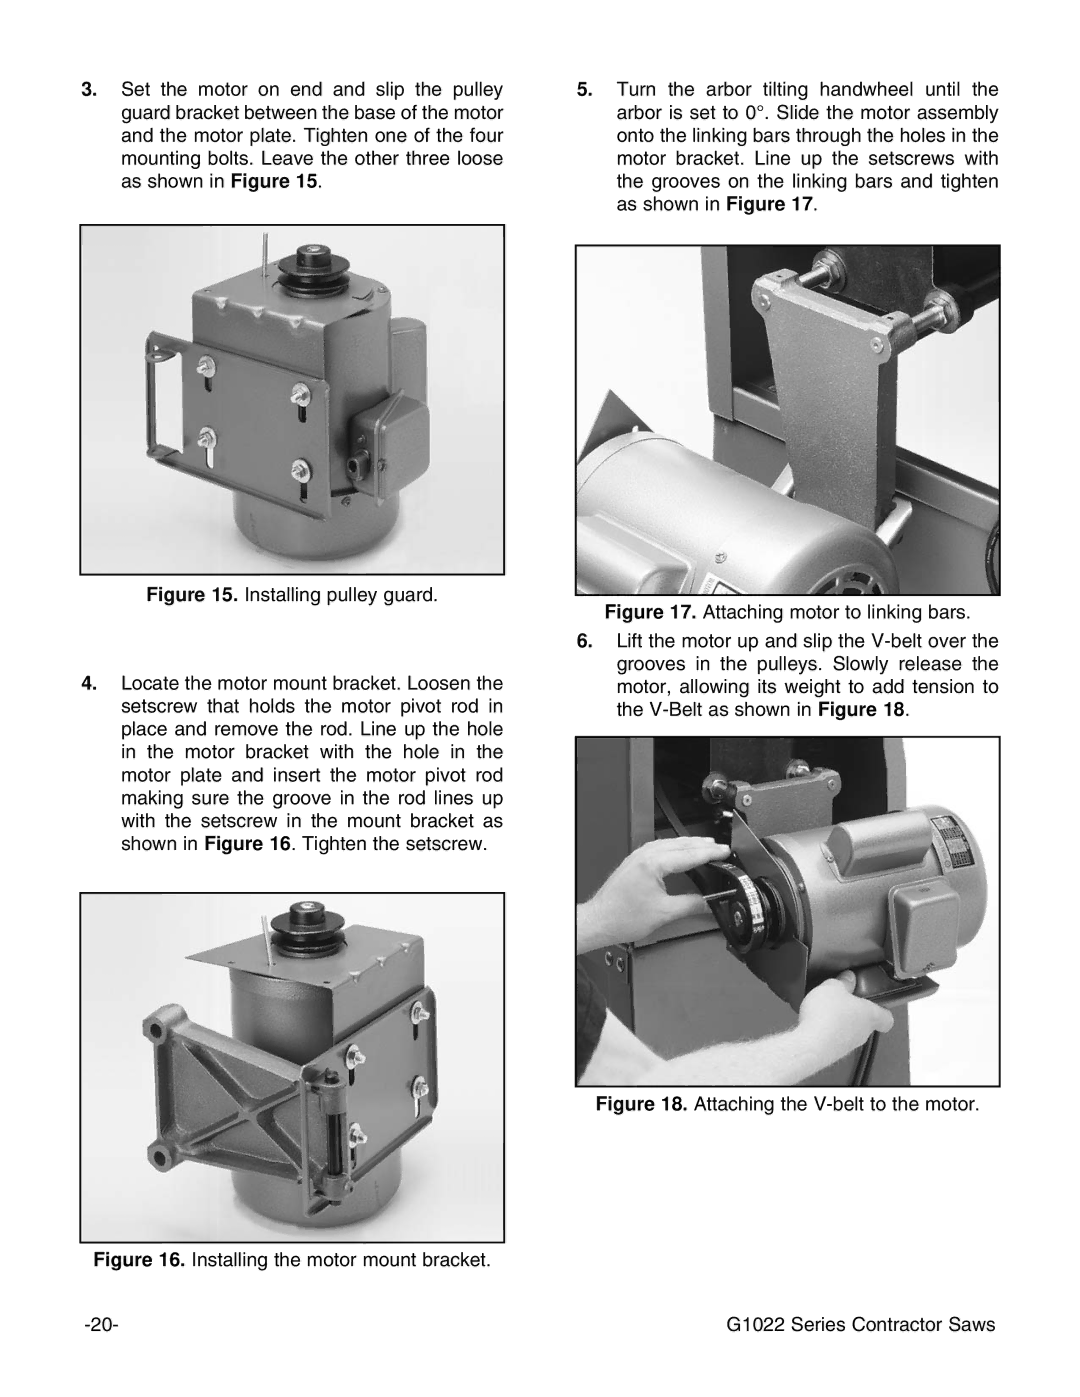
3.Set the motor on end and slip the pulley guard bracket between the base of the motor and the motor plate. Tighten one of the four mounting bolts. Leave the other three loose as shown in Figure 15.
Figure 15. Installing pulley guard.
4.Locate the motor mount bracket. Loosen the setscrew that holds the motor pivot rod in place and remove the rod. Line up the hole in the motor bracket with the hole in the motor plate and insert the motor pivot rod making sure the groove in the rod lines up with the setscrew in the mount bracket as shown in Figure 16. Tighten the setscrew.
Figure 16. Installing the motor mount bracket.
5.Turn the arbor tilting handwheel until the arbor is set to 0¡. Slide the motor assembly onto the linking bars through the holes in the motor bracket. Line up the setscrews with the grooves on the linking bars and tighten as shown in Figure 17.
Figure 17. Attaching motor to linking bars.
6.Lift the motor up and slip the V-belt over the grooves in the pulleys. Slowly release the motor, allowing its weight to add tension to the V-Belt as shown in Figure 18.
Figure 18. Attaching the V-belt to the motor.
G1022 Series Contractor Saws |
