Blade Parallelism
Your table saw will give the best results if the miter slot is parallel to the blade. If they are not exactly parallel, your cuts and finished work will be lower in quality. To check and adjust blade parallelism:
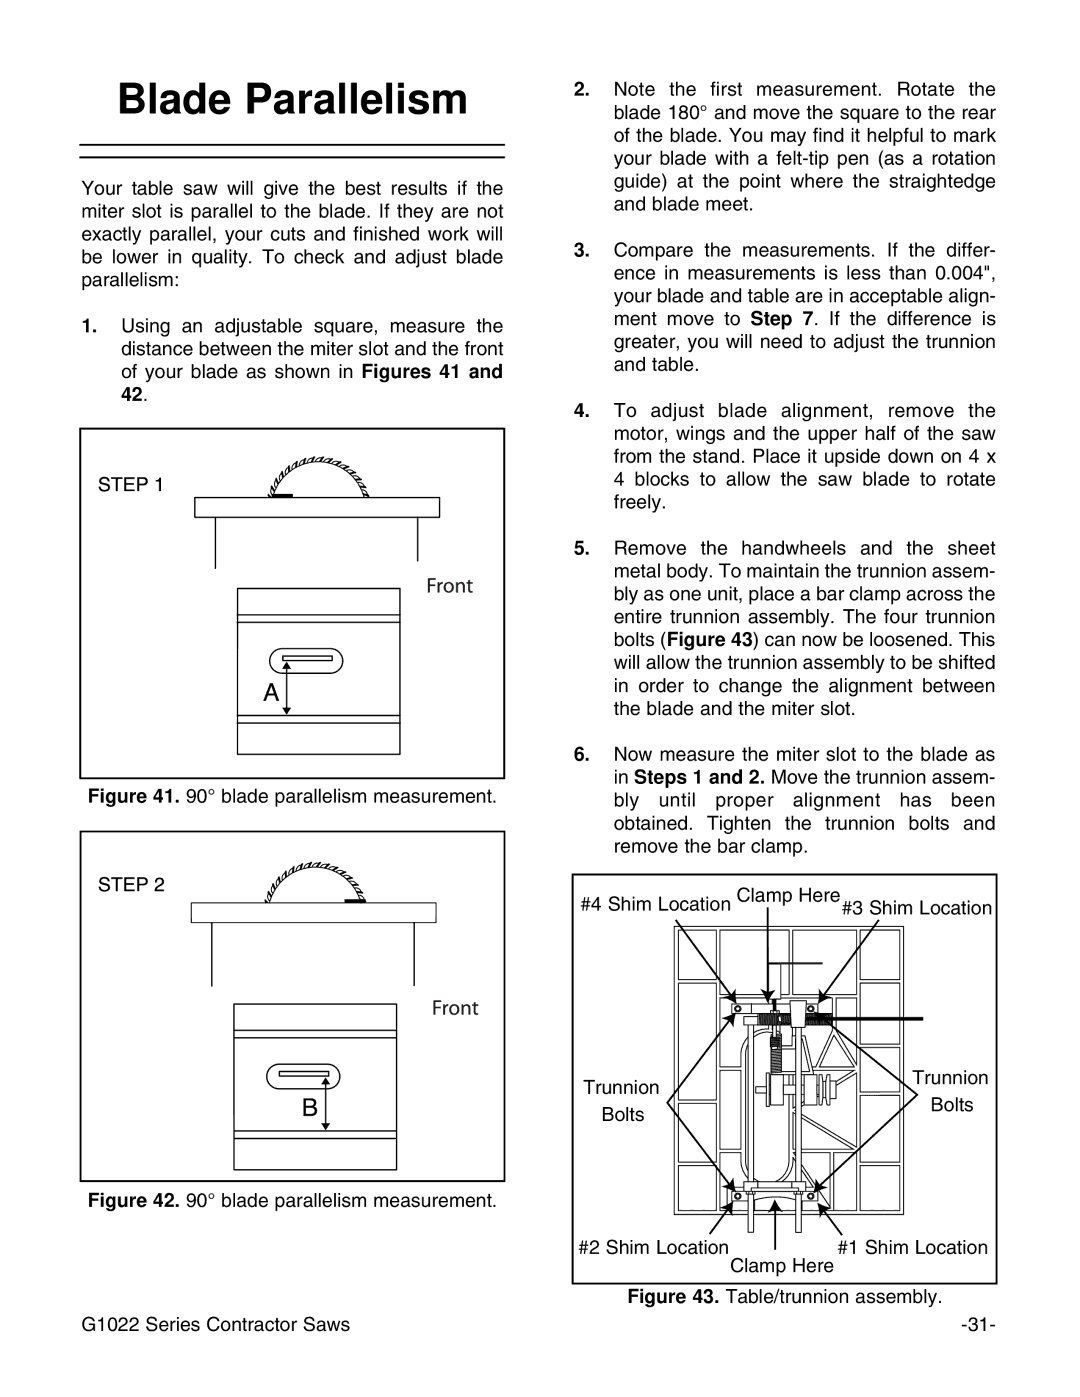
1.Using an adjustable square, measure the distance between the miter slot and the front of your blade as shown in Figures 41 and 42.
Figure 41. 90¡ blade parallelism measurement.
2.Note the first measurement. Rotate the blade 180¡ and move the square to the rear of the blade. You may find it helpful to mark your blade with a
3.Compare the measurements. If the differ- ence in measurements is less than 0.004", your blade and table are in acceptable align- ment move to Step 7. If the difference is greater, you will need to adjust the trunnion and table.
4.To adjust blade alignment, remove the motor, wings and the upper half of the saw from the stand. Place it upside down on 4 x 4 blocks to allow the saw blade to rotate freely.
5.Remove the handwheels and the sheet metal body. To maintain the trunnion assem- bly as one unit, place a bar clamp across the entire trunnion assembly. The four trunnion bolts (Figure 43) can now be loosened. This will allow the trunnion assembly to be shifted in order to change the alignment between the blade and the miter slot.
6.Now measure the miter slot to the blade as in Steps 1 and 2. Move the trunnion assem- bly until proper alignment has been obtained. Tighten the trunnion bolts and remove the bar clamp.
#4 Shim Location Clamp Here#3 Shim Location
Figure 42. 90¡ blade parallelism measurement.
Trunnion
Bolts
#2 Shim Location  Clamp Here
Trunnion
Bolts
