Blade Guard
1.Screw the threaded end of the support shaft into the hole in the back of the rear trunnion. The check nut on the shaft will be used to tighten the shaft in place as shown in Figure 25. Leave it loose for now.
Figure 25. Installing blade guard.
2.Loosen the blade-guard mounting bolt locat- ed just inside the table cut-out and the blade guard mounting bolt on the end of the sup- port shaft.
3.Slip the slots at the bottom of the guard over the two mounting bolts as shown in Figure 26. The washers should be between the bolt head and the slots. Rotate the support shaft to align the mounting bolts to the mounting slots on the guard.
Blade Guard Mounting Bolts
Blade Guard
Support Shaft
Figure 26. Blade guard components.
4.Tighten the mounting bolts to secure the blade guard.
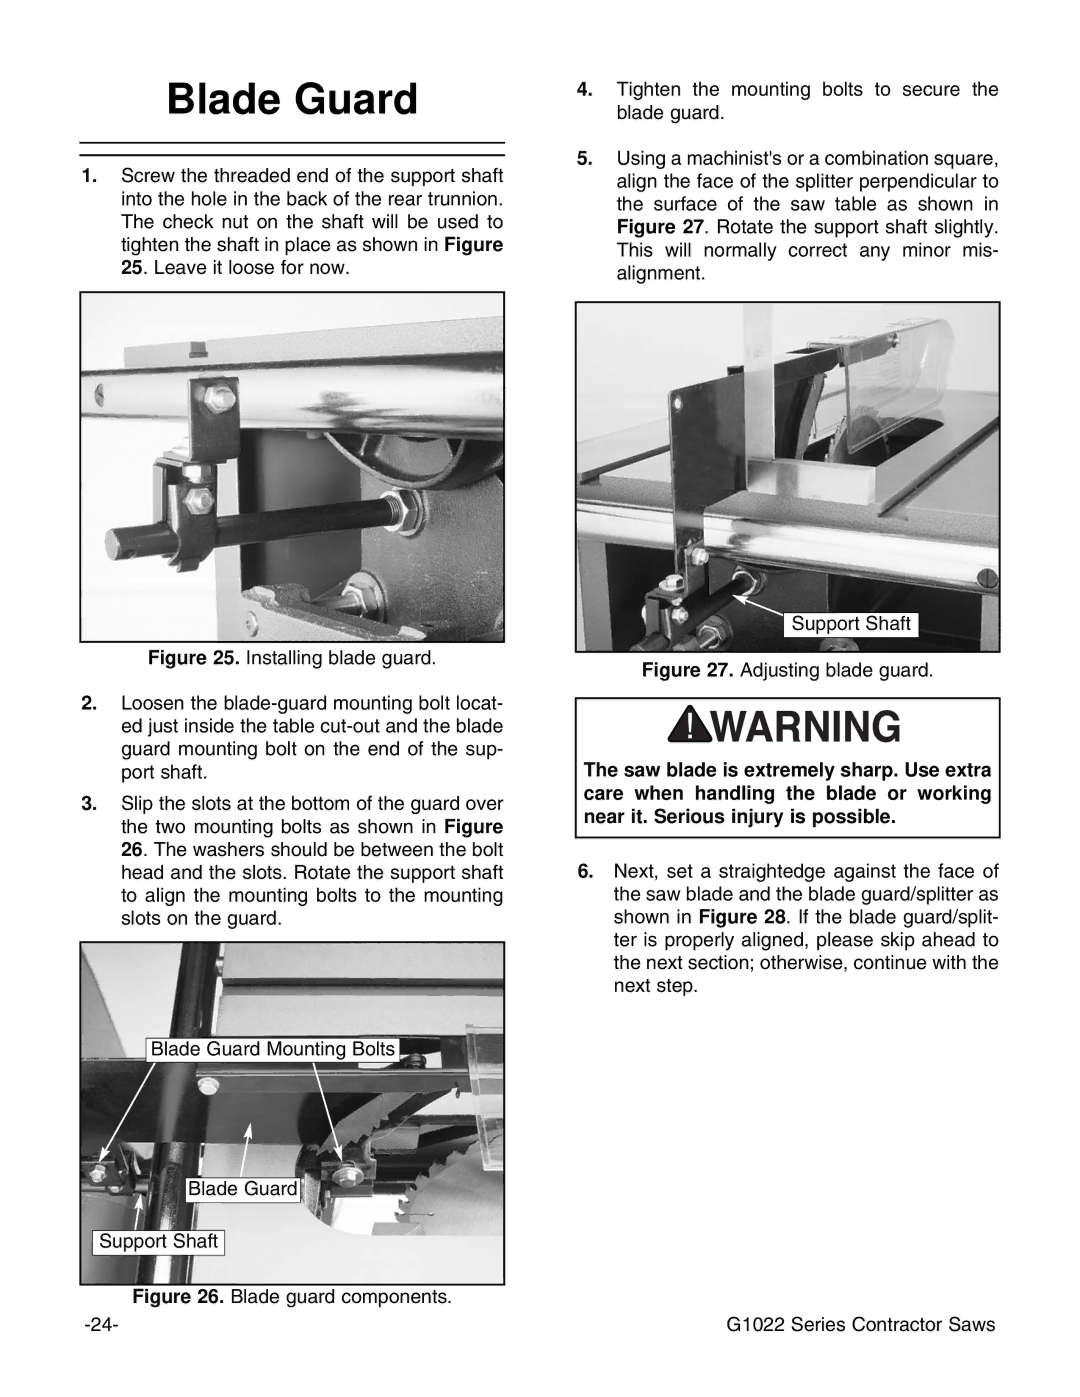
5.Using a machinist's or a combination square, align the face of the splitter perpendicular to the surface of the saw table as shown in Figure 27. Rotate the support shaft slightly. This will normally correct any minor mis- alignment.
Support Shaft
Figure 27. Adjusting blade guard.
The saw blade is extremely sharp. Use extra care when handling the blade or working near it. Serious injury is possible.
6.Next, set a straightedge against the face of the saw blade and the blade guard/splitter as shown in Figure 28. If the blade guard/split- ter is properly aligned, please skip ahead to the next section; otherwise, continue with the next step.
