Grizzly G4003G owner manual Adjusting spindle bearings

Models: G4003G

1 72
Download 72 pages 18.24 Kb
Page 41
Image 41

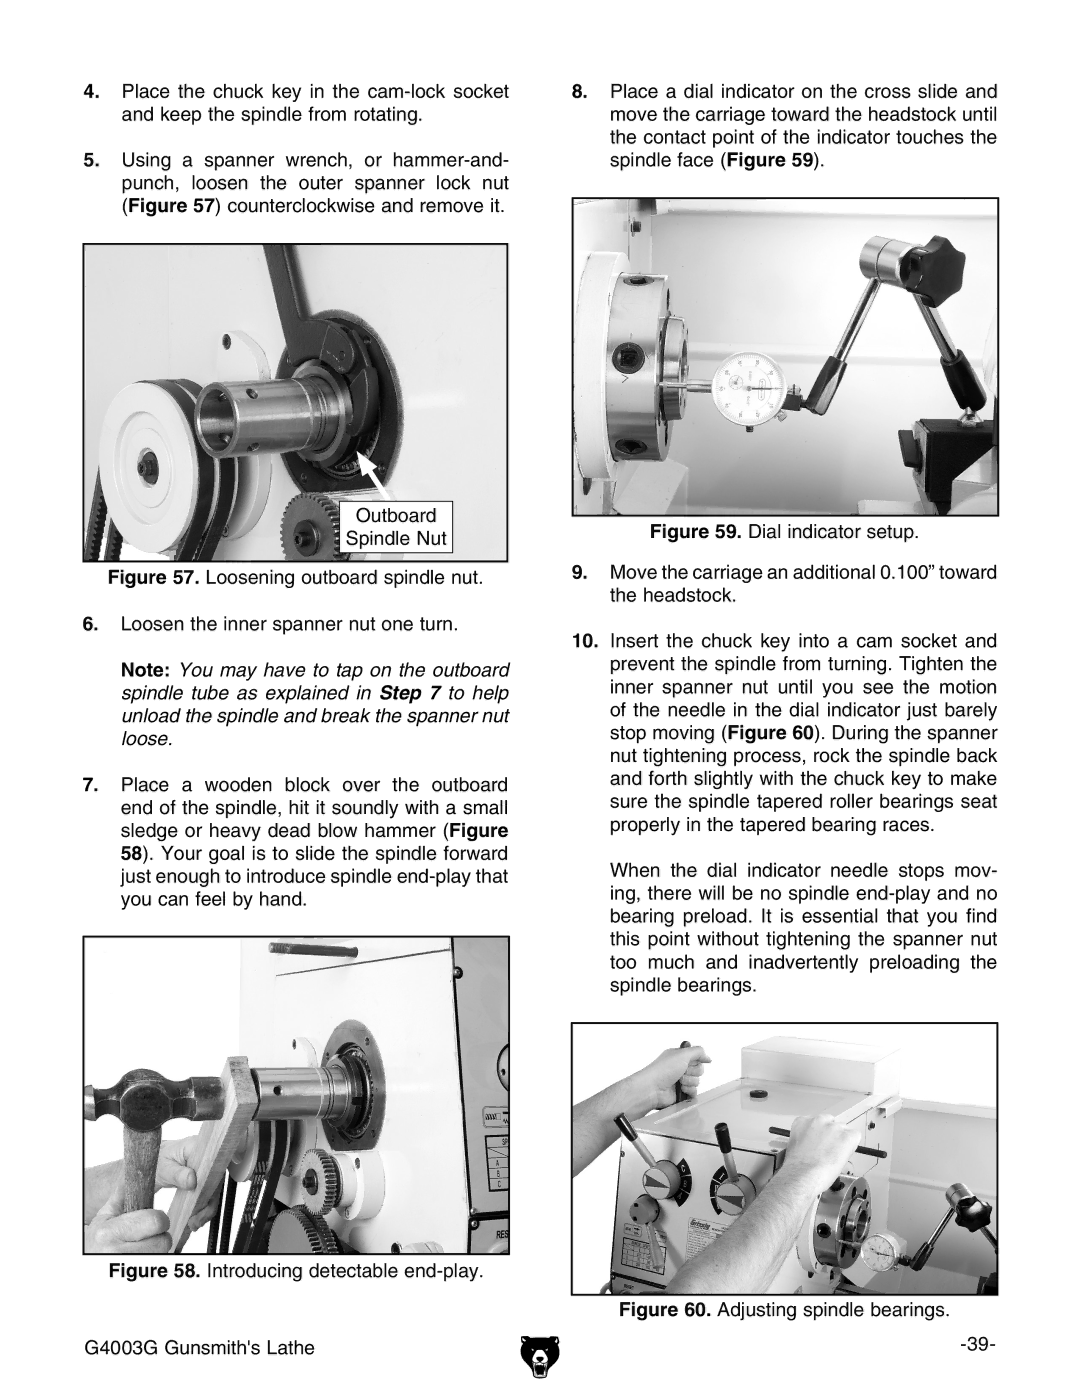
4.Place the chuck key in the cam-lock socket and keep the spindle from rotating.

5.Using a spanner wrench, or hammer-and- punch, loosen the outer spanner lock nut (Figure 57) counterclockwise and remove it.

Outboard

Spindle Nut

Figure 57. Loosening outboard spindle nut.

6.Loosen the inner spanner nut one turn.

Note: You may have to tap on the outboard spindle tube as explained in Step 7 to help unload the spindle and break the spanner nut loose.

7.Place a wooden block over the outboard end of the spindle, hit it soundly with a small sledge or heavy dead blow hammer (Figure 58). Your goal is to slide the spindle forward just enough to introduce spindle end-play that you can feel by hand.

Figure 58. Introducing detectable end-play.

G4003G Gunsmith's Lathe

8.Place a dial indicator on the cross slide and move the carriage toward the headstock until the contact point of the indicator touches the spindle face (Figure 59).

Figure 59. Dial indicator setup.

9.Move the carriage an additional 0.100” toward the headstock.

10.Insert the chuck key into a cam socket and prevent the spindle from turning. Tighten the inner spanner nut until you see the motion of the needle in the dial indicator just barely stop moving (Figure 60). During the spanner nut tightening process, rock the spindle back and forth slightly with the chuck key to make sure the spindle tapered roller bearings seat properly in the tapered bearing races.

When the dial indicator needle stops mov- ing, there will be no spindle end-play and no bearing preload. It is essential that you find this point without tightening the spanner nut too much and inadvertently preloading the spindle bearings.

Figure 60. Adjusting spindle bearings.

-39-

Page 41
Image 41
Grizzly G4003G owner manual Adjusting spindle bearings