Your saw comes from the factory with a red motor bracket designed to protect the motor assembly during shipping. Remove the bracket shown in
Figure 10C.
Blade Guard/Splitter
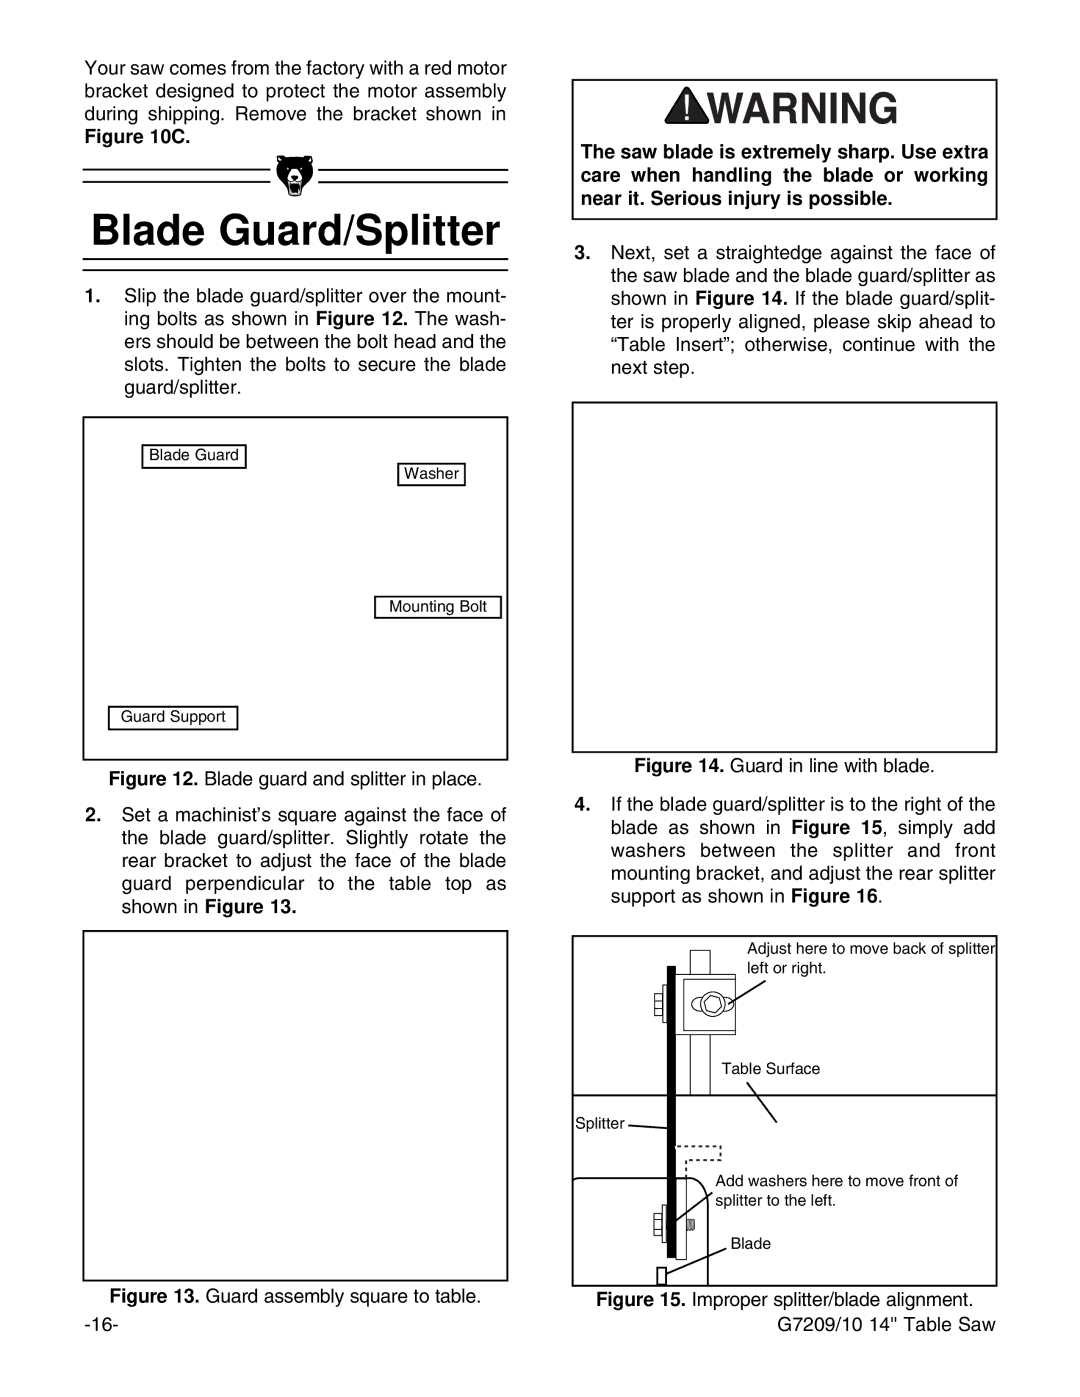
1.Slip the blade guard/splitter over the mount- ing bolts as shown in Figure 12. The wash- ers should be between the bolt head and the slots. Tighten the bolts to secure the blade guard/splitter.
Blade Guard |
Washer |
Mounting Bolt |
Guard Support |
Figure 12. Blade guard and splitter in place.
2.Set a machinistÕs square against the face of the blade guard/splitter. Slightly rotate the rear bracket to adjust the face of the blade guard perpendicular to the table top as shown in Figure 13.
Figure 13. Guard assembly square to table.
The saw blade is extremely sharp. Use extra care when handling the blade or working near it. Serious injury is possible.
3.Next, set a straightedge against the face of the saw blade and the blade guard/splitter as shown in Figure 14. If the blade guard/split- ter is properly aligned, please skip ahead to ÒTable InsertÓ; otherwise, continue with the next step.
Figure 14. Guard in line with blade.
4.If the blade guard/splitter is to the right of the blade as shown in Figure 15, simply add washers between the splitter and front mounting bracket, and adjust the rear splitter support as shown in Figure 16.
Adjust here to move back of splitter left or right.
Table Surface
Splitter ![]()
Add washers here to move front of
![]() splitter to the left.
splitter to the left.
Blade