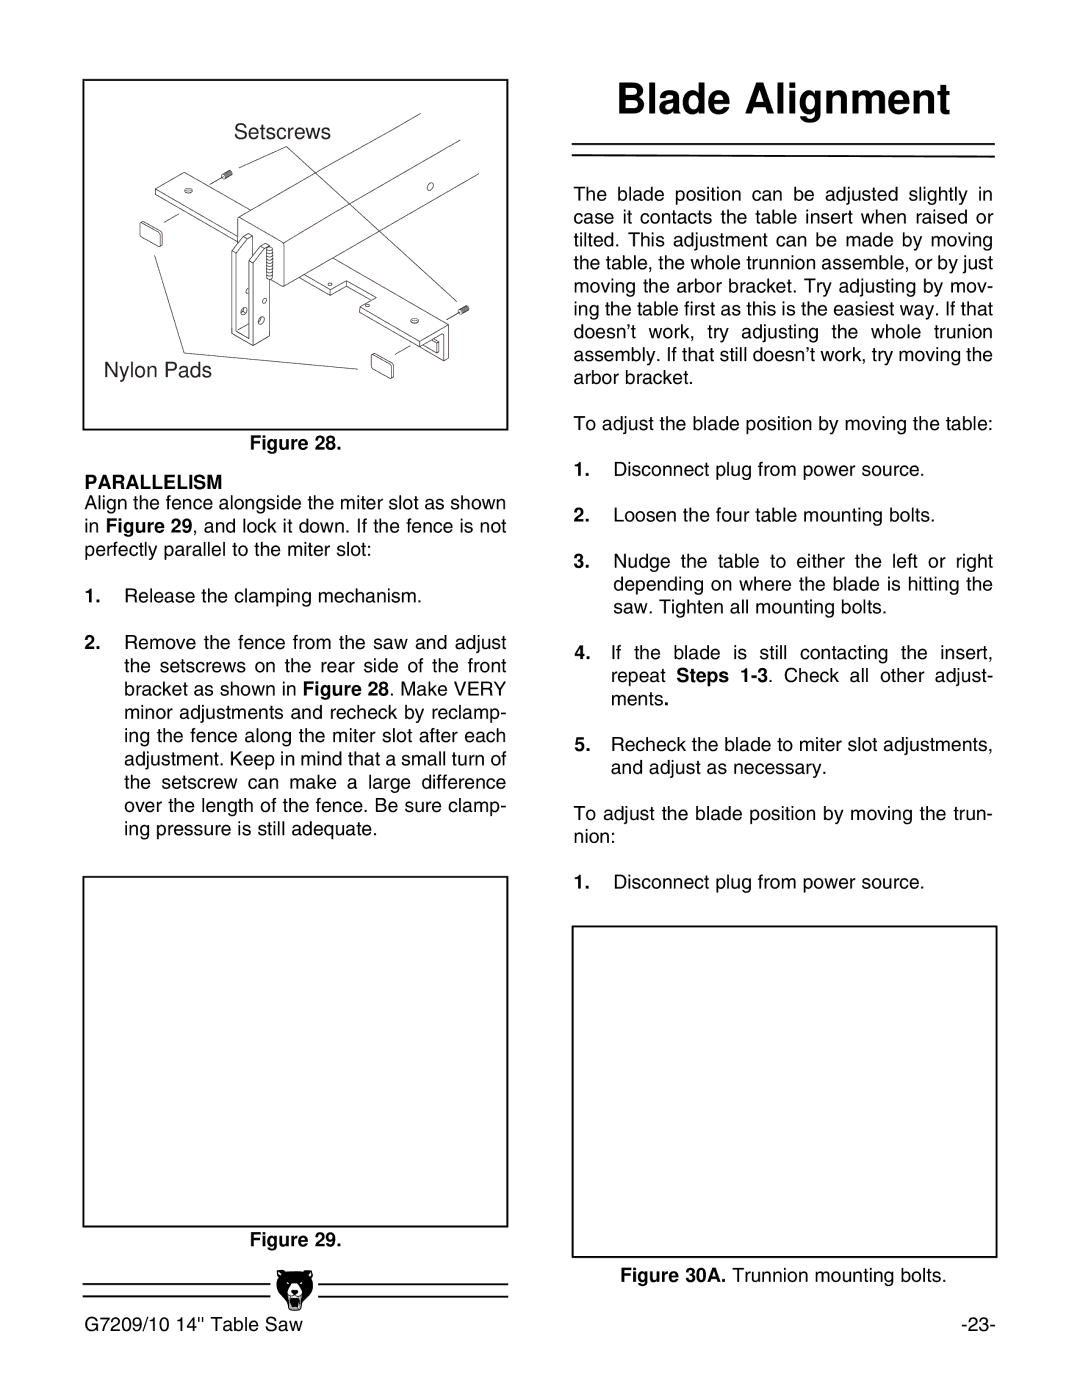
Setscrews |
Nylon Pads |
Figure 28.
PARALLELISM
Align the fence alongside the miter slot as shown in Figure 29, and lock it down. If the fence is not perfectly parallel to the miter slot:
1.Release the clamping mechanism.
2.Remove the fence from the saw and adjust the setscrews on the rear side of the front bracket as shown in Figure 28. Make VERY minor adjustments and recheck by reclamp- ing the fence along the miter slot after each adjustment. Keep in mind that a small turn of the setscrew can make a large difference over the length of the fence. Be sure clamp- ing pressure is still adequate.
Figure 29.
G7209/10 14'' Table Saw
Blade Alignment
The blade position can be adjusted slightly in case it contacts the table insert when raised or tilted. This adjustment can be made by moving the table, the whole trunnion assemble, or by just moving the arbor bracket. Try adjusting by mov- ing the table first as this is the easiest way. If that doesnÕt work, try adjusting the whole trunion assembly. If that still doesnÕt work, try moving the arbor bracket.
To adjust the blade position by moving the table:
1.Disconnect plug from power source.
2.Loosen the four table mounting bolts.
3.Nudge the table to either the left or right depending on where the blade is hitting the saw. Tighten all mounting bolts.
4.If the blade is still contacting the insert, repeat Steps
5.Recheck the blade to miter slot adjustments, and adjust as necessary.
To adjust the blade position by moving the trun- nion:
1.Disconnect plug from power source.