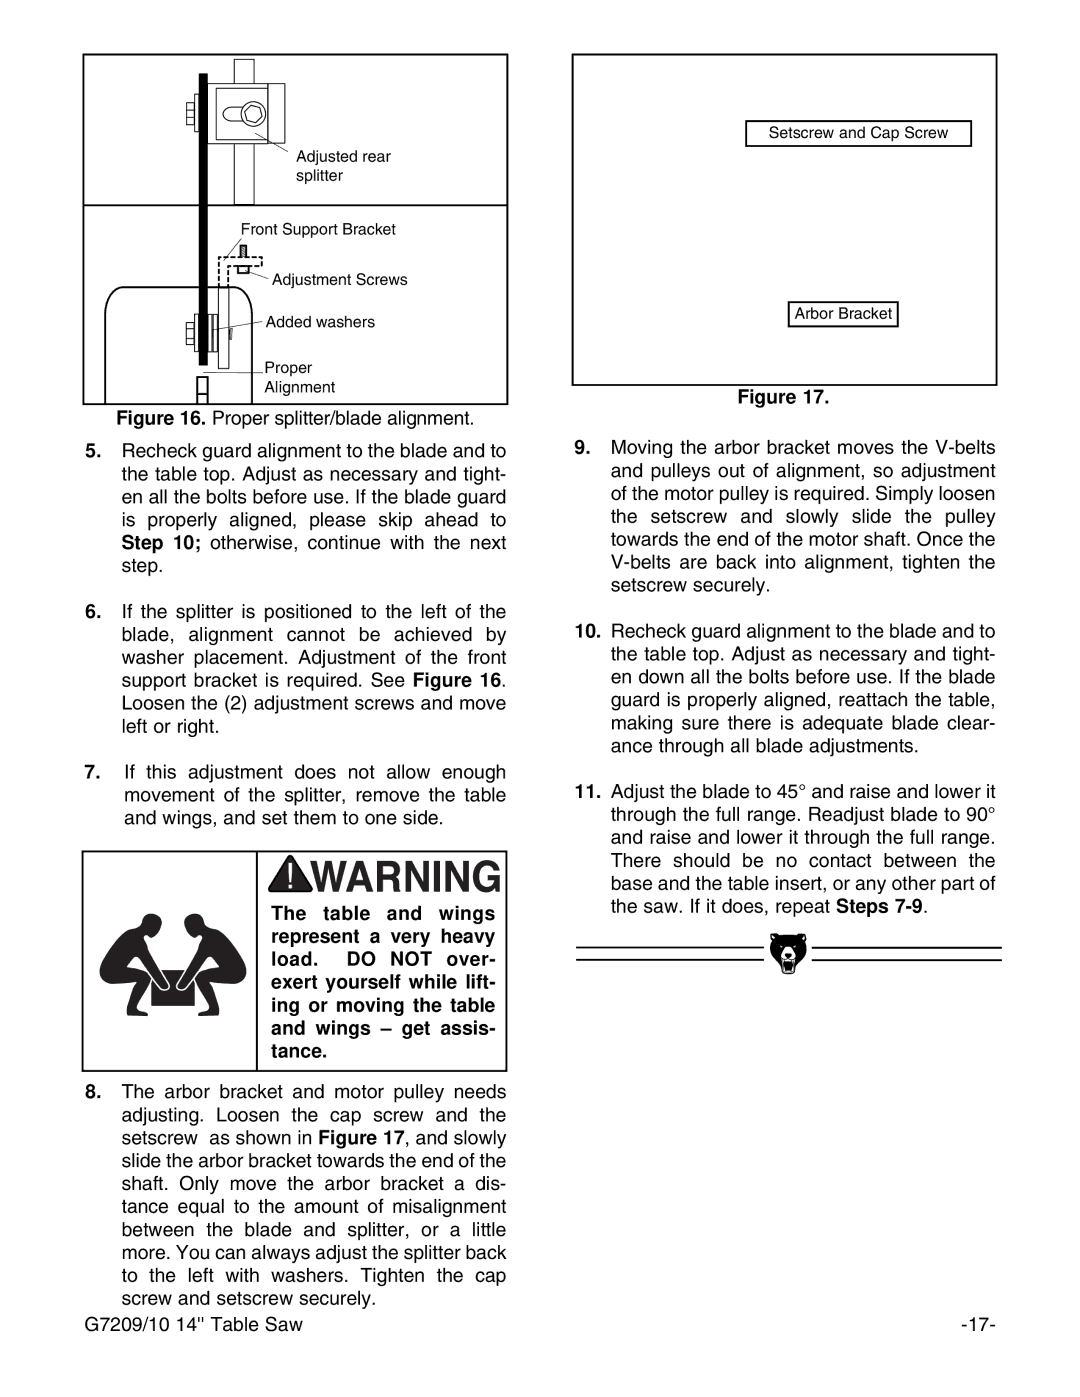
Adjusted rear |
splitter |
Front Support Bracket |
Adjustment Screws |
Added washers |
Proper |
Alignment |
Figure 16. Proper splitter/blade alignment.
5.Recheck guard alignment to the blade and to the table top. Adjust as necessary and tight- en all the bolts before use. If the blade guard is properly aligned, please skip ahead to Step 10; otherwise, continue with the next step.
6.If the splitter is positioned to the left of the blade, alignment cannot be achieved by washer placement. Adjustment of the front support bracket is required. See Figure 16. Loosen the (2) adjustment screws and move left or right.
7.If this adjustment does not allow enough movement of the splitter, remove the table and wings, and set them to one side.
The table and wings represent a very heavy load. DO NOT over- exert yourself while lift- ing or moving the table and wings – get assis- tance.
8.The arbor bracket and motor pulley needs adjusting. Loosen the cap screw and the setscrew as shown in Figure 17, and slowly slide the arbor bracket towards the end of the shaft. Only move the arbor bracket a dis- tance equal to the amount of misalignment between the blade and splitter, or a little more. You can always adjust the splitter back to the left with washers. Tighten the cap screw and setscrew securely.
G7209/10 14'' Table Saw
Setscrew and Cap Screw
Arbor Bracket
Figure 17.
9.Moving the arbor bracket moves the
10.Recheck guard alignment to the blade and to the table top. Adjust as necessary and tight- en down all the bolts before use. If the blade guard is properly aligned, reattach the table, making sure there is adequate blade clear- ance through all blade adjustments.
11.Adjust the blade to 45¡ and raise and lower it through the full range. Readjust blade to 90¡ and raise and lower it through the full range. There should be no contact between the base and the table insert, or any other part of the saw. If it does, repeat Steps