Headstock
Adjustment
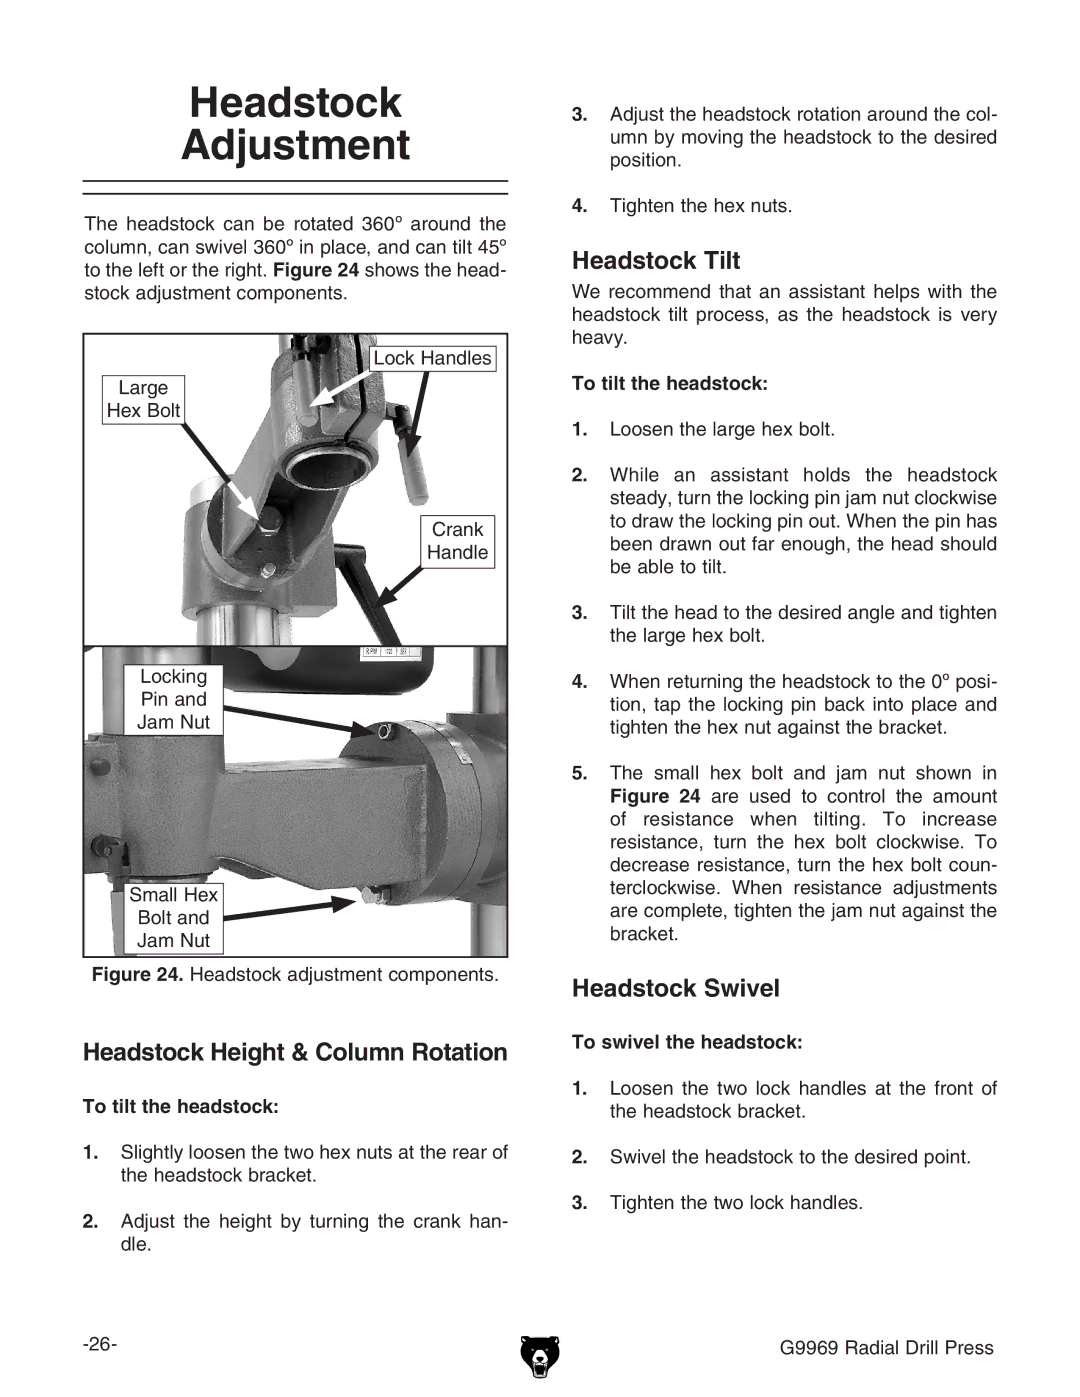
The headstock can be rotated 360º around the column, can swivel 360º in place, and can tilt 45º to the left or the right. Figure 24 shows the head- stock adjustment components.
Lock Handles |
Large |
Hex Bolt |
Crank |
Handle |
Locking |
Pin and |
Jam Nut |
Small Hex |
Bolt and |
Jam Nut |
Figure 24. Headstock adjustment components.
Headstock Height & Column Rotation
To tilt the headstock:
1.Slightly loosen the two hex nuts at the rear of the headstock bracket.
2.Adjust the height by turning the crank han- dle.
3.Adjust the headstock rotation around the col- umn by moving the headstock to the desired position.
4.Tighten the hex nuts.
Headstock Tilt
We recommend that an assistant helps with the headstock tilt process, as the headstock is very heavy.
To tilt the headstock:
1.Loosen the large hex bolt.
2.While an assistant holds the headstock steady, turn the locking pin jam nut clockwise to draw the locking pin out. When the pin has been drawn out far enough, the head should be able to tilt.
3.Tilt the head to the desired angle and tighten the large hex bolt.
4.When returning the headstock to the 0º posi- tion, tap the locking pin back into place and tighten the hex nut against the bracket.
5.The small hex bolt and jam nut shown in Figure 24 are used to control the amount of resistance when tilting. To increase resistance, turn the hex bolt clockwise. To decrease resistance, turn the hex bolt coun- terclockwise. When resistance adjustments are complete, tighten the jam nut against the bracket.
Headstock Swivel
To swivel the headstock:
1.Loosen the two lock handles at the front of the headstock bracket.
2.Swivel the headstock to the desired point.
3.Tighten the two lock handles.
G9969 Radial Drill Press