3.Place the rack inside the headstock bracket, engage it with the gear inside the headstock bracket, and with help of assistants, slide the rack and headstock bracket onto the column, as shown in Figure 8.
Figure 8. Mounting headstock bracket.
4.Re-install the cap and tighten the cap screw.
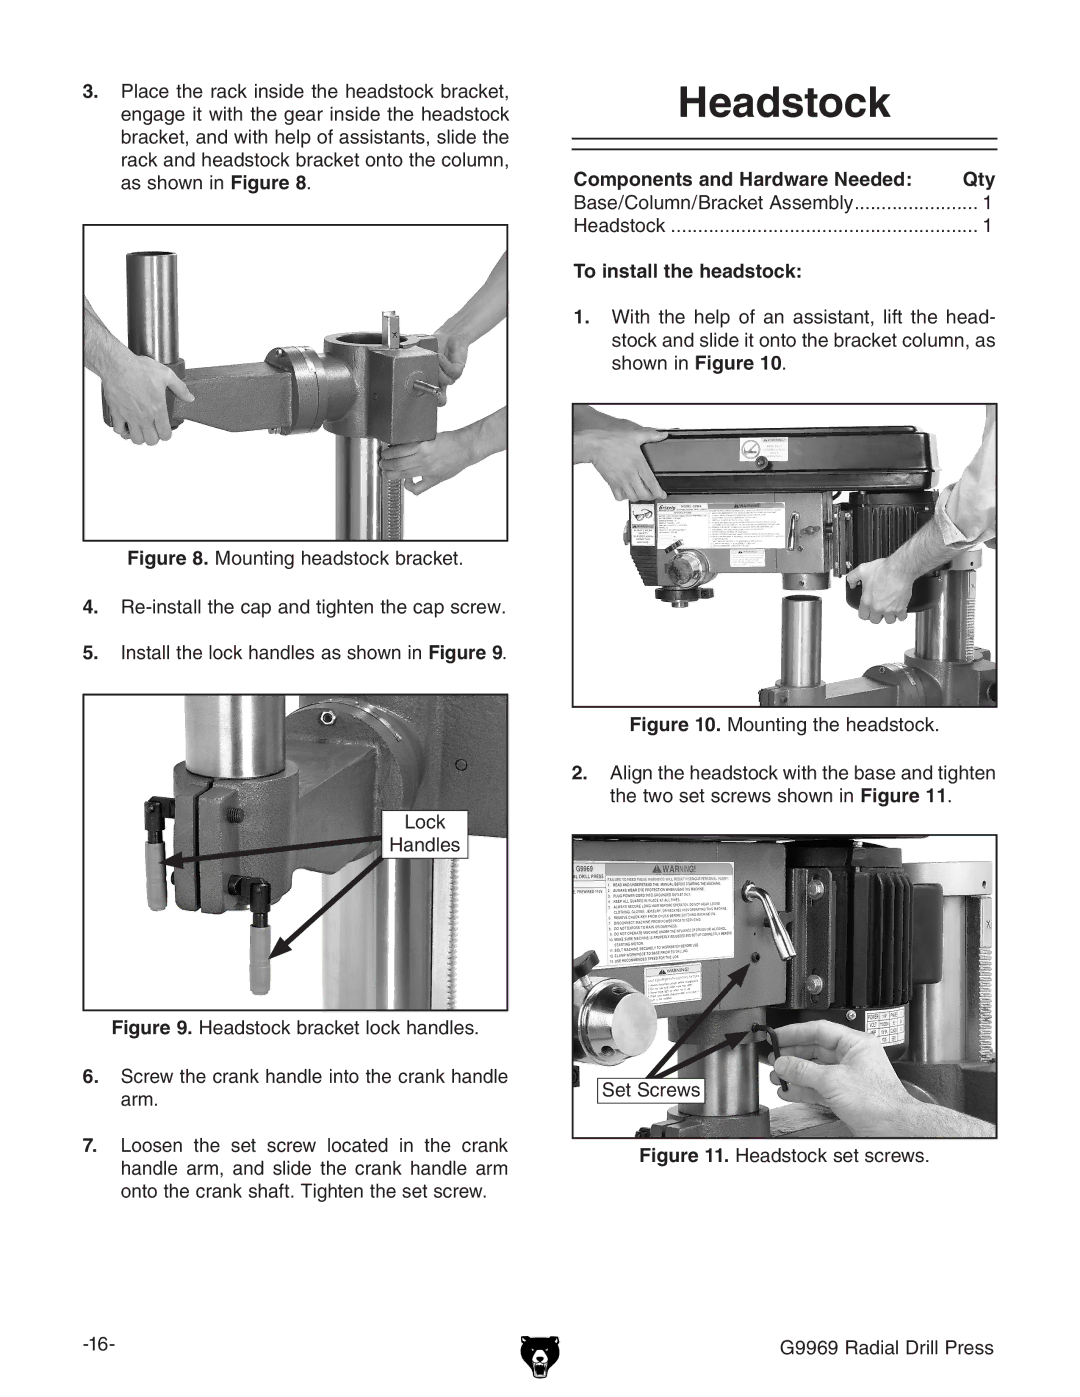
5.Install the lock handles as shown in Figure 9.
Lock
Handles
Figure 9. Headstock bracket lock handles.
6.Screw the crank handle into the crank handle arm.
7.Loosen the set screw located in the crank handle arm, and slide the crank handle arm onto the crank shaft. Tighten the set screw.
Headstock |
|
Components and Hardware Needed: | Qty |
Base/Column/Bracket Assembly | 1 |
Headstock | 1 |
To install the headstock: |
|
1.With the help of an assistant, lift the head- stock and slide it onto the bracket column, as shown in Figure 10.