2.To test for proper nail/staple penetra- tion, hold the nailer/stapler perpen- dicular to the surface of a piece of clean scrap wood that is thick enough for the length of nails/staples you have loaded.
3.Depress the safety yoke mechanism on your workpiece.
4.Before pulling the trigger, make sure your free hand and other body parts are positioned out of the way of a potential path of a nail/staple in case of deflection.
Deflection is caused when grain irregularities, knots or foreign objects inside the wood cause the nail/staple to change its path, resulting in the nail/staple puncturing the surface of the workpiece, as shown in Figure 5.
Besides damaging your workpiece, deflection can cause injury if your free hand is securing the workpiece in the location that the nail/staple deflects.
Figure 5. Example of nail deflection.
5.Pull the trigger.
—If the nail/staple drove into the wood far enough, continue with your intended operations.
—If the nail/staple either went too far or not far enough, then go to the Adjusting Depth sub-section on this page.
H7664 2-in-1 Combination Nailer/Stapler
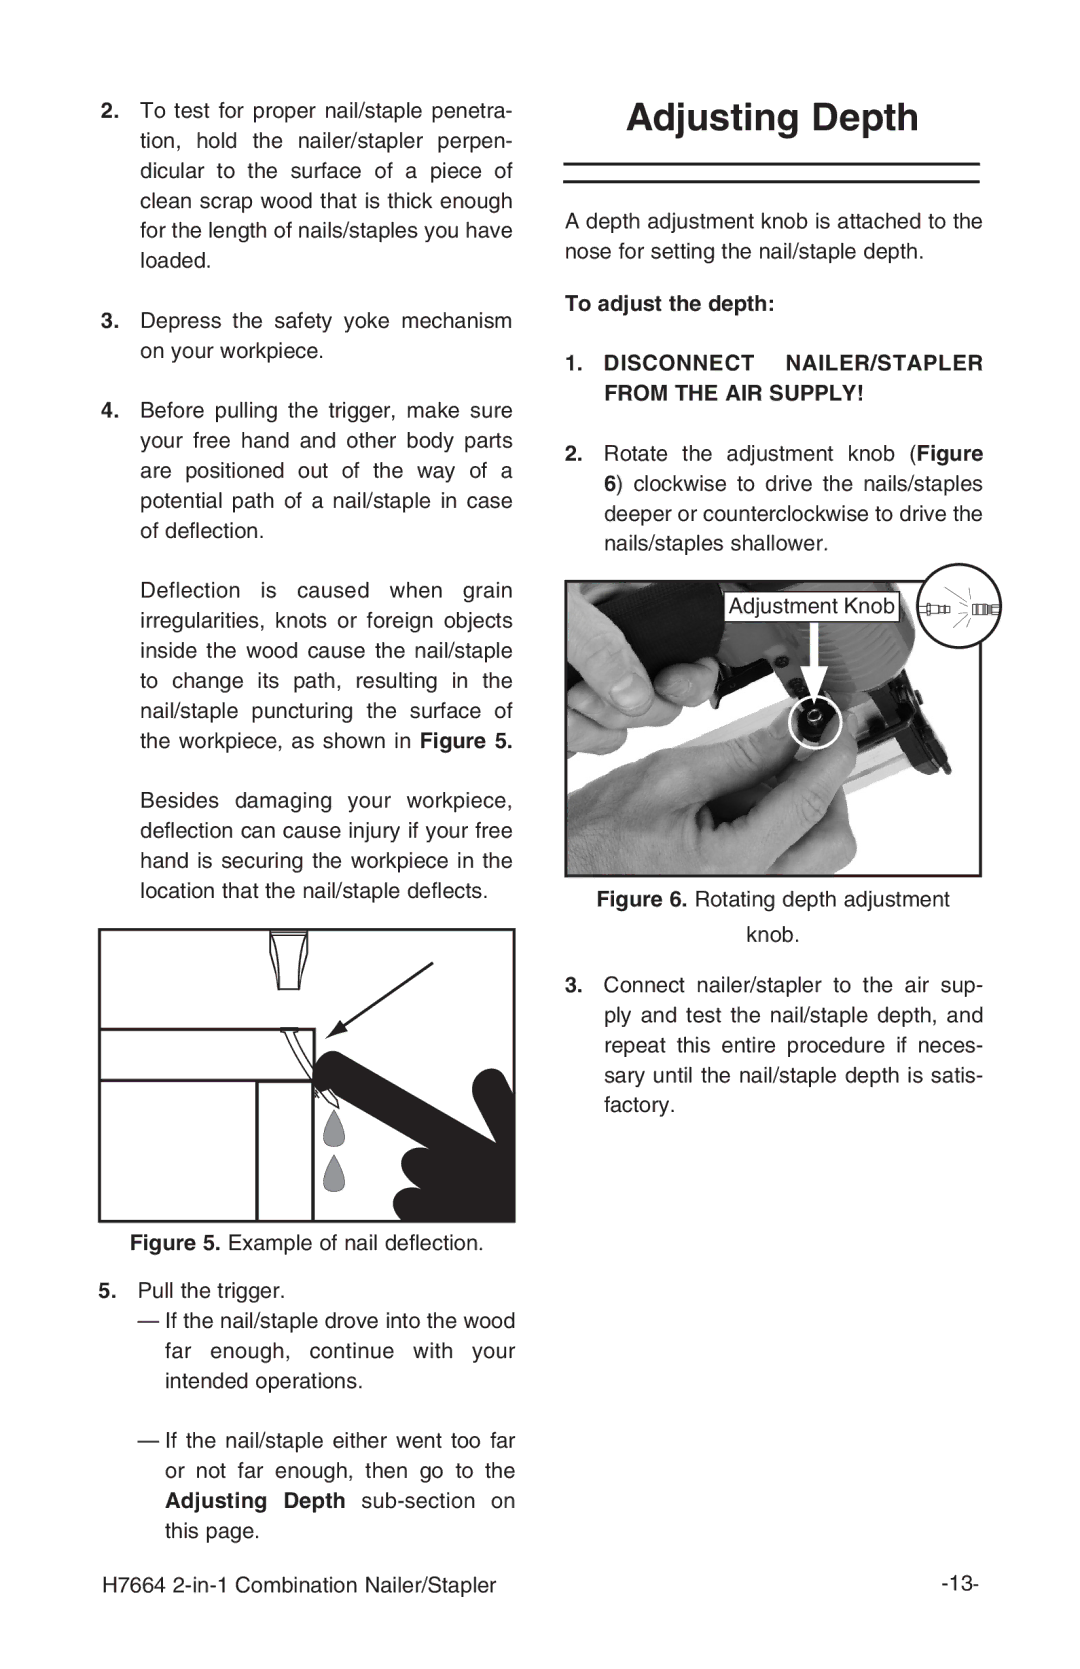
Adjusting Depth
A depth adjustment knob is attached to the nose for setting the nail/staple depth.
To adjust the depth:
1.DISCONNECT NAILER/STAPLER FROM THE AIR SUPPLY!
2.Rotate the adjustment knob (Figure 6) clockwise to drive the nails/staples deeper or counterclockwise to drive the nails/staples shallower.
Adjustment Knob ![]()
![]()
![]()
![]()
![]()
![]()
![]()
![]()
![]()
![]()
![]()
![]()
![]()
![]()
![]()
![]()
![]()