To clear a jammed nail from the dis- charge area:
1.DISCONNECT NAILER/STAPLER FROM THE AIR SUPPLY!
2.Unlock the catch lever and pull the magazine pusher back completely.
3.Remove the nail/staple stick from the magazine.
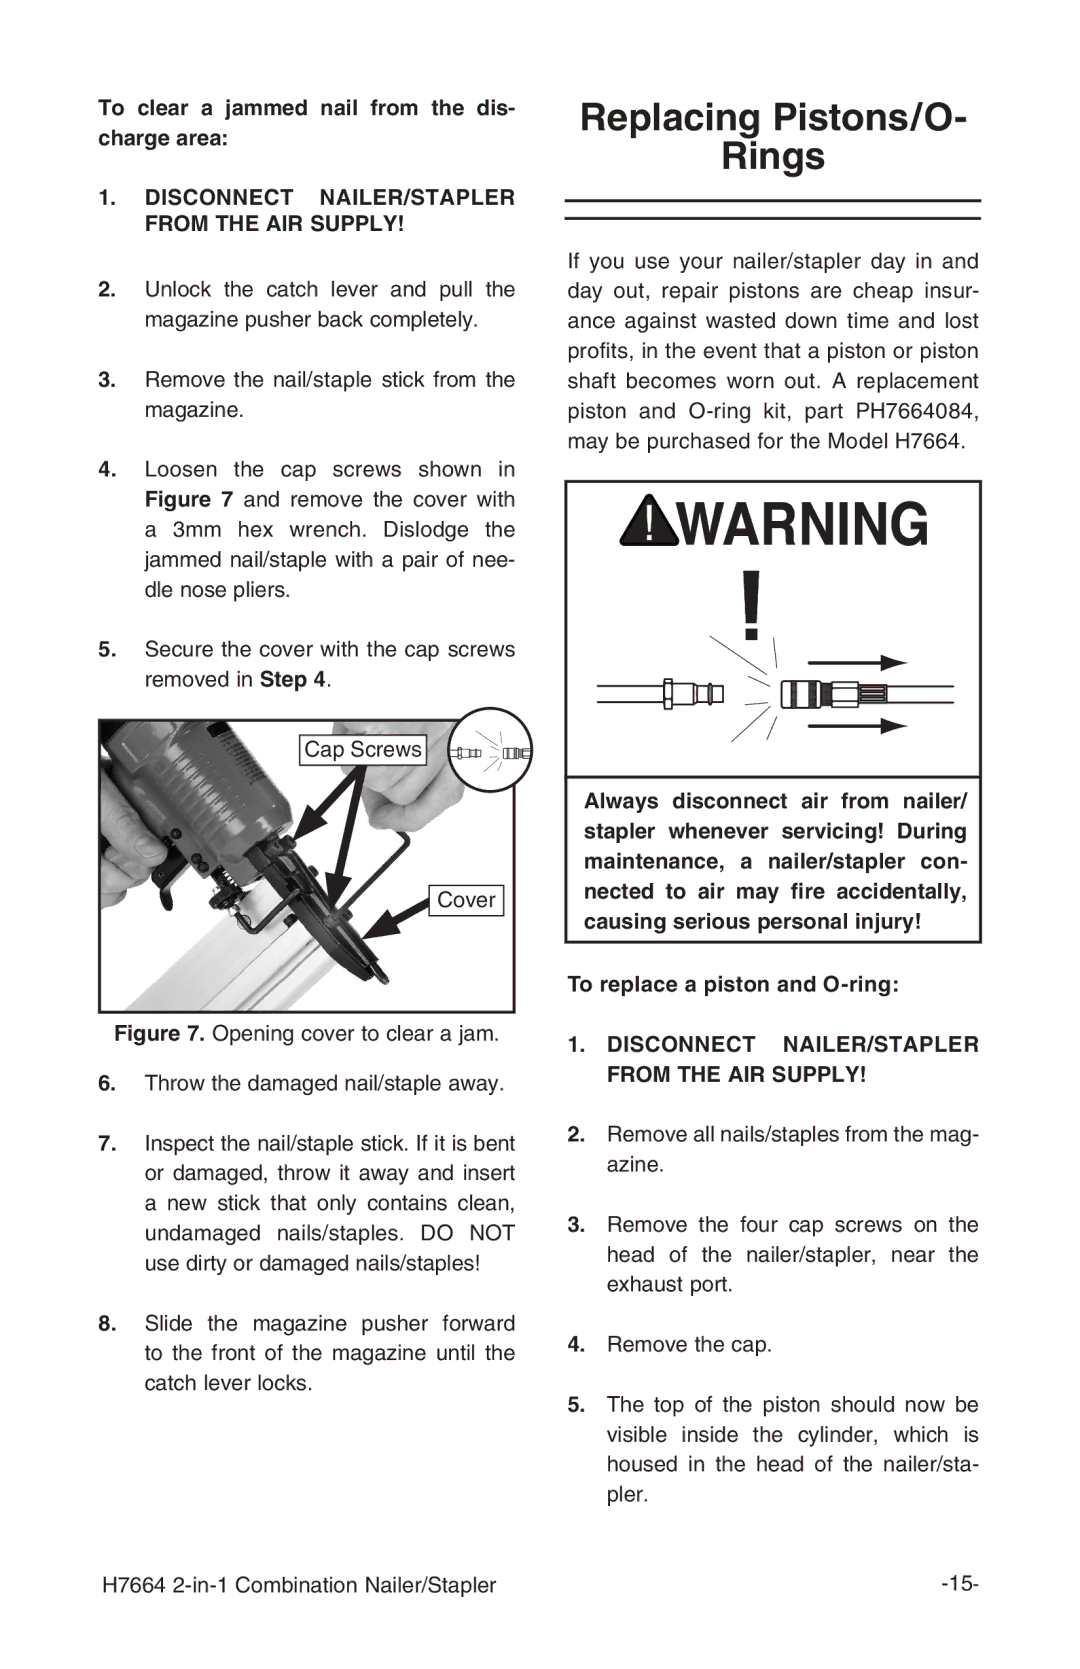
4.Loosen the cap screws shown in Figure 7 and remove the cover with a 3mm hex wrench. Dislodge the jammed nail/staple with a pair of nee- dle nose pliers.
5.Secure the cover with the cap screws removed in Step 4.
Cap Screws ![]()
![]()
![]()
![]()
![]()
![]()
![]()
![]()
![]()
![]()
![]()
![]()
![]()
![]()
![]()
![]()
![]()
![]() Cover
Cover
Figure 7. Opening cover to clear a jam.
6.Throw the damaged nail/staple away.
7.Inspect the nail/staple stick. If it is bent or damaged, throw it away and insert a new stick that only contains clean, undamaged nails/staples. DO NOT use dirty or damaged nails/staples!
8.Slide the magazine pusher forward to the front of the magazine until the catch lever locks.
Replacing Pistons/O-
Rings
If you use your nailer/stapler day in and day out, repair pistons are cheap insur- ance against wasted down time and lost profits, in the event that a piston or piston shaft becomes worn out. A replacement piston and
Always disconnect air from nailer/ stapler whenever servicing! During maintenance, a nailer/stapler con- nected to air may fire accidentally, causing serious personal injury!
To replace a piston and O-ring:
1.DISCONNECT NAILER/STAPLER FROM THE AIR SUPPLY!
2.Remove all nails/staples from the mag- azine.
3.Remove the four cap screws on the head of the nailer/stapler, near the exhaust port.
4.Remove the cap.
5.The top of the piston should now be visible inside the cylinder, which is housed in the head of the nailer/sta- pler.
H7664 |
