Changing Belt
To remove the old belt:
1.Open the side and rear access covers as shown in Steps
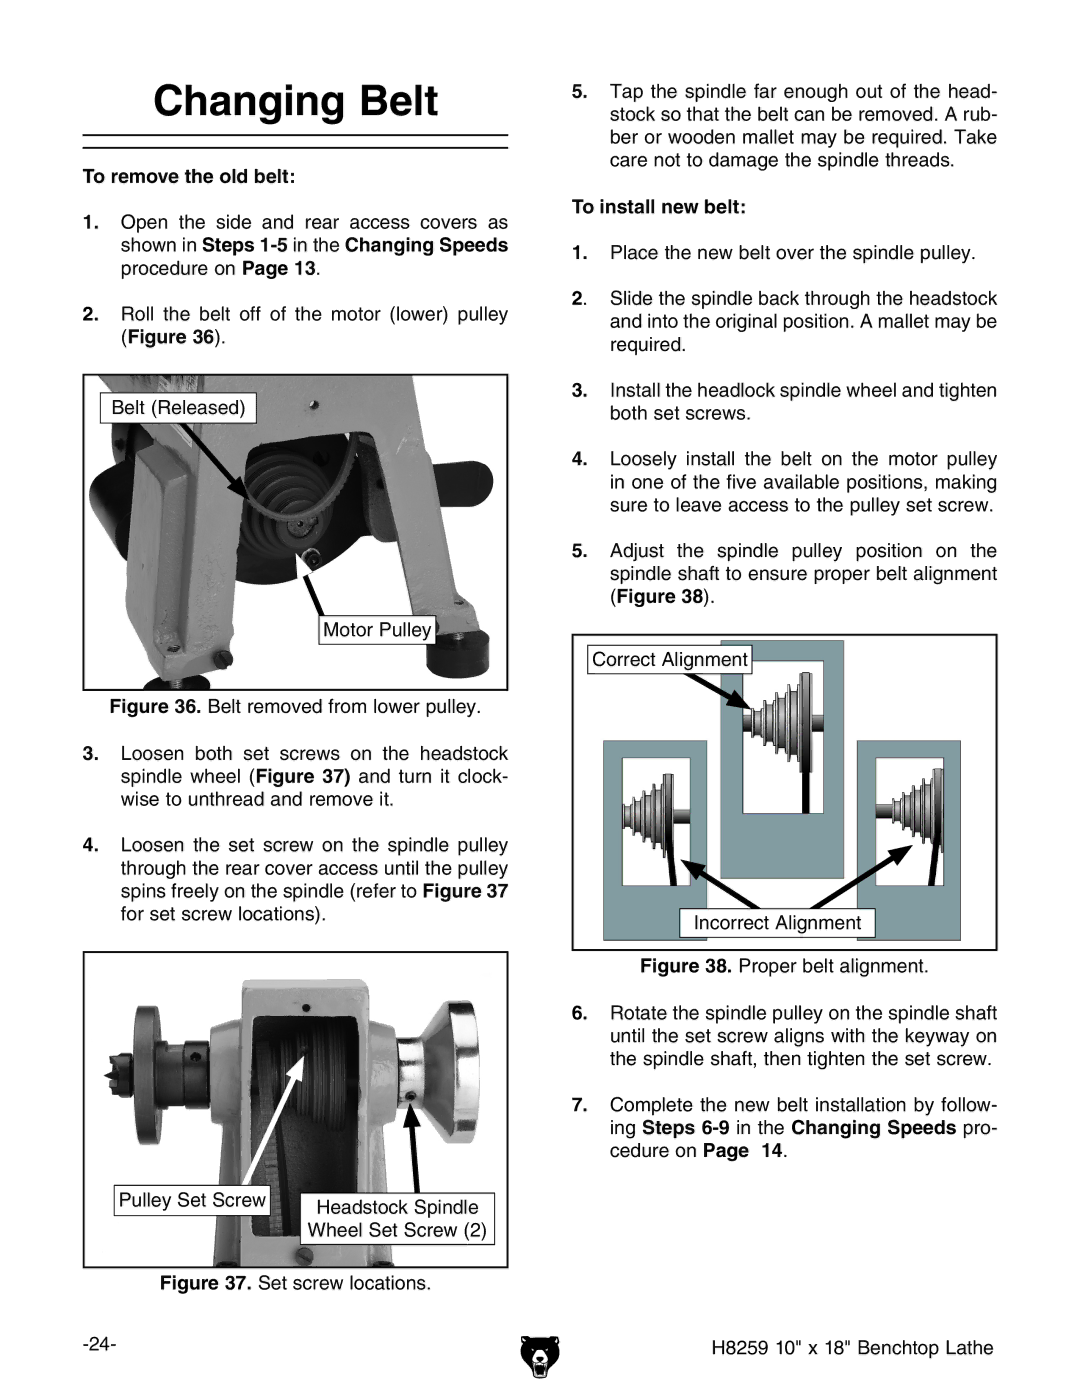
2.Roll the belt off of the motor (lower) pulley (Figure 36).
Belt (Released)
Motor Pulley
Figure 36. Belt removed from lower pulley.
3.Loosen both set screws on the headstock spindle wheel (Figure 37) and turn it clock- wise to unthread and remove it.
4.Loosen the set screw on the spindle pulley through the rear cover access until the pulley spins freely on the spindle (refer to Figure 37 for set screw locations).
Pulley Set Screw | Headstock Spindle |
| |
| Wheel Set Screw (2) |
Figure 37. Set screw locations. | |
5.Tap the spindle far enough out of the head- stock so that the belt can be removed. A rub- ber or wooden mallet may be required. Take care not to damage the spindle threads.
To install new belt:
1.Place the new belt over the spindle pulley.
2. | Slide the spindle back through the headstock |
| and into the original position. A mallet may be |
| required. |
3.Install the headlock spindle wheel and tighten both set screws.
4.Loosely install the belt on the motor pulley in one of the five available positions, making sure to leave access to the pulley set screw.
5.Adjust the spindle pulley position on the spindle shaft to ensure proper belt alignment (Figure 38).
Correct Alignment
Incorrect Alignment