5.Rotate the hand crank clockwise to feed the workpiece until it is completely through the rollers, as illustrated in Figure 16.

7.Continue to feed the workpiece through the rollers until the cylinder is formed, as illus- trated in Figure 18.

Workpiece
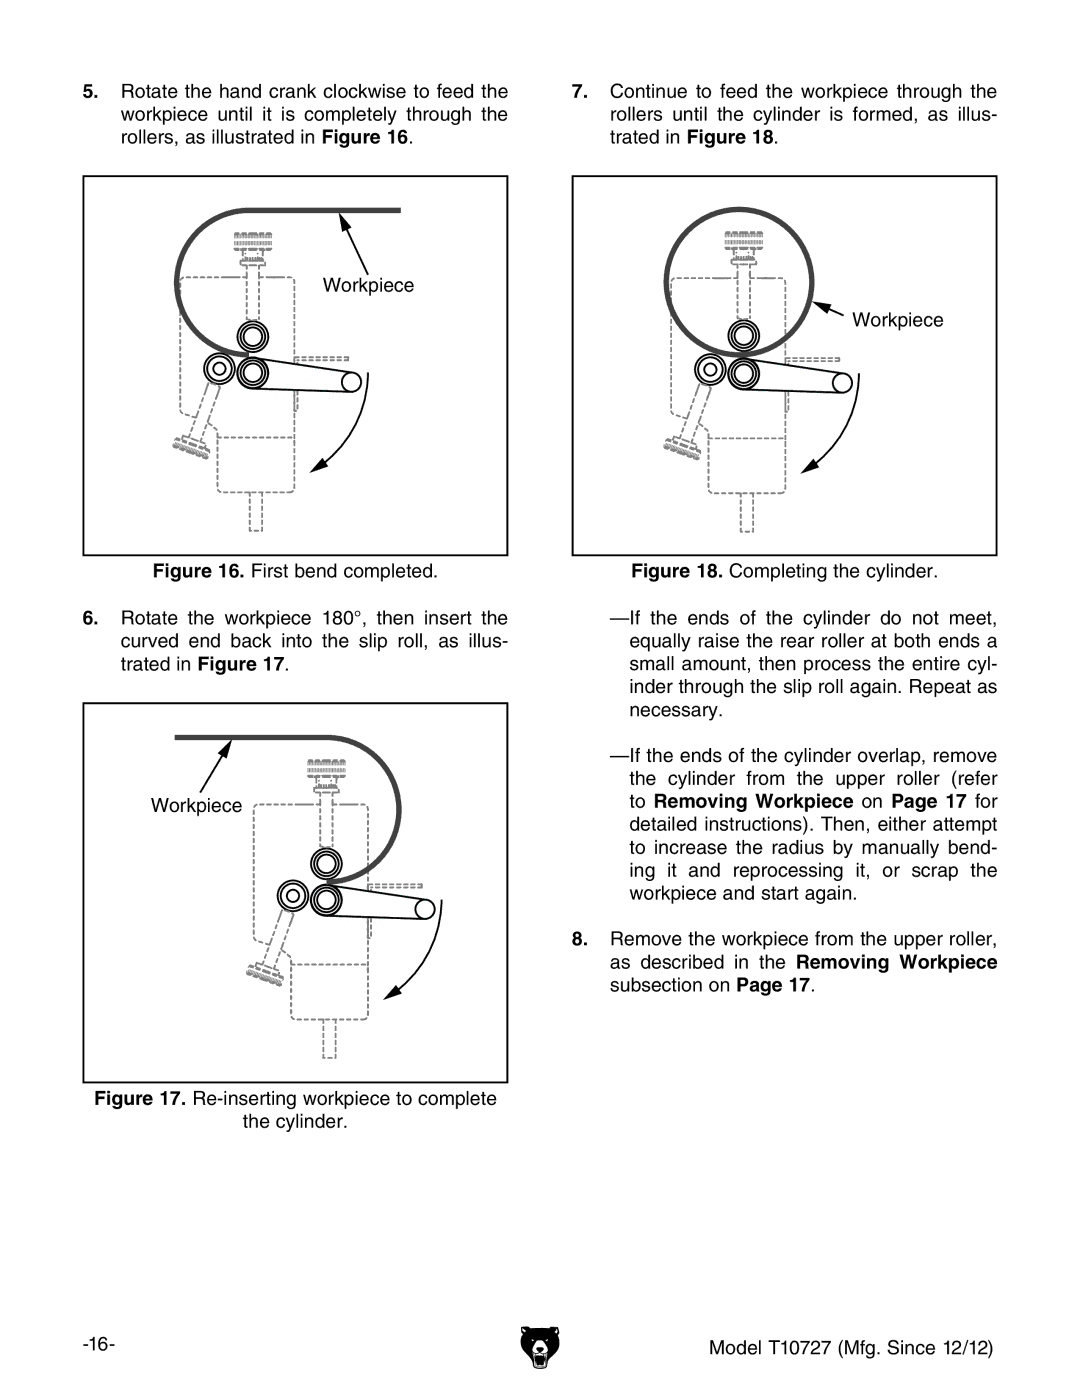
Figure 16. First bend completed.

6.rotate the workpiece 180°, then insert the curved end back into the slip roll, as illus- trated in Figure 17.

Workpiece

Figure 17. Re-inserting workpiece to complete

the cylinder.

-16-

Workpiece

Figure 18. Completing the cylinder.

—if the ends of the cylinder do not meet, equally raise the rear roller at both ends a small amount, then process the entire cyl- inder through the slip roll again. Repeat as necessary.

—if the ends of the cylinder overlap, remove the cylinder from the upper roller (refer to Removing Workpiece on Page 17 for detailed instructions). Then, either attempt to increase the radius by manually bend- ing it and reprocessing it, or scrap the workpiece and start again.

8.remove the workpiece from the upper roller, as described in the Removing Workpiece subsection on Page 17.

Model T10727 (Mfg. Since 12/12)

Page 18
Image 18
Grizzly T10727 owner manual Re-inserting workpiece to complete Cylinder Workpiece