System Component Information
VIII. Using the Air Regulators and Needle
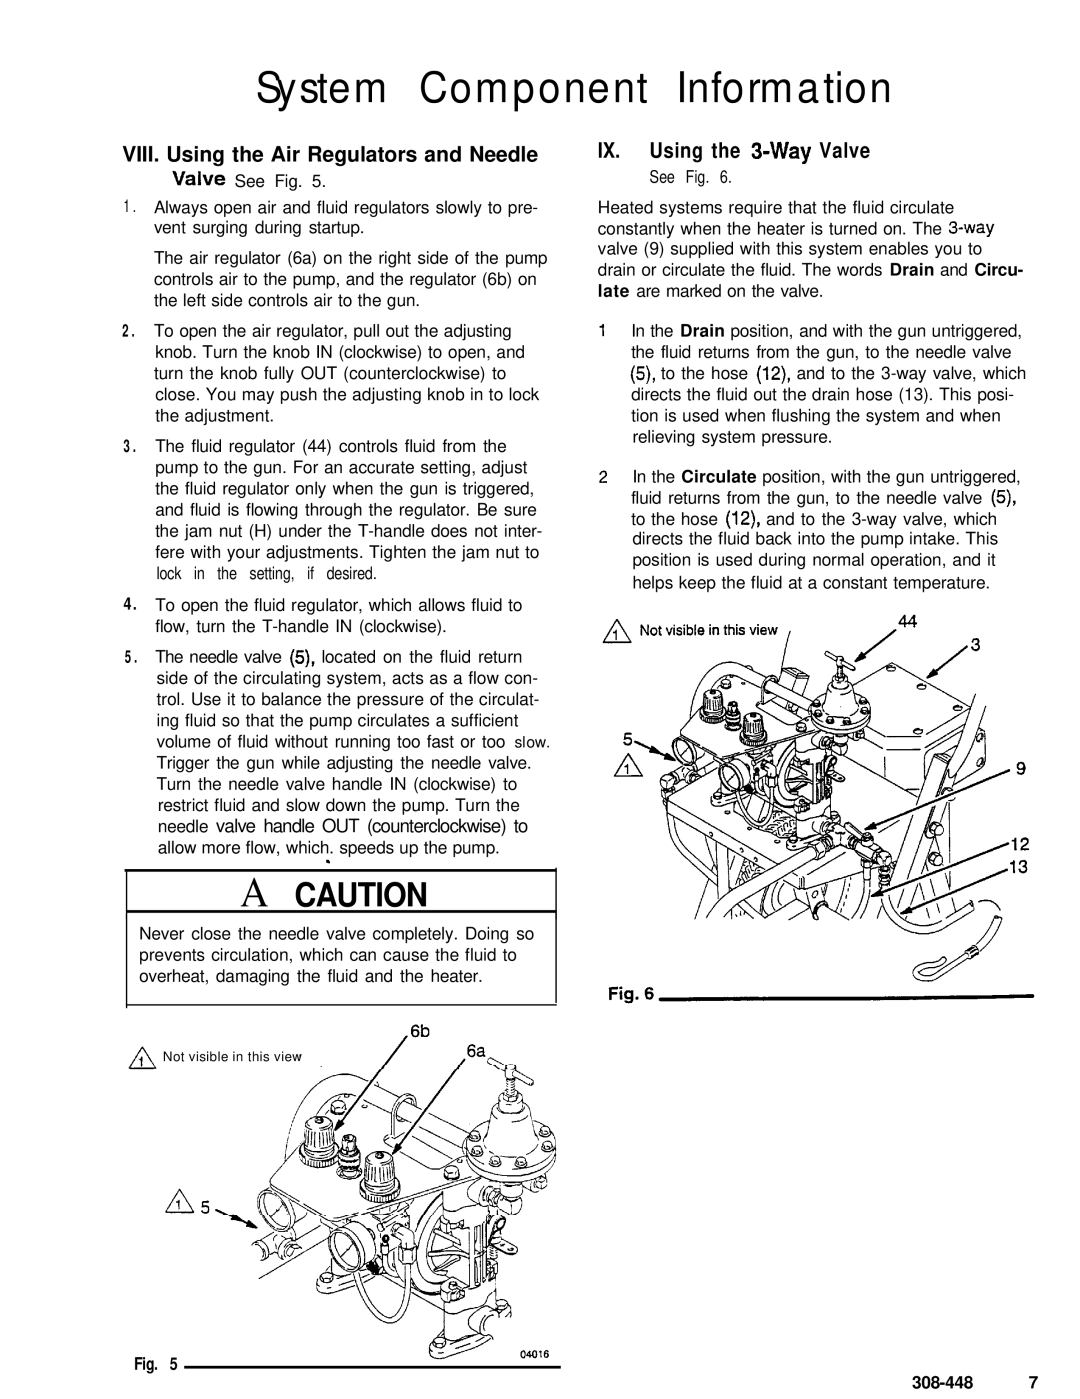
valve See Fig. 5.
1 . Always open air and fluid regulators slowly to pre- vent surging during startup.
The air regulator (6a) on the right side of the pump controls air to the pump, and the regulator (6b) on the left side controls air to the gun.
2 . To open the air regulator, pull out the adjusting knob. Turn the knob IN (clockwise) to open, and turn the knob fully OUT (counterclockwise) to close. You may push the adjusting knob in to lock the adjustment.
3 . The fluid regulator (44) controls fluid from the pump to the gun. For an accurate setting, adjust the fluid regulator only when the gun is triggered, and fluid is flowing through the regulator. Be sure the jam nut (H) under the
IX. Using the 3-Way Valve
See Fig. 6.
Heated systems require that the fluid circulate constantly when the heater is turned on. The
In the Drain position, and with the gun untriggered, the fluid returns from the gun, to the needle valve (5), to the hose (12), and to the
In the Circulate position, with the gun untriggered, fluid returns from the gun, to the needle valve (5), to the hose (12), and to the
4.
5.
To open the fluid regulator, which allows fluid to flow, turn the
The needle valve (5), located on the fluid return side of the circulating system, acts as a flow con- trol. Use it to balance the pressure of the circulat- ing fluid so that the pump circulates a sufficient volume of fluid without running too fast or too slow. Trigger the gun while adjusting the needle valve. Turn the needle valve handle IN (clockwise) to restrict fluid and slow down the pump. Turn the needle valve handle OUT (counterclockwise) to
allow more flow, which. speeds up the pump.
-
A CAUTION
Never close the needle valve completely. Doing so prevents circulation, which can cause the fluid to overheat, damaging the fluid and the heater.
.6b
A1 Not visible in this view
Fig. 5
