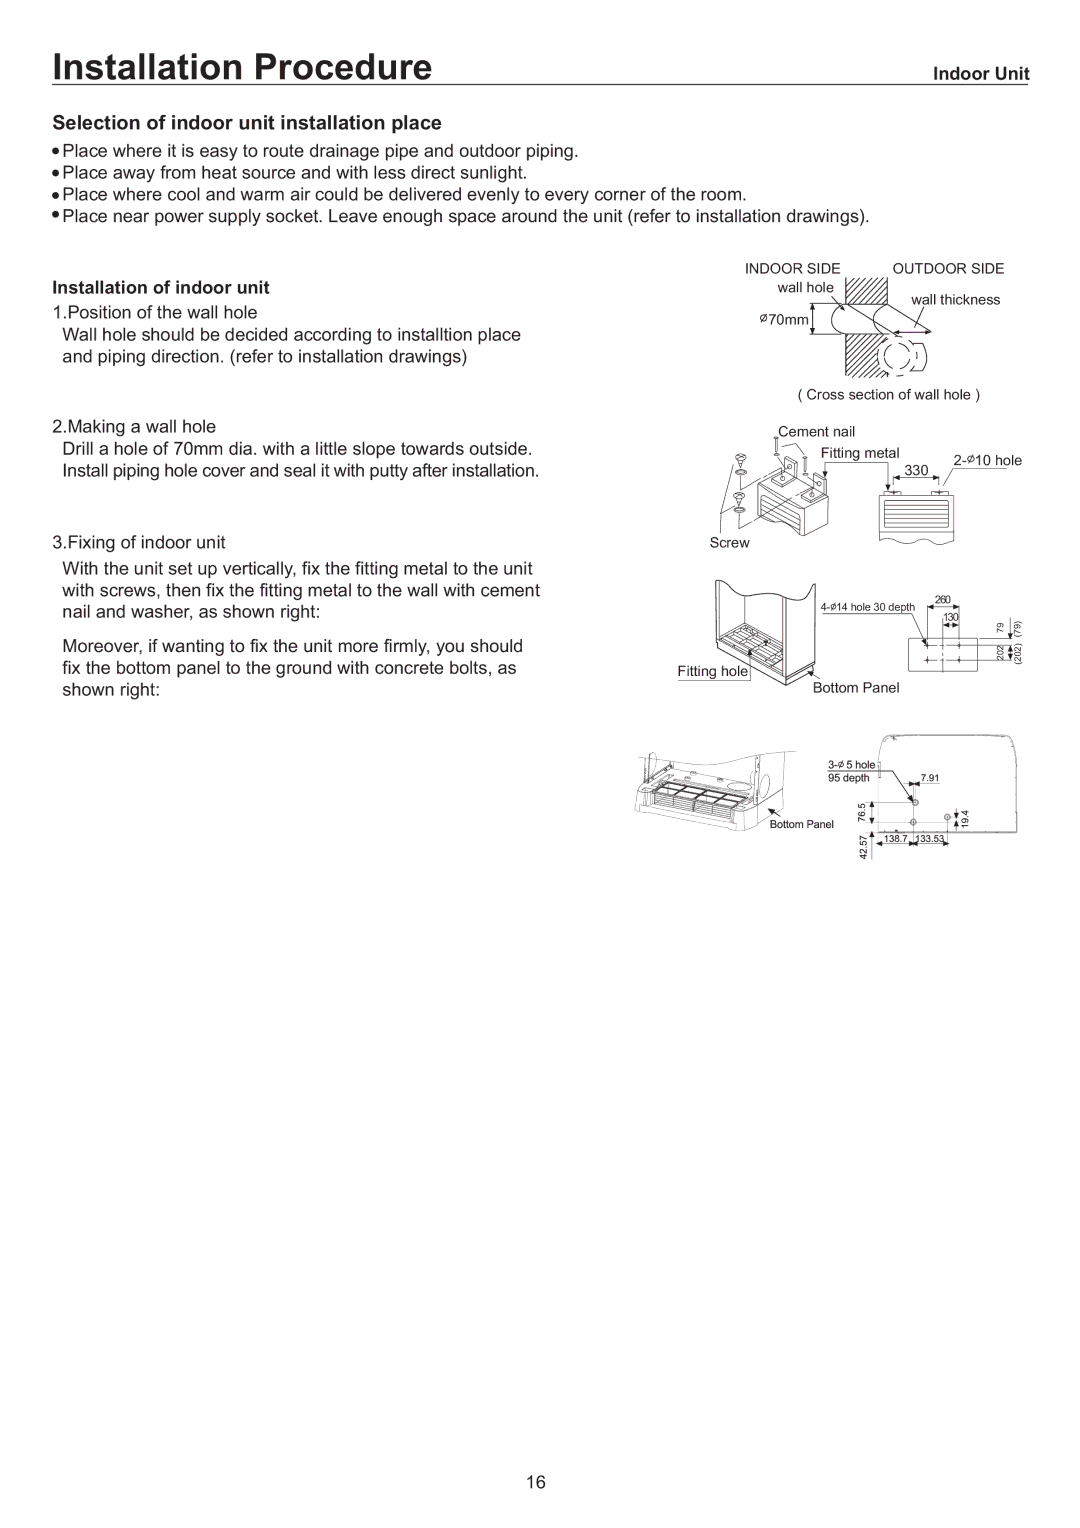
AP60KS1ERA, AP48DS1ERA, AP48KS1ERA specifications
The Haier AP48KS1ERA, AP48DS1ERA, and AP60KS1ERA are part of Haier's innovative range of air conditioning solutions aimed at delivering superior comfort, efficiency, and advanced features to enhance the indoor environment. These models are engineered with cutting-edge technologies to meet various climate control needs in homes and offices.The AP48KS1ERA is celebrated for its powerful cooling capacity, making it ideal for larger rooms or open spaces. This model employs an advanced inverter technology that adjusts the compressor speed according to the cooling demand, ensuring optimal temperature control while minimizing energy consumption. Additionally, the unit operates quietly, providing a peaceful atmosphere during operation.
The AP48DS1ERA offers dual functionality, providing both cooling and heating modes. This versatility makes it a suitable choice for varying climate conditions throughout the year. Its energy-efficient operation is backed by a high energy efficiency ratio (EER), which helps in reducing utility bills without compromising on performance. The inclusion of a smart control system allows users to adjust settings remotely, offering convenience and flexibility.
On the other hand, the AP60KS1ERA stands out with its higher cooling capacity, designed for larger spaces requiring rapid temperature control. Similar to the AP48KS1ERA, this model also integrates inverter technology for energy efficiency and consistent cooling performance. The sophisticated air purification system in the AP60KS1ERA ensures that circulating air is clean and free of allergens, making it an excellent choice for households with allergy sufferers.
All three models come equipped with user-friendly interfaces and programmable timers, enabling tailored operation according to individual preferences. The energy-saving modes are designed to automatically adjust settings when the room is unoccupied, enhancing energy efficiency while maintaining comfort. Furthermore, these air conditioning units feature eco-friendly refrigerants, which align with modern environmental standards.
Durability and ease of maintenance are also key characteristics of Haier air conditioners. Each unit boasts a robust build, ensuring longevity and reliable performance in diverse conditions. With easy access to filters and components, maintenance is straightforward, requiring minimal effort from users.
In summary, the Haier AP48KS1ERA, AP48DS1ERA, and AP60KS1ERA offer a blend of efficiency, performance, and comfort. These models embody Haier's commitment to providing high-quality climate control solutions, ensuring a pleasant indoor environment all year round.

