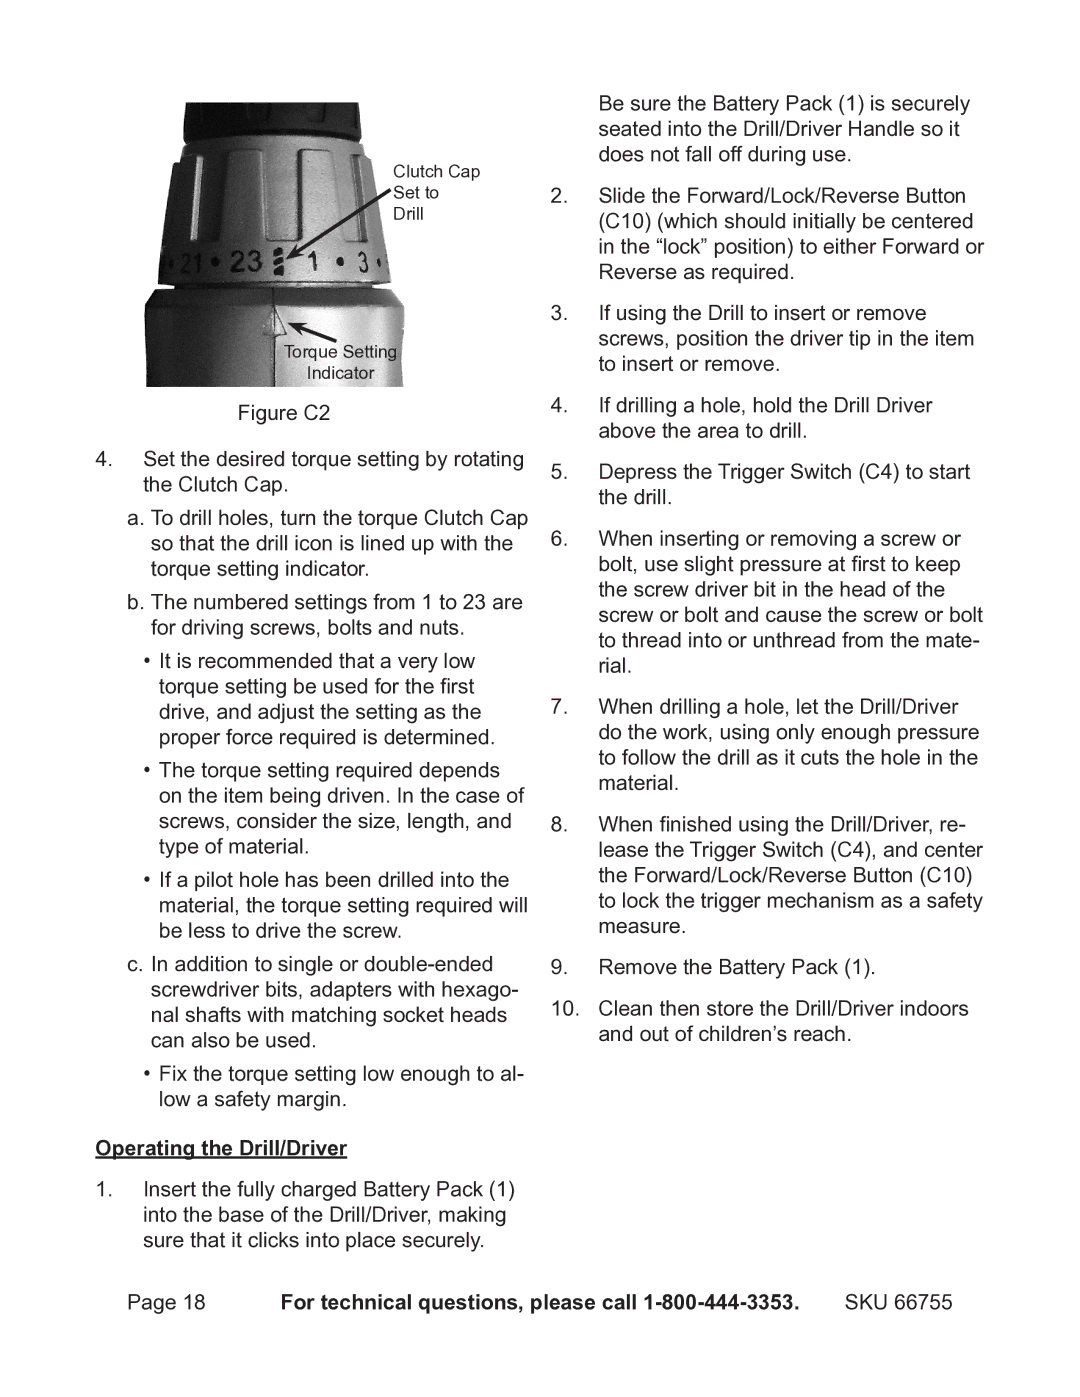
Clutch Cap
Set to
Drill
Torque Setting
Indicator
Figure C2
4.Set the desired torque setting by rotating the Clutch Cap.
a.To drill holes, turn the torque Clutch Cap so that the drill icon is lined up with the torque setting indicator.
b.The numbered settings from 1 to 23 are for driving screws, bolts and nuts.
•It is recommended that a very low torque setting be used for the first drive, and adjust the setting as the proper force required is determined.
•The torque setting required depends on the item being driven. In the case of screws, consider the size, length, and type of material.
•If a pilot hole has been drilled into the material, the torque setting required will be less to drive the screw.
c.In addition to single or double-ended screwdriver bits, adapters with hexago- nal shafts with matching socket heads can also be used.
•Fix the torque setting low enough to al- low a safety margin.
Operating the Drill/Driver
1.Insert the fully charged Battery Pack (1) into the base of the Drill/Driver, making sure that it clicks into place securely.
Be sure the Battery Pack (1) is securely seated into the Drill/Driver Handle so it does not fall off during use.
2.Slide the Forward/Lock/Reverse Button (C10) (which should initially be centered in the “lock” position) to either Forward or Reverse as required.
3.If using the Drill to insert or remove screws, position the driver tip in the item to insert or remove.
4.If drilling a hole, hold the Drill Driver above the area to drill.
5.Depress the Trigger Switch (C4) to start the drill.
6.When inserting or removing a screw or bolt, use slight pressure at first to keep the screw driver bit in the head of the screw or bolt and cause the screw or bolt to thread into or unthread from the mate- rial.
7.When drilling a hole, let the Drill/Driver do the work, using only enough pressure to follow the drill as it cuts the hole in the material.
8.When finished using the Drill/Driver, re- lease the Trigger Switch (C4), and center the Forward/Lock/Reverse Button (C10) to lock the trigger mechanism as a safety measure.
9.Remove the Battery Pack (1).
10.Clean then store the Drill/Driver indoors and out of children’s reach.
Page 18 | For technical questions, please call | SKU 66755 |