direction. You will have a clearer idea of the time involved to clean the area after doing a test run.
5.Clear the cleaning area of all objects that are not being cleaned. If any water prone or delicate items cannot be moved, protect them. If detergent is to be used, cover or remove any plants or animals that may be damaged by the detergent. Disconnect power to and protect any nearby electrical wiring from water and spray.
6.Place the Pressure Washer in a location which is protected from any water from the cleaning area. Select a location higher than the cleaning area. The pressure washer’s location should be close enough so that the hose will reach every portion of the job to be done with some slack for movement. Also, select an area with proper access to a dedicated circuit.
7.Route the power cord along a safe route to reach the work area without creating a tripping hazard or exposing the power cord to possible damage. The power cord must reach the work area with enough extra length to allow free movement while working.
Tool Set Up
To prevent serious injury from accidental operation:
Turn the Power Switch of the pressure washer off, unplug it from its electrical outlet, and relieve all pressure in a safe manner before making adjustments or installing accessories.
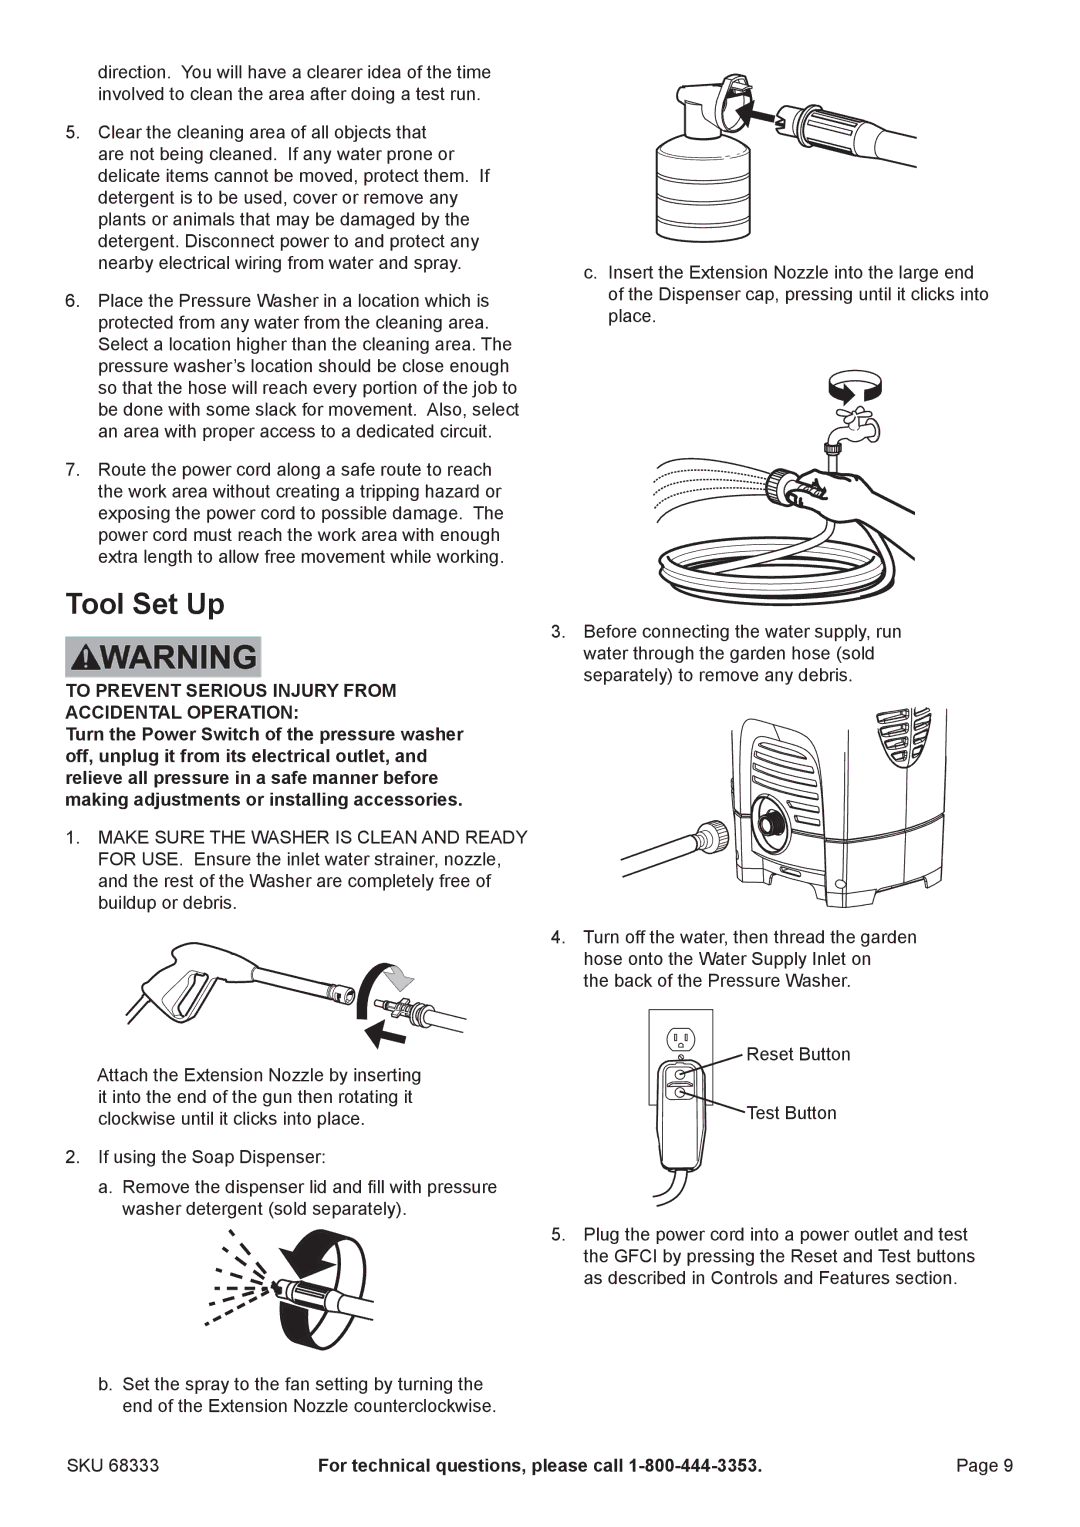
1.Make sure the washer is clean and ready for use. Ensure the inlet water strainer, nozzle, and the rest of the Washer are completely free of buildup or debris.
c.Insert the Extension Nozzle into the large end of the Dispenser cap, pressing until it clicks into place.
3.Before connecting the water supply, run water through the garden hose (sold separately) to remove any debris.
4.Turn off the water, then thread the garden hose onto the Water Supply Inlet on
the back of the Pressure Washer.
Attach the Extension Nozzle by inserting it into the end of the gun then rotating it clockwise until it clicks into place.
2.If using the Soap Dispenser:
a.Remove the dispenser lid and fill with pressure washer detergent (sold separately).
b.Set the spray to the fan setting by turning the end of the Extension Nozzle counterclockwise.
Reset Button
![]() Test Button
Test Button
5.Plug the power cord into a power outlet and test the GFCI by pressing the Reset and Test buttons as described in Controls and Features section.
SKU 68333 | For technical questions, please call | Page 9 |
