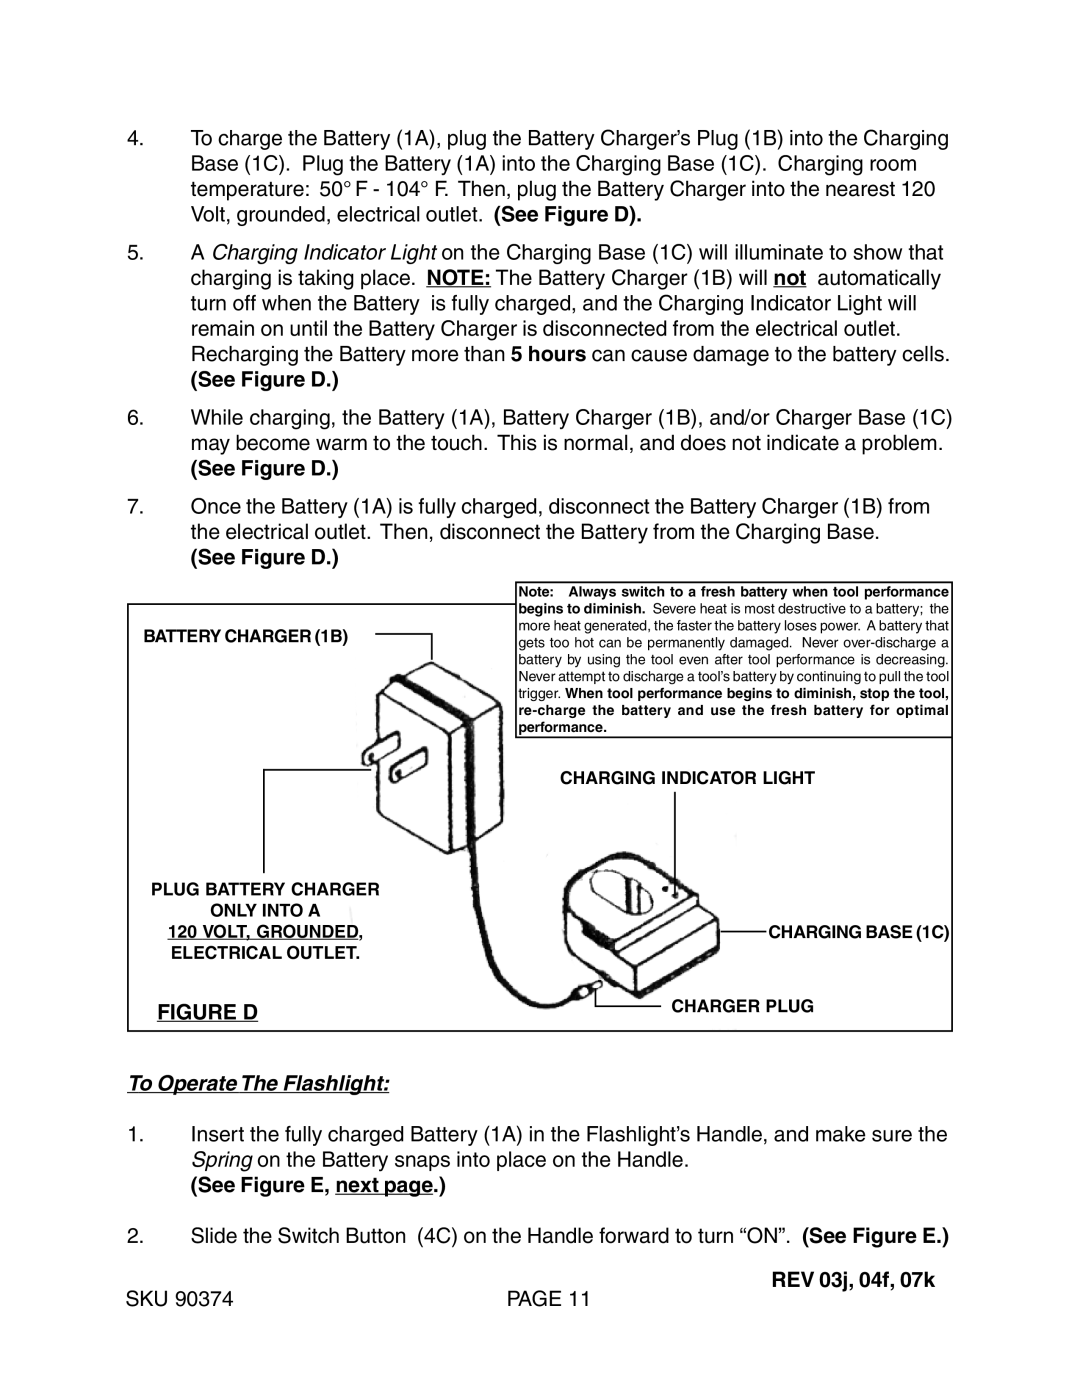
4.To charge the Battery (1A), plug the Battery Charger’s Plug (1B) into the Charging Base (1C). Plug the Battery (1A) into the Charging Base (1C). Charging room temperature: 50° F - 104° F. Then, plug the Battery Charger into the nearest 120 Volt, grounded, electrical outlet. (See Figure D).
5.A Charging Indicator Light on the Charging Base (1C) will illuminate to show that charging is taking place. NOTE: The Battery Charger (1B) will not automatically turn off when the Battery is fully charged, and the Charging Indicator Light will remain on until the Battery Charger is disconnected from the electrical outlet. Recharging the Battery more than 5 hours can cause damage to the battery cells.
(See Figure D.)
6.While charging, the Battery (1A), Battery Charger (1B), and/or Charger Base (1C) may become warm to the touch. This is normal, and does not indicate a problem.
(See Figure D.)
7.Once the Battery (1A) is fully charged, disconnect the Battery Charger (1B) from the electrical outlet. Then, disconnect the Battery from the Charging Base.
(See Figure D.)
BATTERY CHARGER (1B)
PLUG BATTERY CHARGER
ONLY INTO A
120 VOLT, GROUNDED,
ELECTRICAL OUTLET.
Note: Always switch to a fresh battery when tool performance begins to diminish. Severe heat is most destructive to a battery; the more heat generated, the faster the battery loses power. A battery that gets too hot can be permanently damaged. Never
CHARGING INDICATOR LIGHT
CHARGING BASE (1C)
FIGURE D
CHARGER PLUG
To Operate The Flashlight:
1.Insert the fully charged Battery (1A) in the Flashlight’s Handle, and make sure the Spring on the Battery snaps into place on the Handle.
(See Figure E, next page.)
2.Slide the Switch Button (4C) on the Handle forward to turn “ON”. (See Figure E.)
REV 03j, 04f, 07k
SKU 90374 | PAGE 11 |
