To Operate The Drill:
1.![]()
![]() WARNING! Always make sure the Trigger (3F) of the Cordless Drill is in its “OFF” position, the Battery (1A) is removed from the Drill, and the Battery Charger (1B) is unplugged from its electrical outlet prior to making any adjustments to the tool. (See Figure H.)
WARNING! Always make sure the Trigger (3F) of the Cordless Drill is in its “OFF” position, the Battery (1A) is removed from the Drill, and the Battery Charger (1B) is unplugged from its electrical outlet prior to making any adjustments to the tool. (See Figure H.)
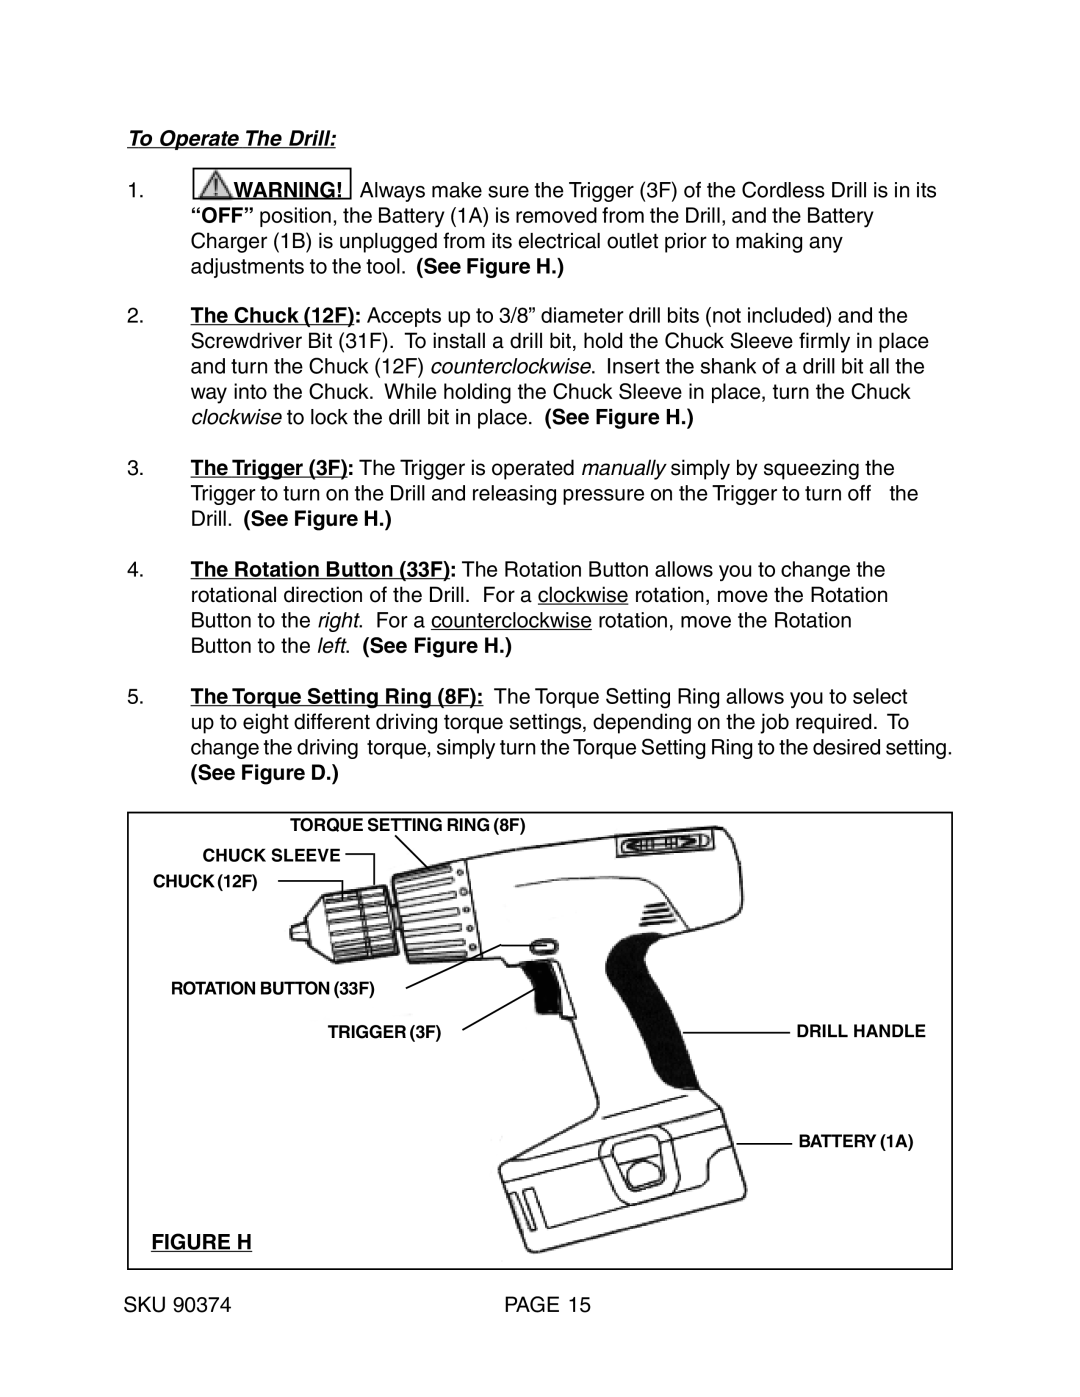
2.The Chuck (12F): Accepts up to 3/8” diameter drill bits (not included) and the Screwdriver Bit (31F). To install a drill bit, hold the Chuck Sleeve firmly in place and turn the Chuck (12F) counterclockwise. Insert the shank of a drill bit all the way into the Chuck. While holding the Chuck Sleeve in place, turn the Chuck clockwise to lock the drill bit in place. (See Figure H.)
3.The Trigger (3F): The Trigger is operated manually simply by squeezing the
Trigger to turn on the Drill and releasing pressure on the Trigger to turn off the Drill. (See Figure H.)
4.The Rotation Button (33F): The Rotation Button allows you to change the rotational direction of the Drill. For a clockwise rotation, move the Rotation Button to the right. For a counterclockwise rotation, move the Rotation Button to the left. (See Figure H.)
5.The Torque Setting Ring (8F): The Torque Setting Ring allows you to select up to eight different driving torque settings, depending on the job required. To change the driving torque, simply turn the Torque Setting Ring to the desired setting.
(See Figure D.)
TORQUE SETTING RING (8F)
CHUCK SLEEVE
CHUCK (12F)
ROTATION BUTTON (33F)
TRIGGER (3F) |
| DRILL HANDLE |
|
BATTERY (1A)
FIGURE H
SKU 90374 | PAGE 15 |
