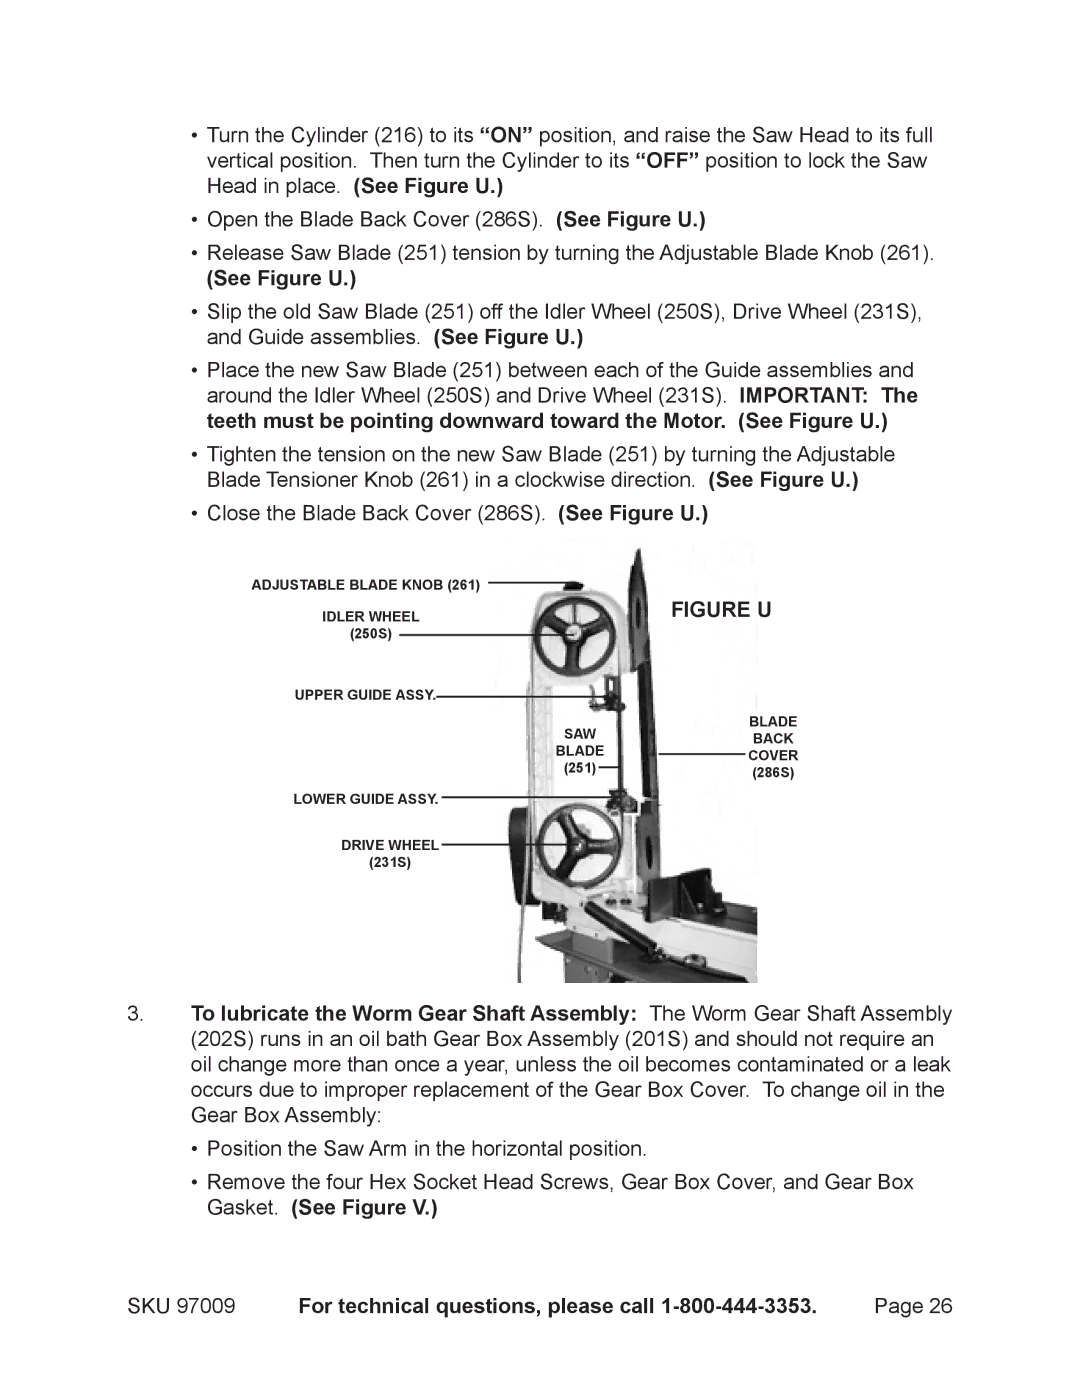
•Turn the Cylinder (216) to its “ON” position, and raise the Saw Head to its full vertical position. Then turn the Cylinder to its “OFF” position to lock the Saw Head in place. (See Figure U.)
•Open the Blade Back Cover (286S). (See Figure U.)
•Release Saw Blade (251) tension by turning the Adjustable Blade Knob (261).
(See Figure U.)
•Slip the old Saw Blade (251) off the Idler Wheel (250S), Drive Wheel (231S), and Guide assemblies. (See Figure U.)
•Place the new Saw Blade (251) between each of the Guide assemblies and around the Idler Wheel (250S) and Drive Wheel (231S). IMPORTANT: The teeth must be pointing downward toward the Motor. (See Figure U.)
•Tighten the tension on the new Saw Blade (251) by turning the Adjustable Blade Tensioner Knob (261) in a clockwise direction. (See Figure U.)
•Close the Blade Back Cover (286S). (See Figure U.)
ADJUSTABLE BLADE KNOB (261) |
|
|
|
|
|
|
| FIGURE U | ||||
|
|
|
| |||||||||
IDLER WHEEL |
|
| ||||||||||
(250S) |
|
|
|
|
|
|
|
|
|
| ||
|
|
|
|
|
|
| ||||||
UPPER GUIDE ASSY. |
|
|
|
|
|
|
| BLADE | ||||
|
|
|
|
|
|
| ||||||
|
|
|
| SAW |
|
|
| |||||
|
|
|
|
|
|
| BACK | |||||
|
|
|
| BLADE |
|
|
| COVER | ||||
|
|
|
|
|
|
| ||||||
(251) |
|
|
|
| (286S) | |||||||
|
| |||||||||||
LOWER GUIDE ASSY. |
|
|
|
|
|
|
| |||||
|
|
|
|
|
|
| ||||||
DRIVE WHEEL |
|
|
|
|
|
|
| |||||
|
|
|
|
| ||||||||
(231S) |
|
|
|
| ||||||||
3.To lubricate the Worm Gear Shaft Assembly: The Worm Gear Shaft Assembly
(202S) runs in an oil bath Gear Box Assembly (201S) and should not require an oil change more than once a year, unless the oil becomes contaminated or a leak occurs due to improper replacement of the Gear Box Cover. To change oil in the Gear Box Assembly:
•Position the Saw Arm in the horizontal position.
•Remove the four Hex Socket Head Screws, Gear Box Cover, and Gear Box Gasket. (See Figure V.)
SKU 97009 | For technical questions, please call | Page 26 |