AVR 1650/AVR 165
Front-Panel Controls, continued
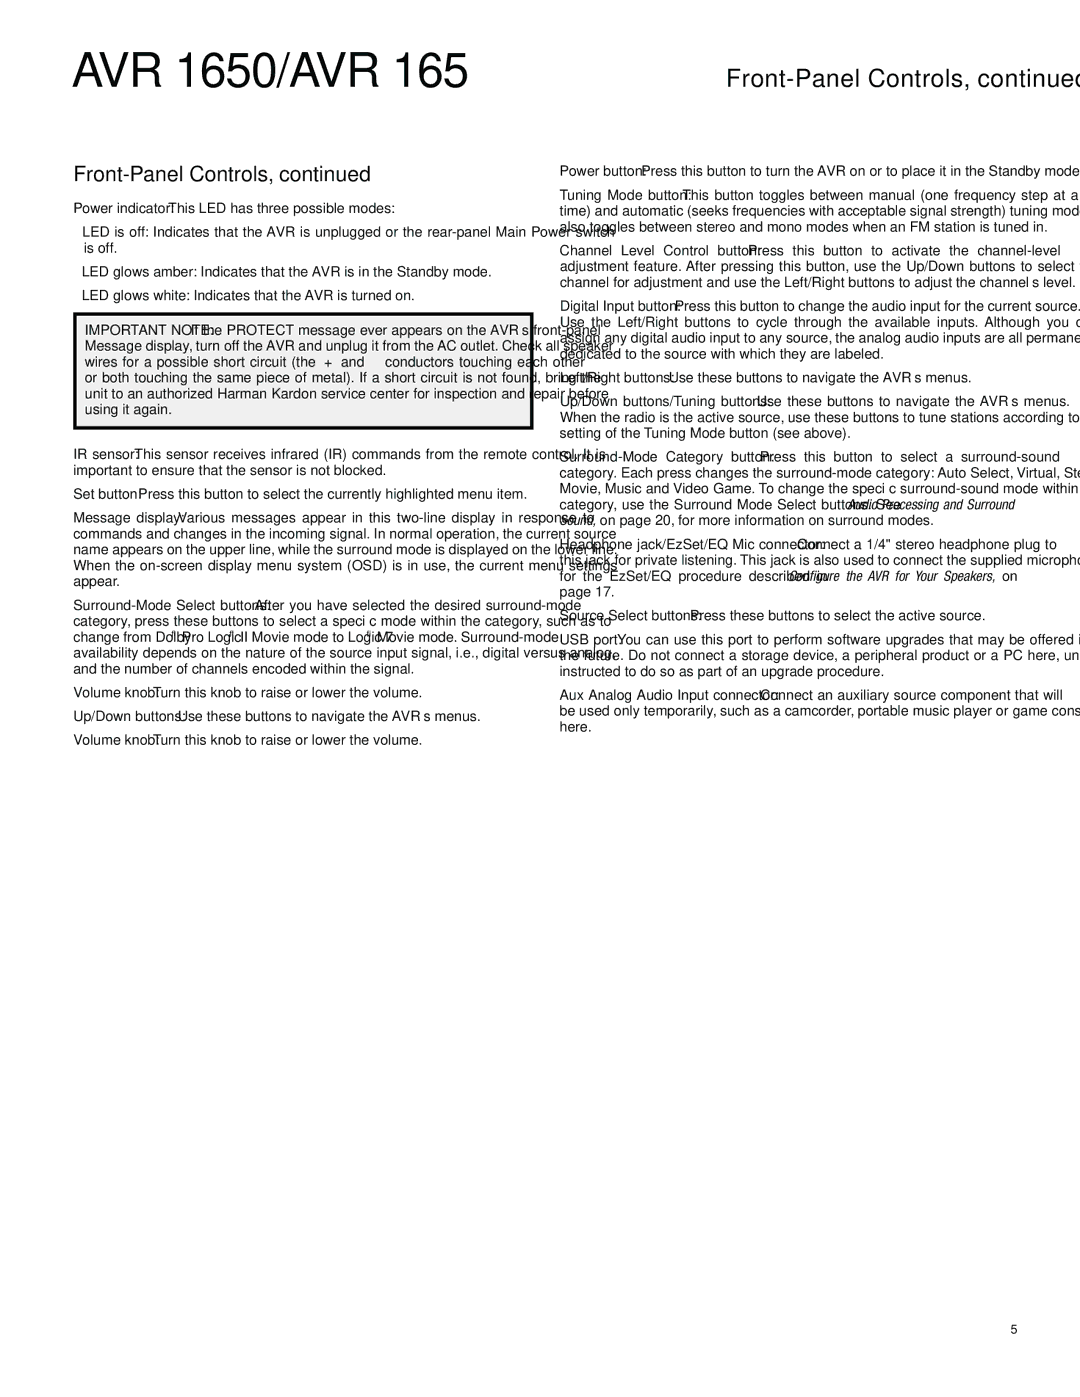
Front-Panel Controls, continued
Power indicator: This LED has three possible modes:
•LED is off: Indicates that the AVR is unplugged or the
•LED glows amber: Indicates that the AVR is in the Standby mode.
•LED glows white: Indicates that the AVR is turned on.
IMPORTANT NOTE: If the PROTECT message ever appears on the AVR’s
IR sensor: This sensor receives infrared (IR) commands from the remote control. It is important to ensure that the sensor is not blocked.
Set button: Press this button to select the currently highlighted menu item.
Message display: Various messages appear in this
Volume knob: Turn this knob to raise or lower the volume.
Up/Down buttons: Use these buttons to navigate the AVR’s menus.
Volume knob: Turn this knob to raise or lower the volume.
Power button: Press this button to turn the AVR on or to place it in the Standby mode.
Tuning Mode button: This button toggles between manual (one frequency step at a time) and automatic (seeks frequencies with acceptable signal strength) tuning mode. It also toggles between stereo and mono modes when an FM station is tuned in.
Channel Level Control button: Press this button to activate the
Digital Input button: Press this button to change the audio input for the current source. Use the Left/Right buttons to cycle through the available inputs. Although you can assign any digital audio input to any source, the analog audio inputs are all permanently dedicated to the source with which they are labeled.
Left/Right buttons: Use these buttons to navigate the AVR’s menus.
Up/Down buttons/Tuning buttons: Use these buttons to navigate the AVR’s menus. When the radio is the active source, use these buttons to tune stations according to the setting of the Tuning Mode button (see above).
category. Each press changes the
Headphone jack/EzSet/EQ Mic connector: Connect a 1/4" stereo headphone plug to this jack for private listening. This jack is also used to connect the supplied microphone for the EzSet/EQ procedure described in Configure the AVR for Your Speakers, on page 17.
Source Select buttons: Press these buttons to select the active source.
USB port: You can use this port to perform software upgrades that may be offered in the future. Do not connect a storage device, a peripheral product or a PC here, unless instructed to do so as part of an upgrade procedure.
Aux Analog Audio Input connector: Connect an auxiliary source component that will be used only temporarily, such as a camcorder, portable music player or game console, here.
5