Multiroom Operation
The AVR500 is fully equipped to operate
as the control center for a sophisticated multi- room operation with optional remote external InfraRed (IR) sensors, speakers and power amplifiers. Although some multi- room installa- tions will require the services of a specially trained installer, it is possible for the average
Installation
The key to remote room operation is to link the remote room to the AVR500’s location with wire for an infrared receiver and speakers or an amplifier. For complete installation instructions for Multiroom use, see page 14.
Multiroom Setup
Once the audio and IR link connections have been made, the AVR500 needs to be configured for multiroom operation using the steps below. When making these selections, you may use the
To activate the Semi-OSD, press the OSD button
sonce. To activate the
Once you have determined which, if any, OSD system to use, setup and operation of the multi- room system is simple.
1.Press the Multi button `to initiate the multiroom system. If the
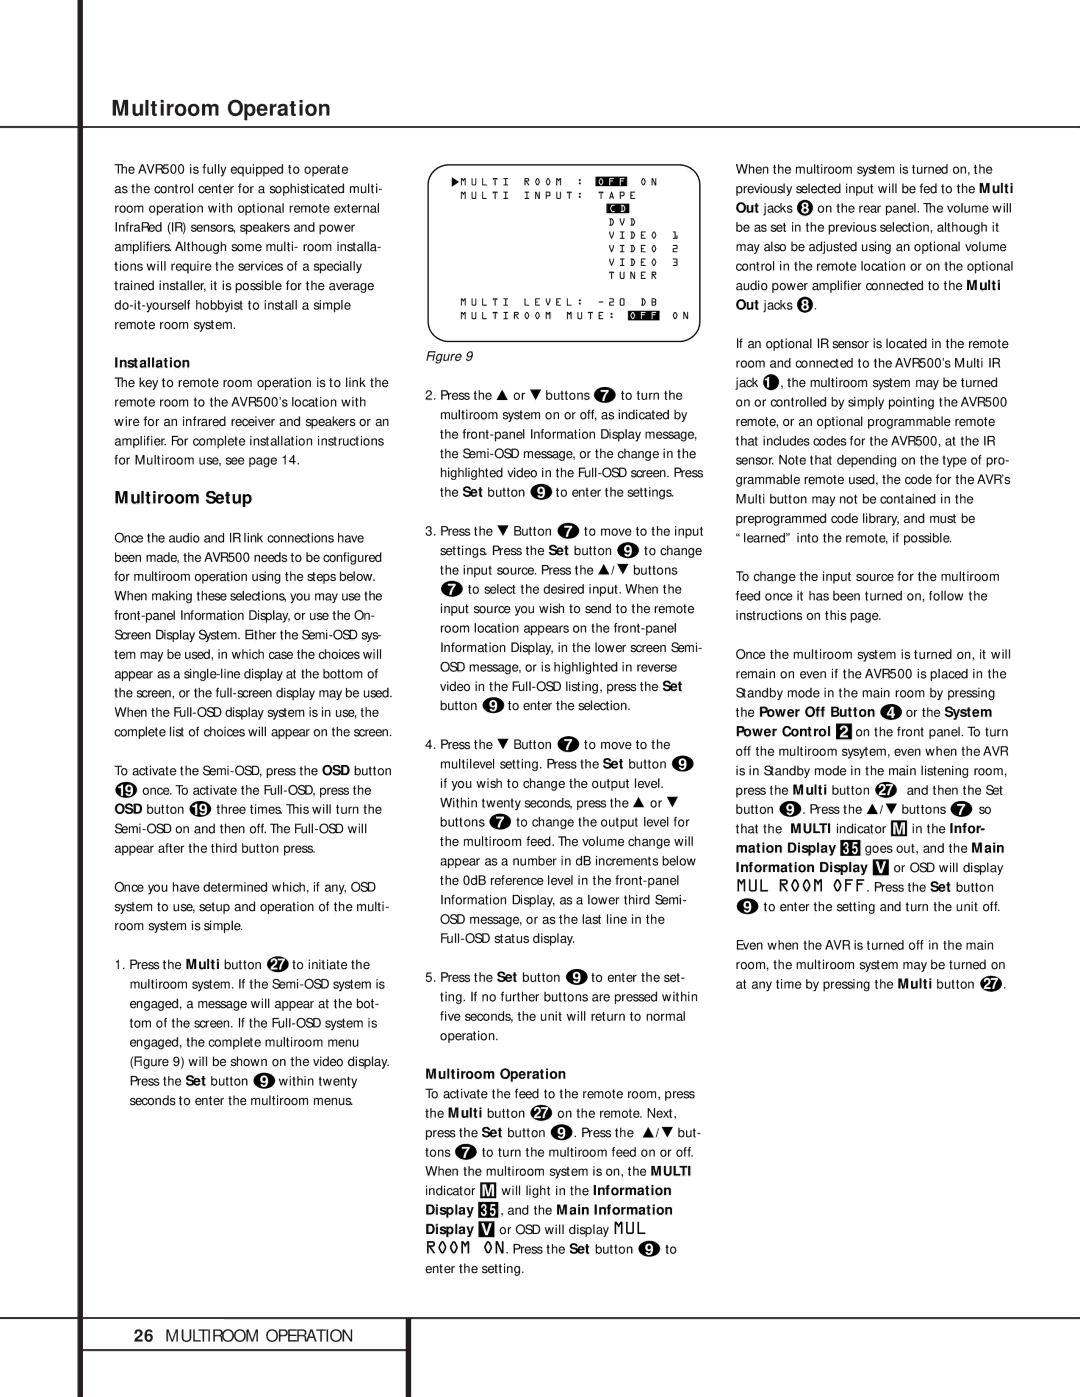
M U L T I R O O M : | O F F | O N |
| ||
M U L T I I N P U T : T A P E |
| ||||
|
|
|
|
| |
|
| C D |
|
| |
|
| D V D |
| ||
|
| V I D E O | 1 | ||
|
| V I D E O | 2 | ||
|
| V I D E O | 3 | ||
|
| T U N E R |
| ||
M U L T I L E V E L : Ð 2 0 D B |
| ||||
|
| ||||
M U L T I R O O M M U T E : | O F F | O N | |||
Figure 9
2.Press the Ú or Û buttons gto turn the multiroom system on or off, as indicated by the
3.Press the Û Button g to move to the input settings. Press the Set button i to change the input source. Press the Ú/ Û buttons g to select the desired input. When the input source you wish to send to the remote room location appears on the
4.Press the Û Button g to move to the multilevel setting. Press the Set button i if you wish to change the output level. Within twenty seconds, press the Ú or Û buttons g to change the output level for the multiroom feed. The volume change will appear as a number in dB increments below the 0dB reference level in the
5.Press the Set button ito enter the set- ting. If no further buttons are pressed within five seconds, the unit will return to normal operation.
Multiroom Operation
To activate the feed to the remote room, press the Multi button ` on the remote. Next, press the Set button i. Press the Ú/ Û but- tons g to turn the multiroom feed on or off. When the multiroom system is on, the MULTI indicator M will light in the Information Display 35, and the Main Information Display V or OSD will display MUL ROOM ON. Press the Set button i to enter the setting.
When the multiroom system is turned on, the previously selected input will be fed to the Multi Out jacks ¥ on the rear panel. The volume will be as set in the previous selection, although it may also be adjusted using an optional volume control in the remote location or on the optional audio power amplifier connected to the Multi Out jacks ¥.
If an optional IR sensor is located in the remote room and connected to the AVR500’s Multi IR jack Û, the multiroom system may be turned on or controlled by simply pointing the AVR500 remote, or an optional programmable remote that includes codes for the AVR500, at the IR sensor. Note that depending on the type of pro- grammable remote used, the code for the AVR’s Multi button may not be contained in the preprogrammed code library, and must be “learned” into the remote, if possible.
To change the input source for the multiroom feed once it has been turned on, follow the instructions on this page.
Once the multiroom system is turned on, it will remain on even if the AVR500 is placed in the Standby mode in the main room by pressing the Power Off Button dor the System Power Control 2on the front panel. To turn off the multiroom sysytem, even when the AVR is in Standby mode in the main listening room, press the Multi button ` and then the Set button i. Press the Ú/ Û buttons g so that the MULTI indicator M in the Infor- mation Display 35goes out, and the Main Information Display V or OSD will display MUL ROOM OFF. Press the Set button
ito enter the setting and turn the unit off.
Even when the AVR is turned off in the main room, the multiroom system may be turned on at any time by pressing the Multi button `.
26MULTIROOM OPERATION