SYSTEM SETUP
from Off to On. See below for more information on using the Video Adjustments banner to optimize your picture settings.
HDMI Settings: This setting displays the characteris- tics of the video output signal at the HDMI Output
. When the DVD 47 is connected to a video dis-
play using the HDMI Output , the display sends information to the DVD 47 that indicates the highest video resolution it is capable of handling, and the DVD 47 automatically sets the video output to match it. That resolution is displayed here. You may use this setting to manually select a lower video output resolution. Changes made here remain active until the DVD 47 or the display is turned off. When either is turned off, and then on again, the DVD 47 will revert to the default setting transmitted by the display. Make sure your video display or other video switching equip- ment (such as an
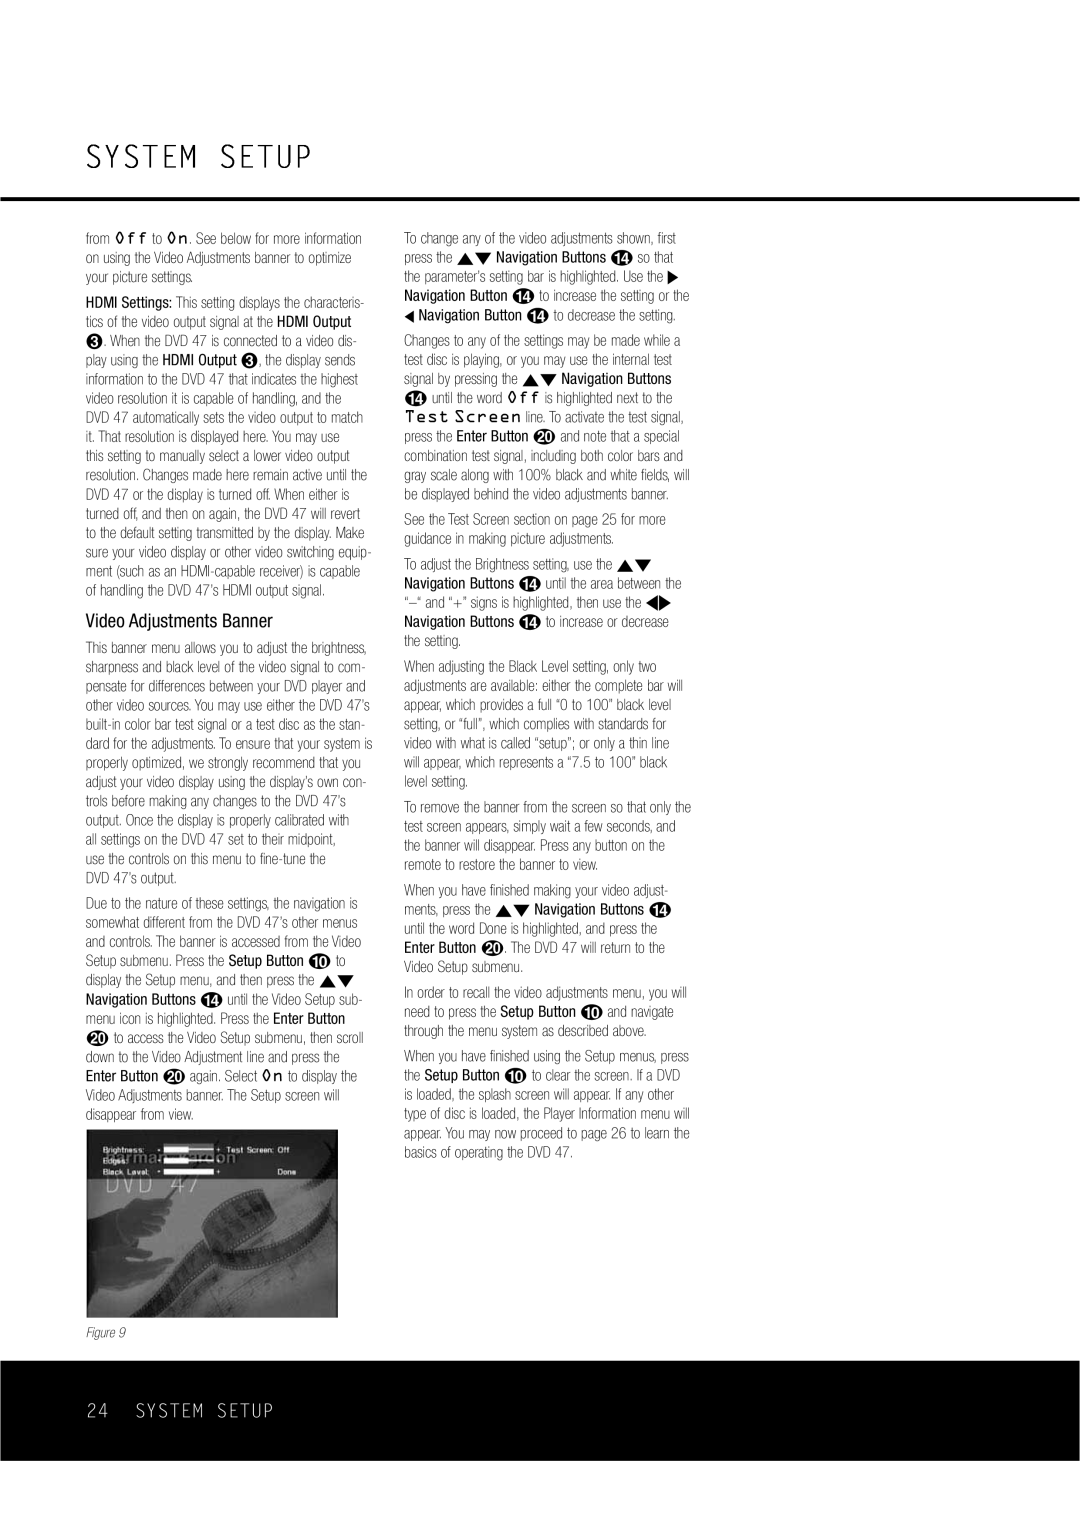
Video Adjustments Banner
This banner menu allows you to adjust the brightness, sharpness and black level of the video signal to com- pensate for differences between your DVD player and other video sources. You may use either the DVD 47’s
all settings on the DVD 47 set to their midpoint, use the controls on this menu to
Due to the nature of these settings, the navigation is somewhat different from the DVD 47’s other menus and controls. The banner is accessed from the Video Setup submenu. Press the Setup Button j to display the Setup menu, and then press the ⁄¤ Navigation Buttons n until the Video Setup sub- menu icon is highlighted. Press the Enter Button t to access the Video Setup submenu, then scroll down to the Video Adjustment line and press the Enter Button t again. Select On to display the Video Adjustments banner. The Setup screen will disappear from view.
To change any of the video adjustments shown, first press the ⁄¤ Navigation Buttons n so that the parameter’s setting bar is highlighted. Use the › Navigation Button n to increase the setting or the
‹Navigation Button n to decrease the setting.
Changes to any of the settings may be made while a test disc is playing, or you may use the internal test signal by pressing the ⁄¤ Navigation Buttons n until the word Off is highlighted next to the Test Screen line. To activate the test signal, press the Enter Button t and note that a special combination test signal, including both color bars and gray scale along with 100% black and white fields, will be displayed behind the video adjustments banner.
See the Test Screen section on page 25 for more guidance in making picture adjustments.
To adjust the Brightness setting, use the ⁄¤ Navigation Buttons n until the area between the
When adjusting the Black Level setting, only two adjustments are available: either the complete bar will appear, which provides a full “0 to 100” black level setting, or “full”, which complies with standards for video with what is called “setup”; or only a thin line will appear, which represents a “7.5 to 100” black level setting.
To remove the banner from the screen so that only the test screen appears, simply wait a few seconds, and the banner will disappear. Press any button on the remote to restore the banner to view.
When you have finished making your video adjust- ments, press the ⁄¤ Navigation Buttons n until the word Done is highlighted, and press the Enter Button t. The DVD 47 will return to the Video Setup submenu.
In order to recall the video adjustments menu, you will need to press the Setup Button j and navigate through the menu system as described above.
When you have finished using the Setup menus, press the Setup Button j to clear the screen. If a DVD is loaded, the splash screen will appear. If any other type of disc is loaded, the Player Information menu will appear. You may now proceed to page 26 to learn the basics of operating the DVD 47.
Figure 9