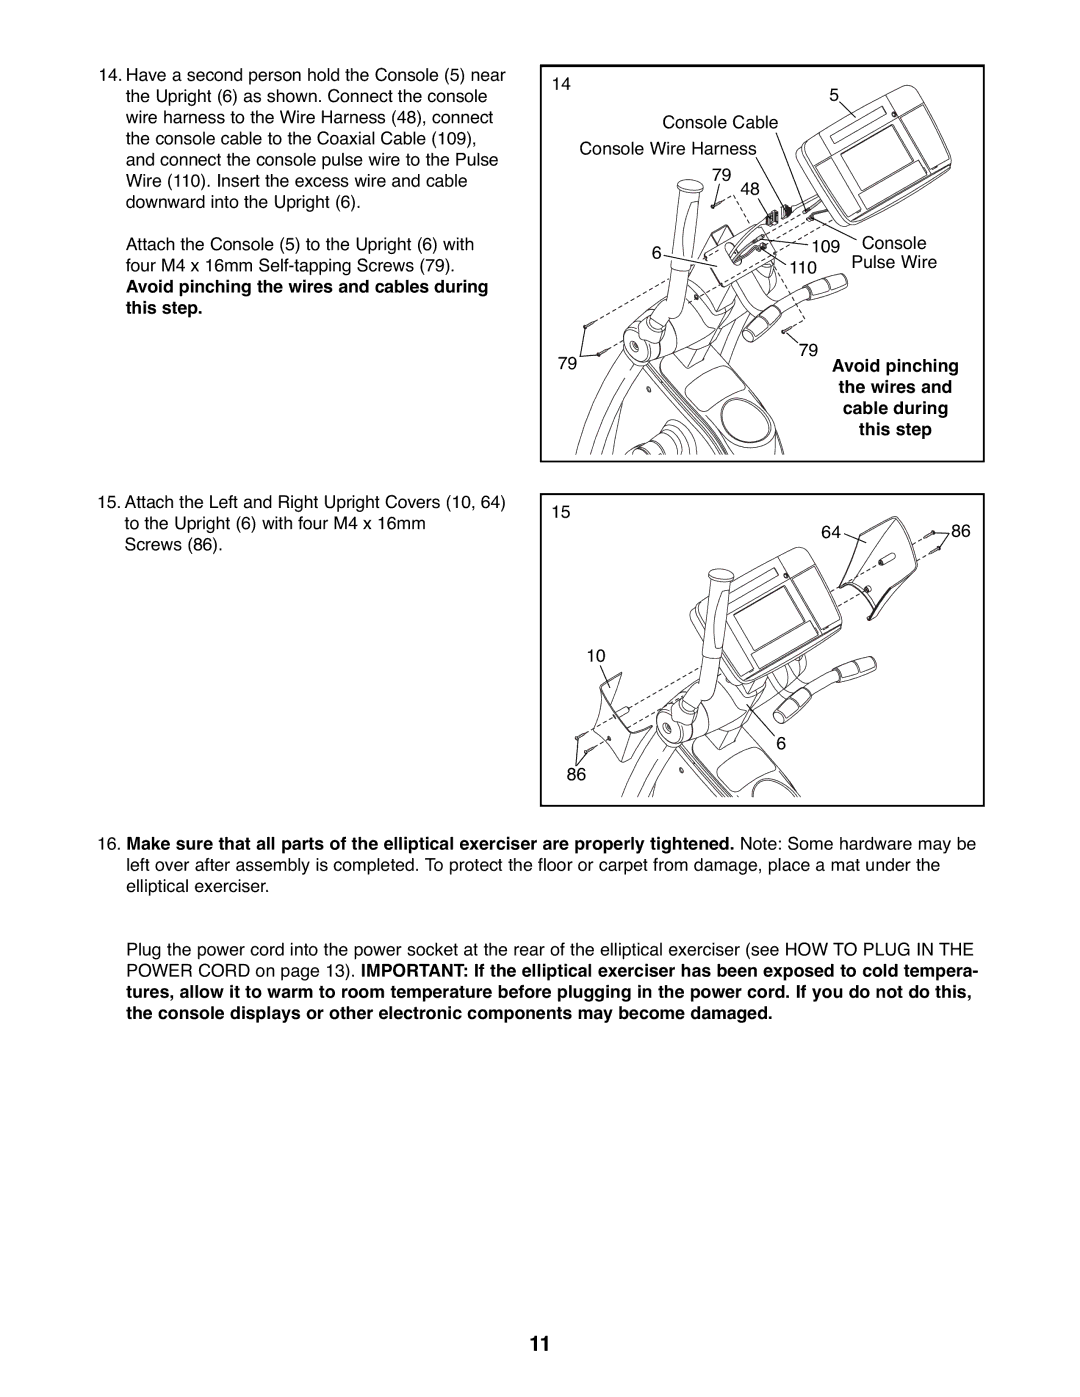
14.Have a second person hold the Console (5) near the Upright (6) as shown. Connect the console wire harness to the Wire Harness (48), connect the console cable to the Coaxial Cable (109), and connect the console pulse wire to the Pulse Wire (110). Insert the excess wire and cable downward into the Upright (6).
Attach the Console (5) to the Upright (6) with four M4 x 16mm
Avoid pinching the wires and cables during this step.
14 |
| 5 |
|
|
|
| |
| Console Cable |
|
|
| Console Wire Harness |
|
|
| 79 |
|
|
| 48 |
|
|
| 6 | 109 | Console |
| 110 | Pulse Wire | |
|
| ||
|
|
| |
79 |
| 79 |
|
| Avoid pinching | ||
|
| the wires and | |
|
|
| cable during |
|
|
| this step |
15.Attach the Left and Right Upright Covers (10, 64) to the Upright (6) with four M4 x 16mm Screws (86).
15 | 86 |
64 | |
10 |
|
6 |
|
86 |
|
16.Make sure that all parts of the elliptical exerciser are properly tightened. Note: Some hardware may be left over after assembly is completed. To protect the floor or carpet from damage, place a mat under the elliptical exerciser.
Plug the power cord into the power socket at the rear of the elliptical exerciser (see HOW TO PLUG IN THE POWER CORD on page 13). IMPORTANT: If the elliptical exerciser has been exposed to cold tempera- tures, allow it to warm to room temperature before plugging in the power cord. If you do not do this, the console displays or other electronic components may become damaged.
11