Flex Liner
 Flex Coupler
Sheet Metal Screws
Figure 5.26
Step 8.
Secure the top adapter to the flashing. Use three sheet metal screws through the side of the top adapter into the flange on the flashing (Figure 5.27). Twist lock the high wind termination cap on to the top adapter.
High Wind
Termination Cap
Top Adaptor
![]() (3) Sheet Metal Screws
(3) Sheet Metal Screws
Flashing
Figure 5.27
Step 9.
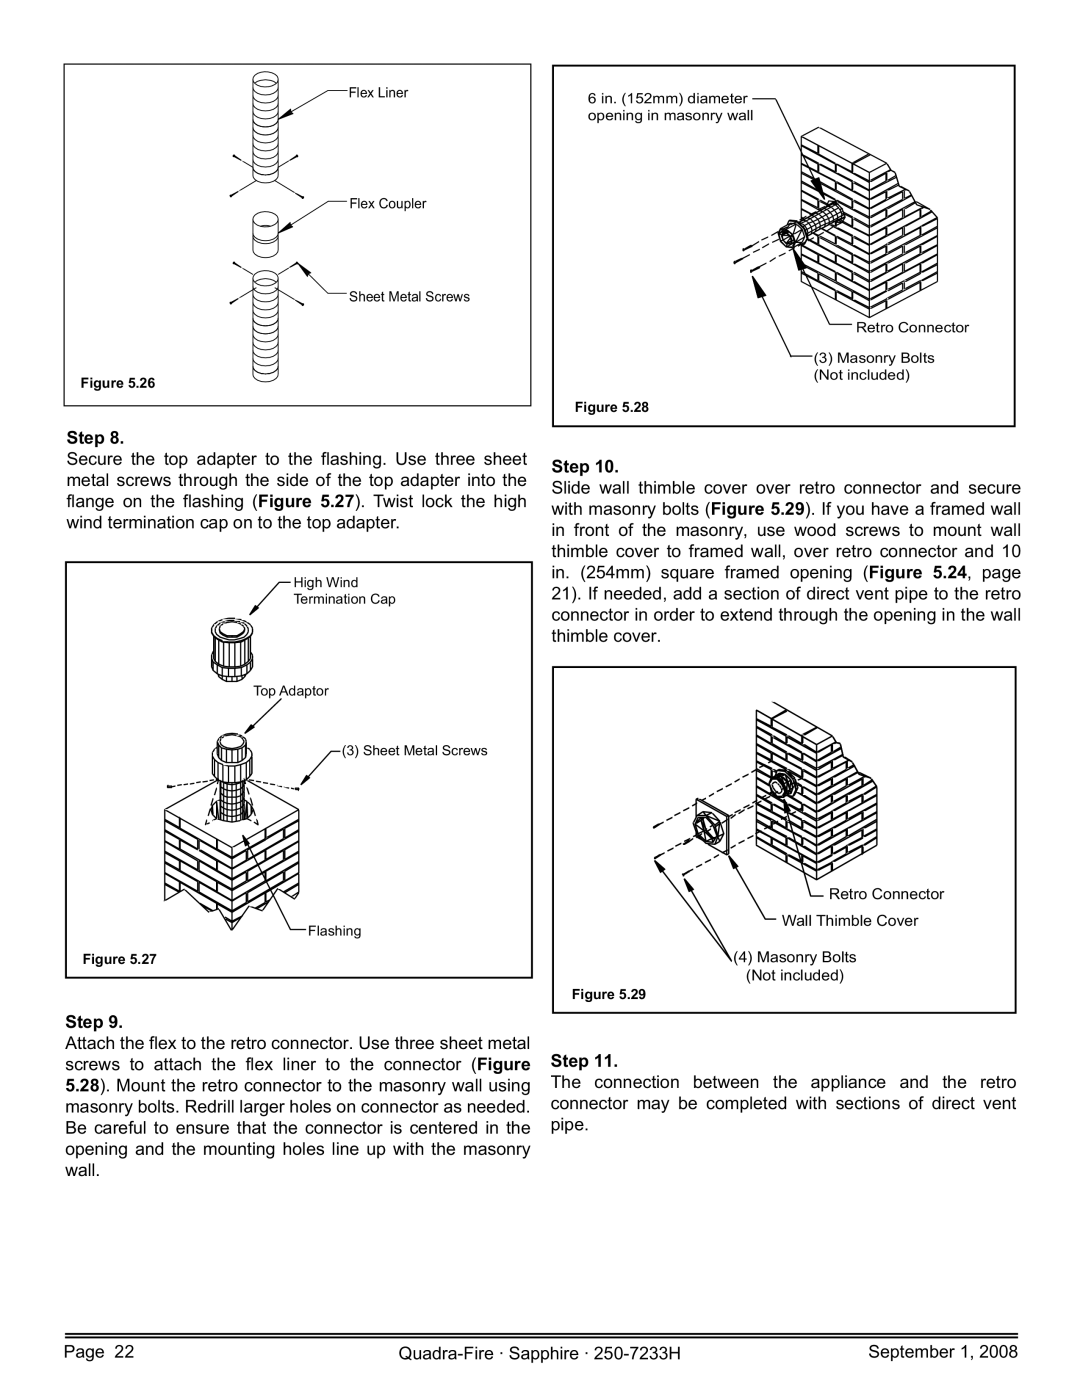
Attach the flex to the retro connector. Use three sheet metal screws to attach the flex liner to the connector (Figure 5.28). Mount the retro connector to the masonry wall using masonry bolts. Redrill larger holes on connector as needed. Be careful to ensure that the connector is centered in the opening and the mounting holes line up with the masonry wall.
6 in. (152mm) diameter opening in masonry wall
Retro Connector
(3) Masonry Bolts (Not included)
Figure 5.28
Step 10.
Slide wall thimble cover over retro connector and secure with masonry bolts (Figure 5.29). If you have a framed wall in front of the masonry, use wood screws to mount wall thimble cover to framed wall, over retro connector and 10 in. (254mm) square framed opening (Figure 5.24, page 21). If needed, add a section of direct vent pipe to the retro connector in order to extend through the opening in the wall thimble cover.
Retro Connector
Wall Thimble Cover
(4)Masonry Bolts (Not included)
Figure 5.29
Step 11.
The connection between the appliance and the retro connector may be completed with sections of direct vent pipe.
Page 22 | September 1, 2008 |