36DV specifications
The Heat & Glo LifeStyle 36DV is a state-of-the-art gas fireplace designed for modern living spaces. This model stands out for its seamless blend of aesthetics, performance, and efficiency. With its sleek design and innovative technologies, the LifeStyle 36DV redefines how people experience warmth and ambiance in their homes.One of the standout features of the LifeStyle 36DV is its powerful heating capability. This direct vent gas fireplace efficiently circulates warm air throughout the room while maintaining optimal energy usage. With an impressive heating output, it can effectively warm spaces of varying sizes, making it suitable for both large living areas and cozy nooks.
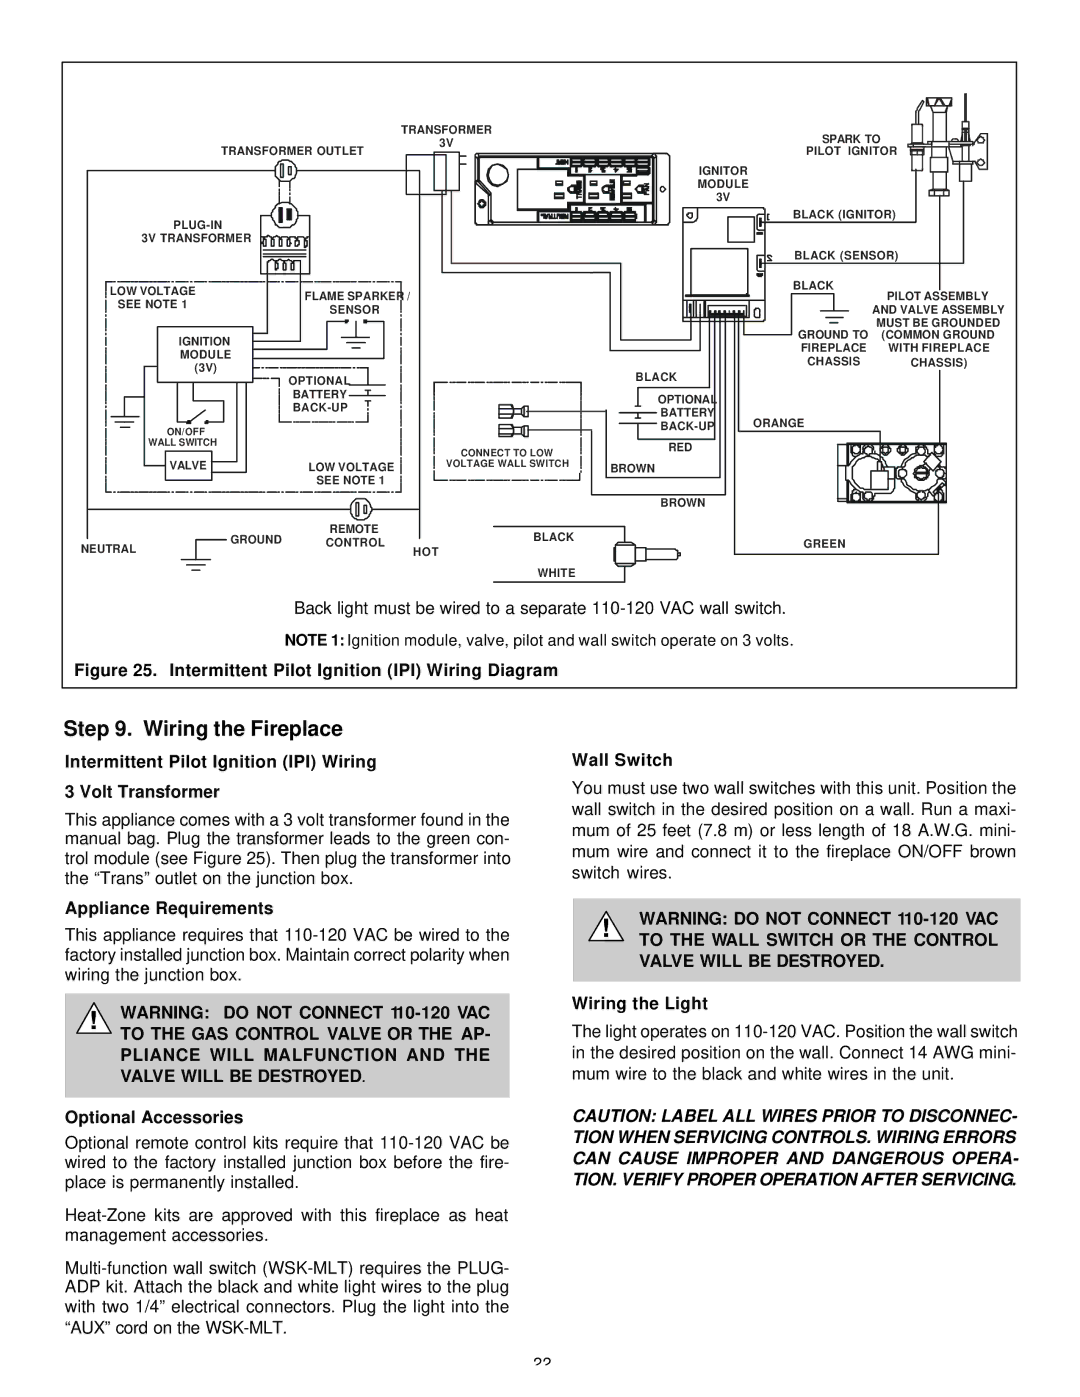
The LifeStyle 36DV is engineered with advanced gas technology. The fireplace utilizes a unique ignition system that ensures reliable starts and consistent performance. This system not only enhances ease of use but also increases safety, minimizing any risks associated with traditional ignition methods.
Additionally, the fireplace is equipped with a dynamic, glass-front design that maximizes the viewing area of the flames. With a variety of media options available, including traditional logs and modern glass media, homeowners can customize the look and feel of their fireplace to match their unique style. The LifeStyle 36DV can serve as a focal point in any room, providing both warmth and visual appeal.
Another noteworthy characteristic of the LifeStyle 36DV is its intuitive control system. With the ability to operate via remote control, wall switch, or smartphone app, adjusting the fireplace's settings has never been easier. Users can effortlessly change the flame height, control fan speed, and set timers, allowing for a personalized experience tailored to individual preferences.
The energy efficiency of the LifeStyle 36DV also cannot be overlooked. This fireplace is designed to meet stringent environmental standards, providing homeowners with a cost-effective heating solution that doesn't compromise on style. By utilizing innovative insulation and venting technology, the LifeStyle 36DV keeps the warmth inside where it belongs.
In summary, the Heat & Glo LifeStyle 36DV is a remarkable gas fireplace offering a perfect combination of modern technology and traditional warmth. With its stylish design, powerful heating capabilities, customizable aesthetics, and user-friendly controls, it stands out as a premier choice for homeowners looking to enhance their living spaces. Whether for cozy family gatherings or romantic evenings, the LifeStyle 36DV provides an inviting atmosphere that is hard to match.

