
PIER-HV-IPI, ST-HV-IPI, RCOR-HV-IPI, LCOR-HV-IPI specifications
The Heat & Glo LifeStyle series, which includes models like the ST-HV-IPI, RCOR-HV-IPI, PIER-HV-IPI, and LCOR-HV-IPI, represents a significant advancement in modern fireplace technology, offering both aesthetic appeal and efficient heating solutions. These models are designed to enhance the beauty and comfort of any living space, merging functional innovation with sophisticated design.One of the standout features of the LifeStyle series is the inclusion of the Instant Ignition, also known as IPI technology. This allows for quick and effortless lighting of the fireplace, providing immediate warmth and ambiance. With a simple push of a button, users can enjoy the soothing glow of flames without the hassle of matches or kindling. This feature is particularly appreciated during unexpected chilly evenings when you want to create a cozy atmosphere in an instant.
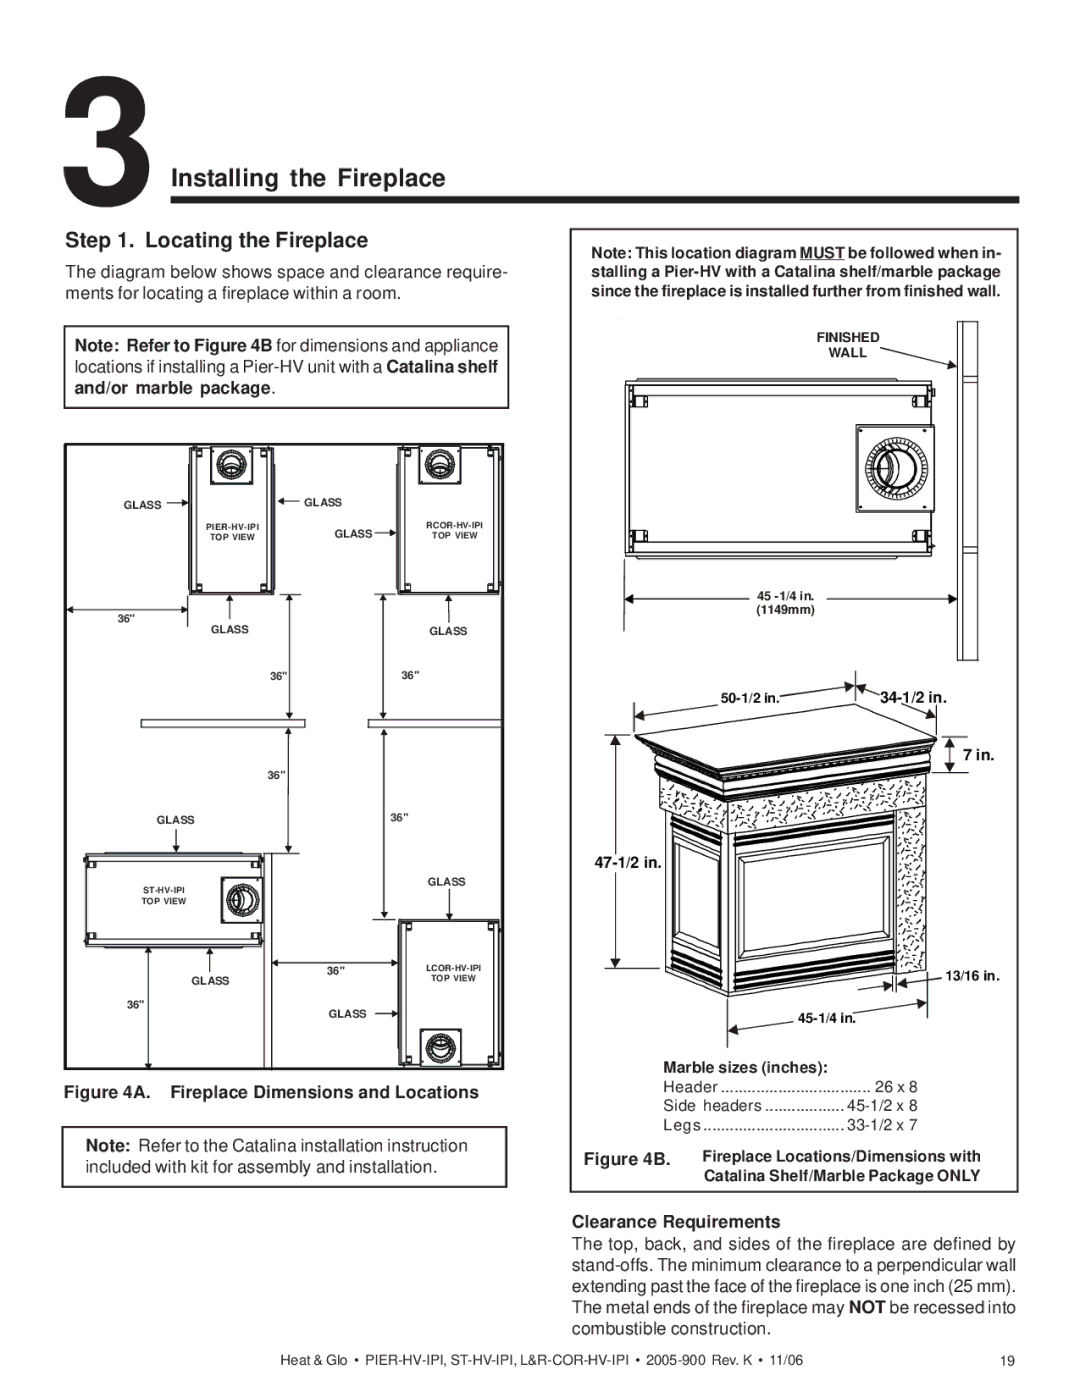
In terms of efficiency, all models in the LifeStyle series utilize advanced venting technologies, which ensure that heat is directed effectively into the living space while maximizing fuel efficiency. The linear design options combined with versatile venting configurations allow homeowners to install these fireplaces in various locations, making them adaptable for different room layouts and styles.
The aesthetic appeal of the LifeStyle fireplaces is heightened by customizable options. Users can choose from a wide array of face options, styles, and finishes to match their home décor. The glass viewing area is designed to be expansive, providing a warm and inviting view of the flames, while the clean, contemporary lines of the units make them suitable for both modern and traditional interiors.
Moreover, the LifeStyle series is equipped with remote control features that enhance user convenience. Homeowners can easily adjust flame height, heat output, and lighting without leaving the comfort of their seating area.
Safety is another crucial aspect of the LifeStyle series. The fireplaces include safety components such as an automatic shut-off that activates under certain conditions, providing peace of mind for families with children or pets.
Overall, the Heat & Glo LifeStyle ST-HV-IPI, RCOR-HV-IPI, PIER-HV-IPI, and LCOR-HV-IPI models epitomize modern fireplace design, combining efficiency and style with advanced technology and user-friendly features, making them a perfect choice for anyone looking to enhance their home environment.