FLAT SPOT FOR LOG #4 AND LOG #7

LOG FOOT

CONTACTS 2 LOG SUPPORT

Figure 5. Log #2

MATE TINE WITH LOG GROOVE

SURFACE

LOG FOOT


CONTACTS


LOG SUPPORT


Figure 6. Log #2

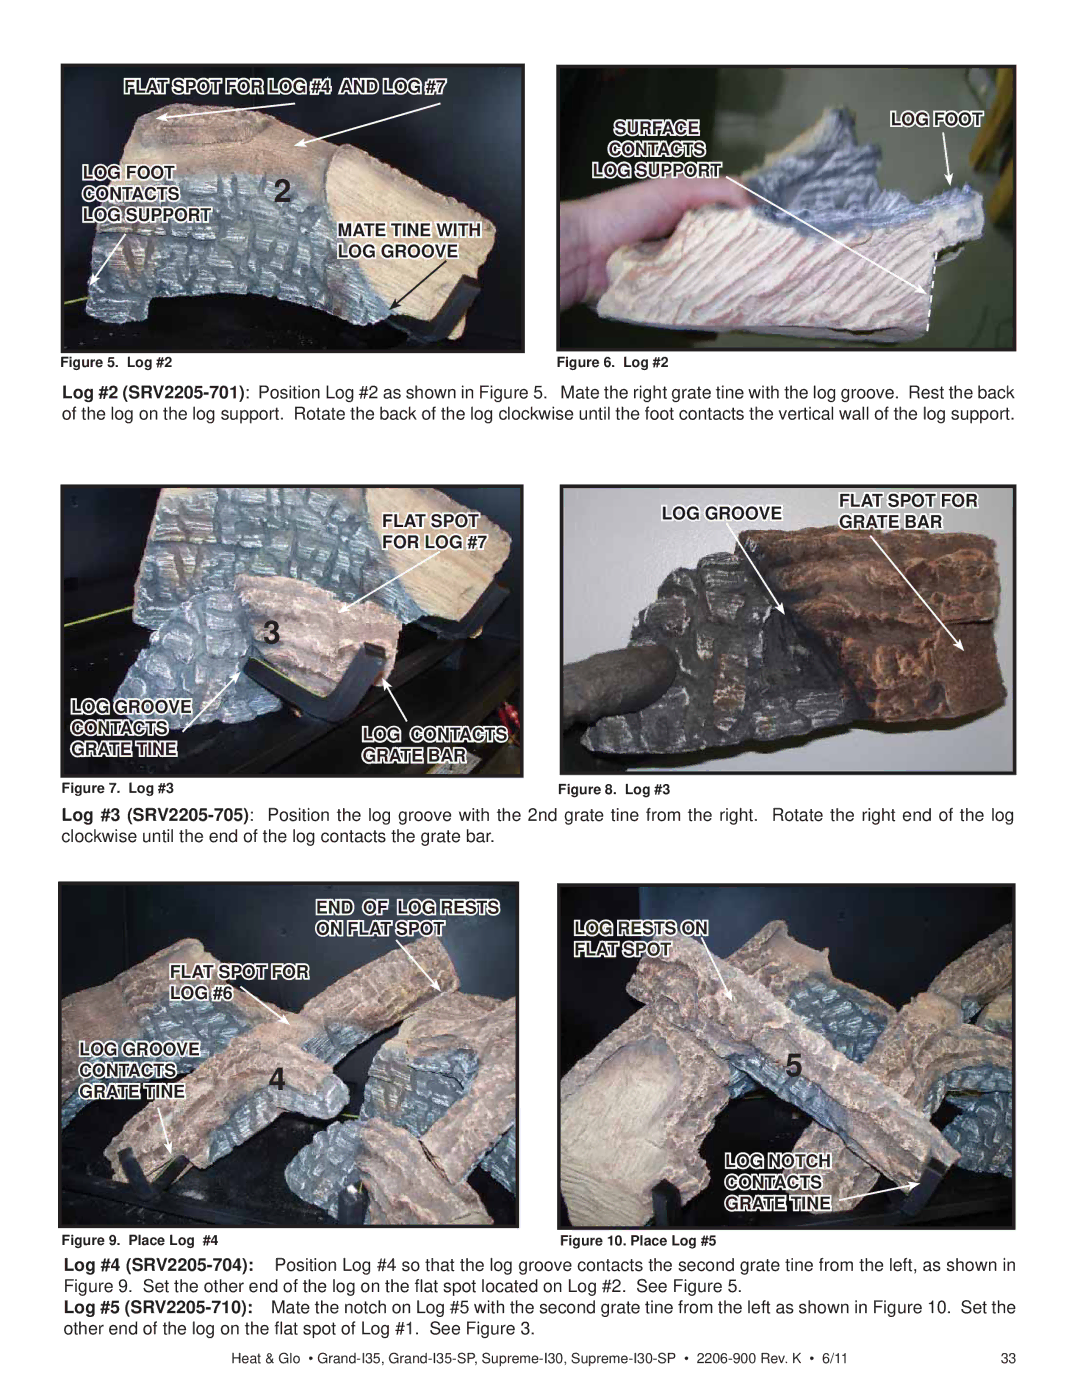
Log #2 (SRV2205-701): Position Log #2 as shown in Figure 5. Mate the right grate tine with the log groove. Rest the back of the log on the log support. Rotate the back of the log clockwise until the foot contacts the vertical wall of the log support.

FLAT SPOT

FOR LOG #7


3

LOG GROOVE


CONTACTS

LOG CONTACTS

GRATE TINE

GRATE BAR


Figure 7. Log #3


LOG GROOVE

FLAT SPOT FOR

GRATE BAR


Figure 8. Log #3

Log #3 (SRV2205-705): Position the log groove with the 2nd grate tine from the right. Rotate the right end of the log clockwise until the end of the log contacts the grate bar.

END OF LOG RESTS

ON FLAT SPOT

FLAT SPOT FOR

LOG #6

LOG GROOVE

CONTACTS 4

GRATE TINE

LOG RESTS ON

FLAT SPOT

5

LOG NOTCH

CONTACTS

GRATE TINE

Figure 9. Place Log #4

Figure 10. Place Log #5

Log #4 (SRV2205-704):Position Log #4 so that the log groove contacts the second grate tine from the left, as shown in Figure 9. Set the other end of the log on the flat spot located on Log #2. See Figure 5.

Log #5 (SRV2205-710):Mate the notch on Log #5 with the second grate tine from the left as shown in Figure 10. Set the other end of the log on the flat spot of Log #1. See Figure 3.

Heat & Glo • Grand-I35, Grand-I35-SP, Supreme-I30, Supreme-I30-SP2206-900 Rev. K • 6/11

33

Page 33
Image 33
Heat & Glo LifeStyle SUPREME-I30 LOG Groove Flat Spot for Grate BAR, END of LOG Rests On Flat Spot Flat Spot for, LOG #6