Manuals
/
Heath Zenith
/
Household Appliance
/
Home Safety Product
Heath Zenith
2LBN2 Installation, Wire the Light Control, Mount the Light Control, breaker
Models:
2LBN2
1
2
16
16
Download
16 pages
1.05 Kb
1
2
3
4
5
6
7
8
Troubleshooting
Specifications
Install
Test And Adjustment
Final Settings
Remplacement de la lampe
Solution
Page 2
Image 2
Page 1
Page 3
Page 2
Image 2
Page 1
Page 3
Contents
Operating Instructions & Parts Manual
SPECIFICATIONS
Motion Sensor Quartz Security Light
2LBN2
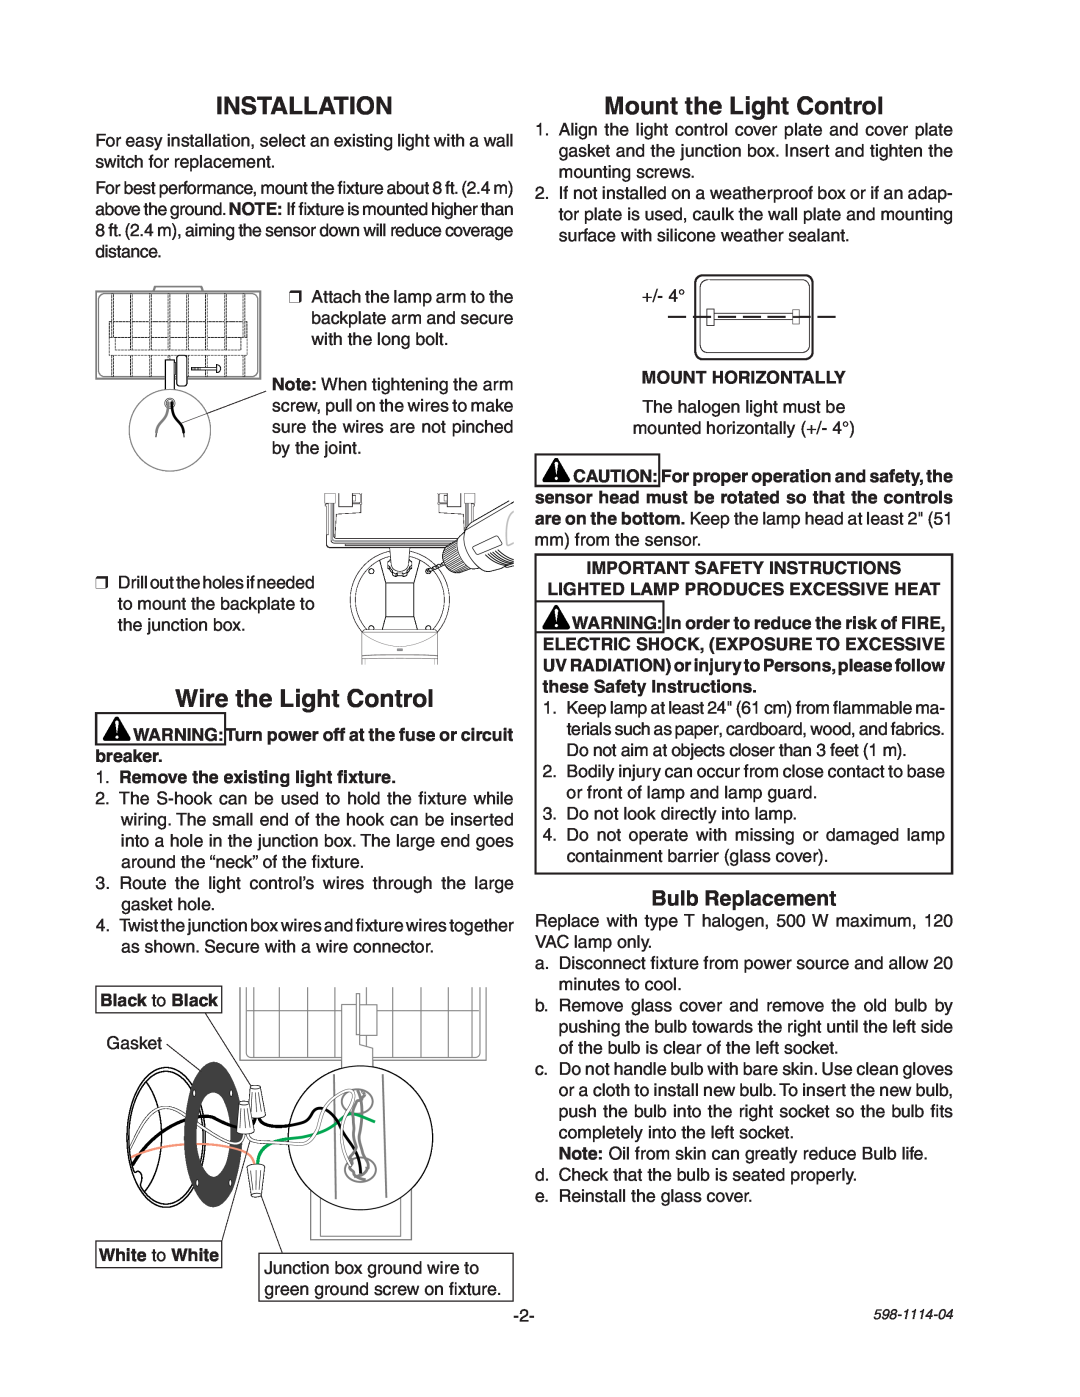
Bulb Replacement
INSTALLATION
Wire the Light Control
Mount the Light Control
OPERATION
TEST AND ADJUSTMENT
Mode Switching Summary
TEST
Most Sensitive
Final Settings
Least Sensitive
change the coverage area
SYMPTOM
TROUBLESHOOTING GUIDE
1 Year limited warranty
SOLUTION
Manual de Instrucciones y Partes
Luz de Cuarzo de Seguridad
y Sensora de Movimiento
ESPECIFICACIONES
Instale el Control de Luz
INSTALACIÓN
Cablee el Control de Luz
Cambio de la bombilla
PRUEBA
FUNCIONAMIENTO
PRUEBA Y AJUSTE
AUTOMÁTICO
Lo más sensible
Calibraciones finales
Lo menos sensible
Guíe el sensor
SÍNTOMA
Tabla de Análisis de Averías
Garantía limitada a un 1 año
POSIBLE CAUSA
SPECIFICATIONS
Mode d’emploi et guide des pièces
Exigences
2LBN2
Montage De La Commande D’Éclairage
INSTALLATION
Remplacement de la lampe
Câblage De La Commande D’Éclairage
Résumé du mode de commutation
FONCTIONNEMENT
ESSAIS ET RÉGLAGES
Bas du détecteur
Le plus sensible
Derniers Réglages
Le moins sensible
serrer la vis. 2. RéglerlasensibilitéRANGE
Garantie limitée d’un an
GUIDE DE DÉPANNAGE
SOLUTION
SYMPTÔME
Notes / Notas
598-1114-04
Top
Page
Image
Contents