Intermediate Problem Solving
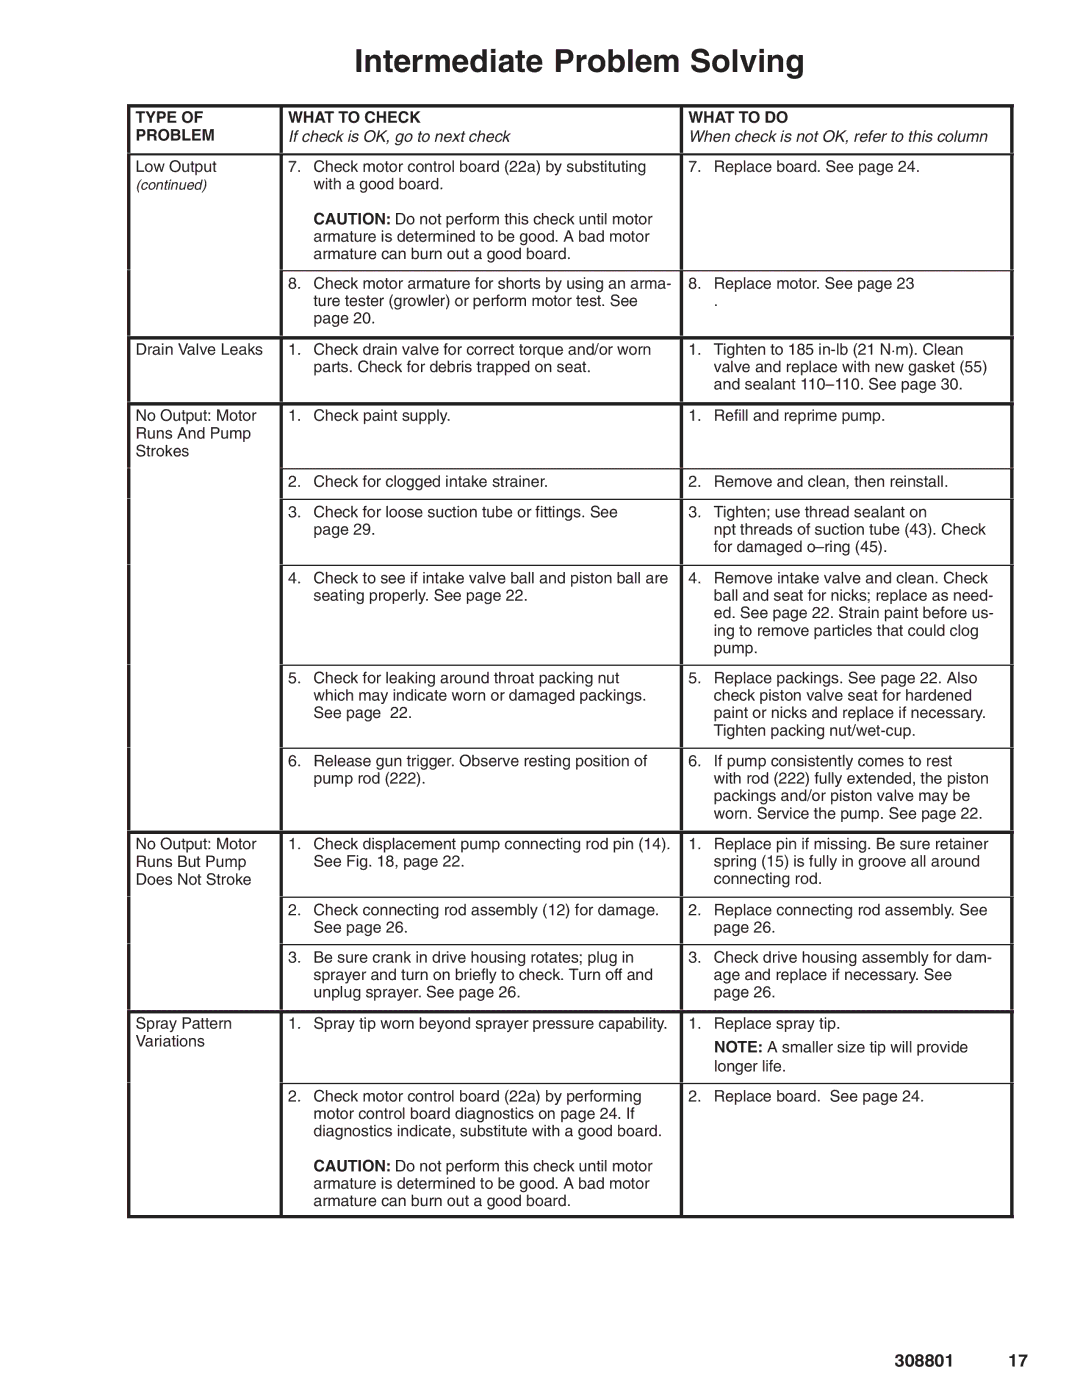
TYPE OF | WHAT TO CHECK | WHAT TO DO |
PROBLEM | If check is OK, go to next check | When check is not OK, refer to this column |
|
|
|
Low Output | 7. Check motor control board (22a) by substituting | 7. Replace board. See page 24. |
(continued) | with a good board. |
|
| CAUTION: Do not perform this check until motor |
|
| armature is determined to be good. A bad motor |
|
| armature can burn out a good board. |
|
|
|
|
8.Check motor armature for shorts by using an arma- ture tester (growler) or perform motor test. See page 20.
8.Replace motor. See page 23
.
Drain Valve Leaks | 1. | Check drain valve for correct torque and/or worn | 1. | Tighten to 185 |
|
| parts. Check for debris trapped on seat. |
| valve and replace with new gasket (55) |
|
|
|
| and sealant |
|
|
|
|
|
No Output: Motor | 1. | Check paint supply. | 1. | Refill and reprime pump. |
Runs And Pump |
|
|
|
|
Strokes |
|
|
|
|
|
|
|
|
|
| 2. | Check for clogged intake strainer. | 2. | Remove and clean, then reinstall. |
|
|
|
|
|
| 3. | Check for loose suction tube or fittings. See | 3. | Tighten; use thread sealant on |
|
| page 29. |
| npt threads of suction tube (43). Check |
|
|
|
| for damaged |
|
|
|
|
|
| 4. | Check to see if intake valve ball and piston ball are | 4. | Remove intake valve and clean. Check |
|
| seating properly. See page 22. |
| ball and seat for nicks; replace as need- |
|
|
|
| ed. See page 22. Strain paint before us- |
|
|
|
| ing to remove particles that could clog |
|
|
|
| pump. |
|
|
|
|
|
| 5. | Check for leaking around throat packing nut | 5. | Replace packings. See page 22. Also |
|
| which may indicate worn or damaged packings. |
| check piston valve seat for hardened |
|
| See page 22. |
| paint or nicks and replace if necessary. |
|
|
|
| Tighten packing |
|
|
|
|
|
| 6. | Release gun trigger. Observe resting position of | 6. | If pump consistently comes to rest |
|
| pump rod (222). |
| with rod (222) fully extended, the piston |
|
|
|
| packings and/or piston valve may be |
|
|
|
| worn. Service the pump. See page 22. |
|
|
|
|
|
No Output: Motor | 1. | Check displacement pump connecting rod pin (14). | 1. | Replace pin if missing. Be sure retainer |
Runs But Pump |
| See Fig. 18, page 22. |
| spring (15) is fully in groove all around |
Does Not Stroke |
|
|
| connecting rod. |
|
|
|
|
|
| 2. | Check connecting rod assembly (12) for damage. | 2. | Replace connecting rod assembly. See |
|
| See page 26. |
| page 26. |
|
|
|
|
|
| 3. | Be sure crank in drive housing rotates; plug in | 3. | Check drive housing assembly for dam- |
|
| sprayer and turn on briefly to check. Turn off and |
| age and replace if necessary. See |
|
| unplug sprayer. See page 26. |
| page 26. |
|
|
|
|
|
Spray Pattern | 1. | Spray tip worn beyond sprayer pressure capability. | 1. | Replace spray tip. |
Variations |
|
|
| NOTE: A smaller size tip will provide |
|
|
|
| |
|
|
|
| longer life. |
|
|
|
|
|
2.Check motor control board (22a) by performing motor control board diagnostics on page 24. If diagnostics indicate, substitute with a good board.
CAUTION: Do not perform this check until motor armature is determined to be good. A bad motor armature can burn out a good board.
2. Replace board. See page 24.
308801 17
