How to Install the Washing Machine
Removing the transport bolts
s
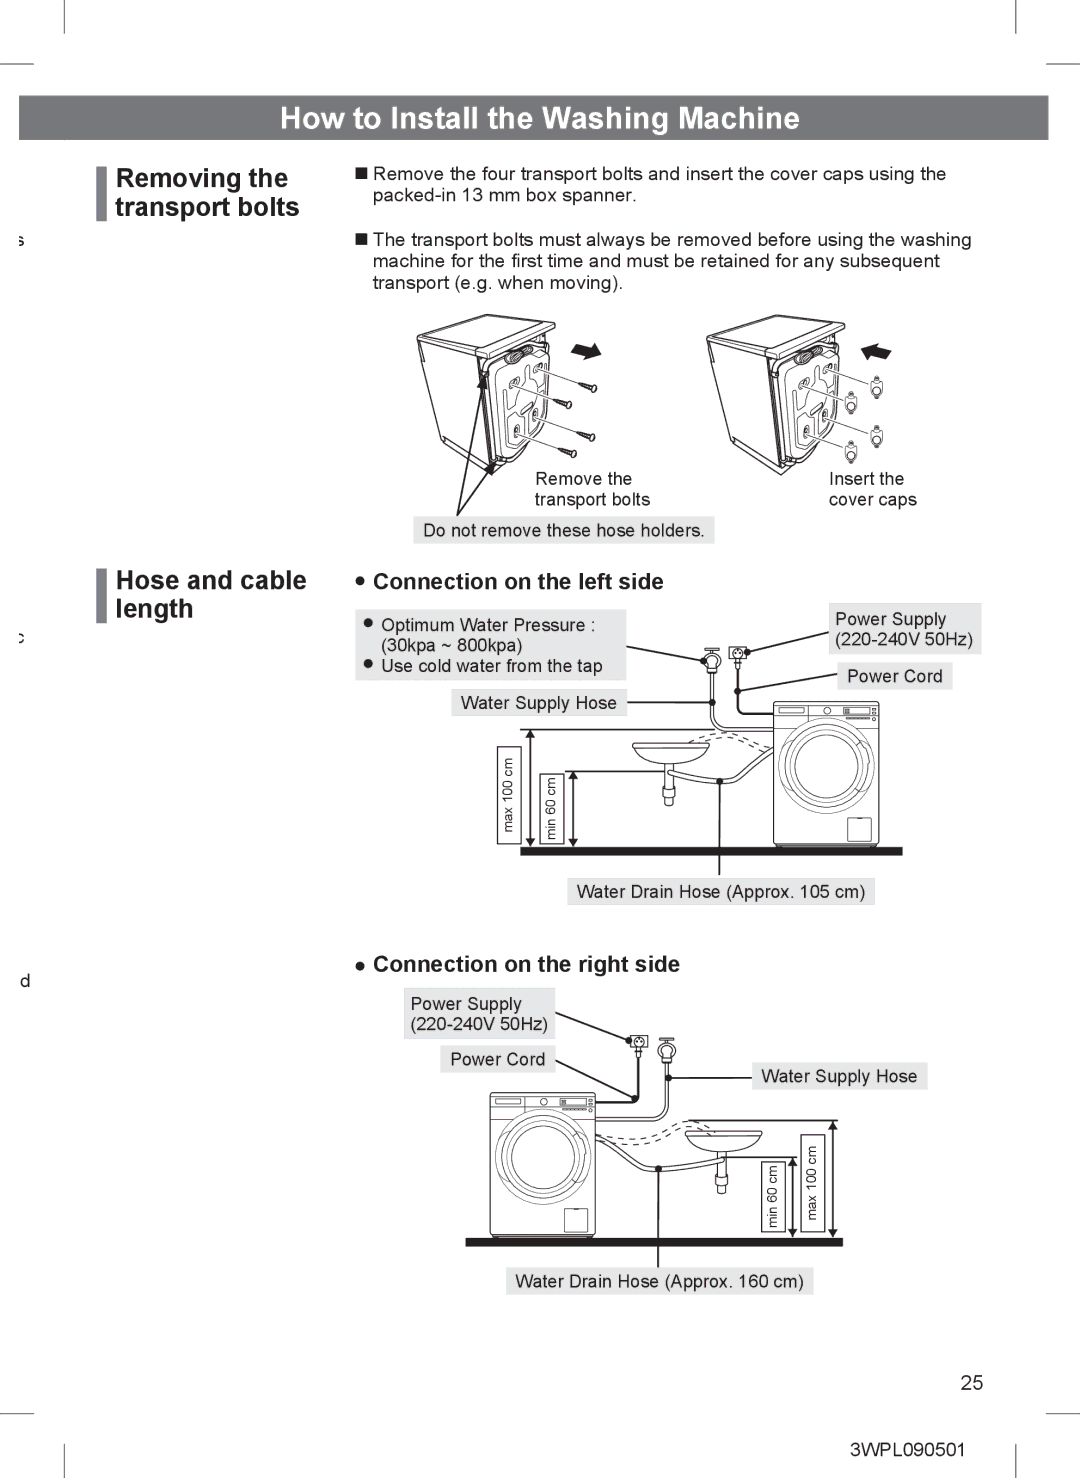
■■Remove the four transport bolts and insert the cover caps using the
■■The transport bolts must always be removed before using the washing machine for the first time and must be retained for any subsequent transport (e.g. when moving).
Remove the | Insert the |
transport bolts | cover caps |
Do not remove these hose holders.
|
| Hose and cable | ●●Connection on the left side | |
|
| |||
|
| length |
|
|
●●Optimum Water Pressure : |
| |||
c |
| |||
(30kpa ~ 800kpa) |
| |||
|
|
| ●●Use cold water from the tap |
|
Water Supply Hose ![]()
max 100 cm | min 60 cm |
Power Supply
Power Cord
nd
Water Drain Hose (Approx. 105 cm)
●●Connection on the right side
Power Supply
![]()
Power Cord
Water Supply Hose
min 60 cm | max 100 cm |
Water Drain Hose (Approx. 160 cm)
25
3WPL090501