INSTALL POWER BCORD BRACKETS (Fig. I)
1.Power cord brackets (1) are provided for convenient cord storage. Attach the power cord brackets to the back of the saw body, as shown, with two Phillips head screws (2). Tighten.
2.Wrap the power cord onto the brackets when the band saw is not in use, to prevent damage to the cord.
Fig. I
2
1
ADJUSTMENT INSTRUCTIONS
![]() WARNING
WARNING
To avoid injury, turn the switch OFF and unplug the band saw from the power source before making any adjustments.
TABLE ADJUSTMENTS (Fig. J, K)
Tilting the table (Fig. J)
The band saw table (1) tilts 0° to 45° right
1.Loosen both table lock knobs (2) underneath the table.
2.Tilt the table to the desired angle on the scale (3) underneath the table.
3.Tighten the two table lock knobs.
Fig. J | 1 |
| 3 |
2
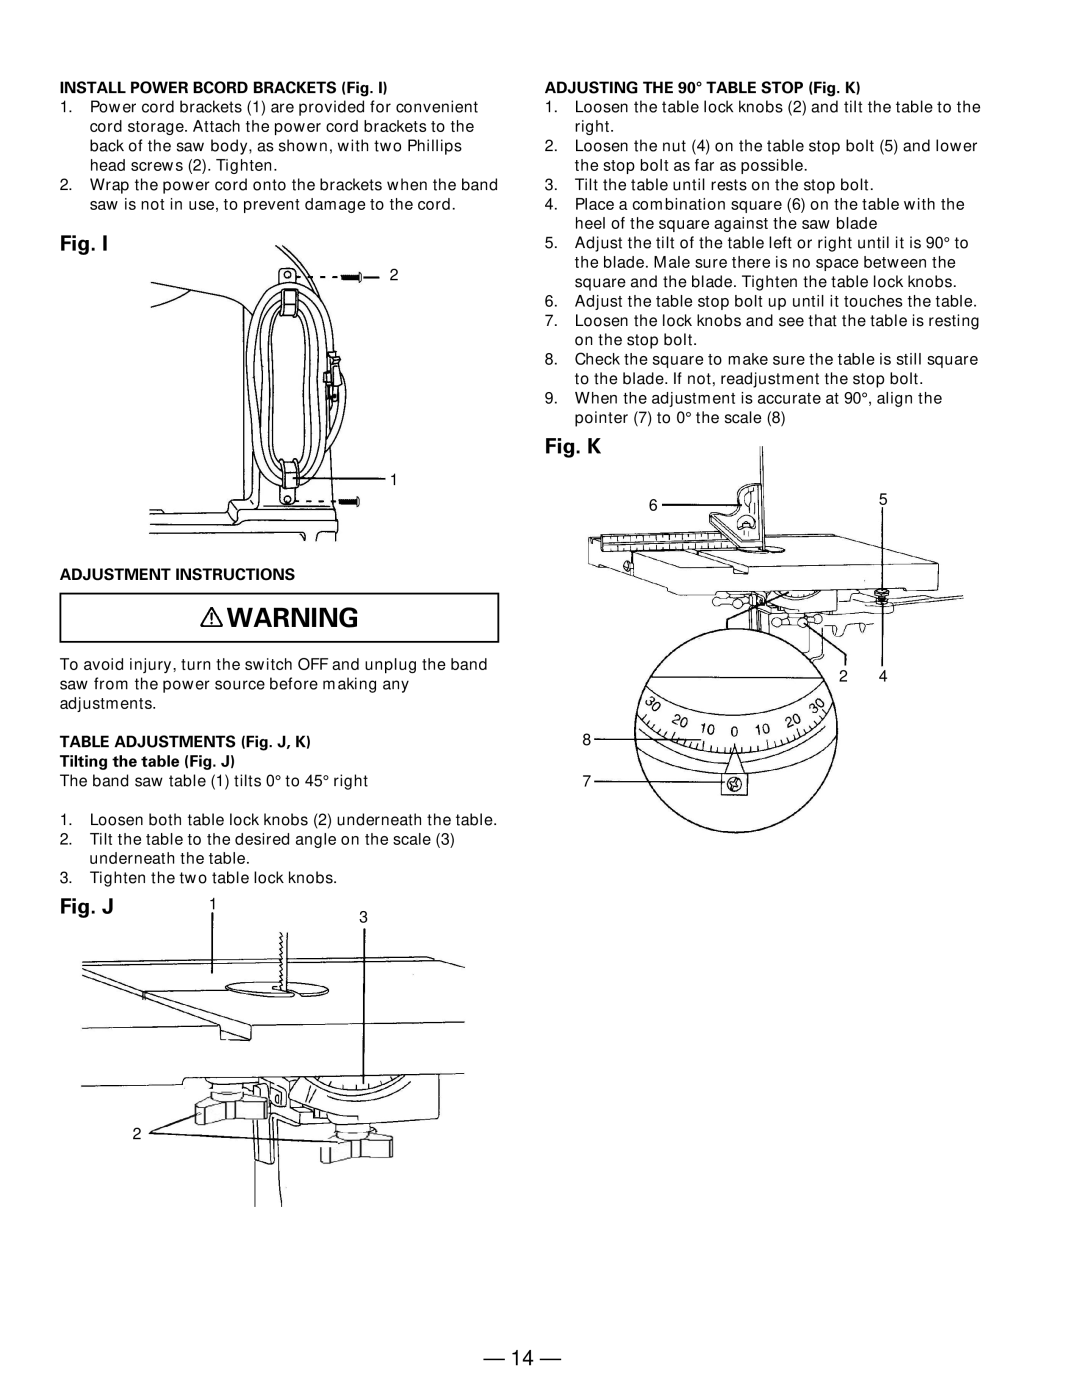
ADJUSTING THE 90° TABLE STOP (Fig. K)
1.Loosen the table lock knobs (2) and tilt the table to the right.
2.Loosen the nut (4) on the table stop bolt (5) and lower the stop bolt as far as possible.
3.Tilt the table until rests on the stop bolt.
4.Place a combination square (6) on the table with the heel of the square against the saw blade
5.Adjust the tilt of the table left or right until it is 90° to the blade. Male sure there is no space between the square and the blade. Tighten the table lock knobs.
6.Adjust the table stop bolt up until it touches the table.
7.Loosen the lock knobs and see that the table is resting on the stop bolt.
8.Check the square to make sure the table is still square to the blade. If not, readjustment the stop bolt.
9.When the adjustment is accurate at 90°, align the pointer (7) to 0° the scale (8)
Fig. K
6 | 5 |
|
2 4
8
7
— 14 —