INSTALLATION INSTRUCTIONS (continued)
Read SAFETY INSTRUCTIONS ( 2 to 9 ) carefully to ensure maximum safety before proceeding to
these steps:
Choose an appropriate site and install the product on a level table where the stand is secure.
ξInstall the monitor to have ready access to a power socket available.
Make sure that the power switch of this device is turned off.
Connecting to Video Imaging Device
(1)Make sure that the display signal of the personal computer to be used is compatible with the specifications of this device.
ξ See "Product Specifications" concerning the specifications of this device. 35 ~ 37
(2)Make sure that the power switch of the monitor is turned off.
(3)Make sure that the power switch of the imaging device is turned off.
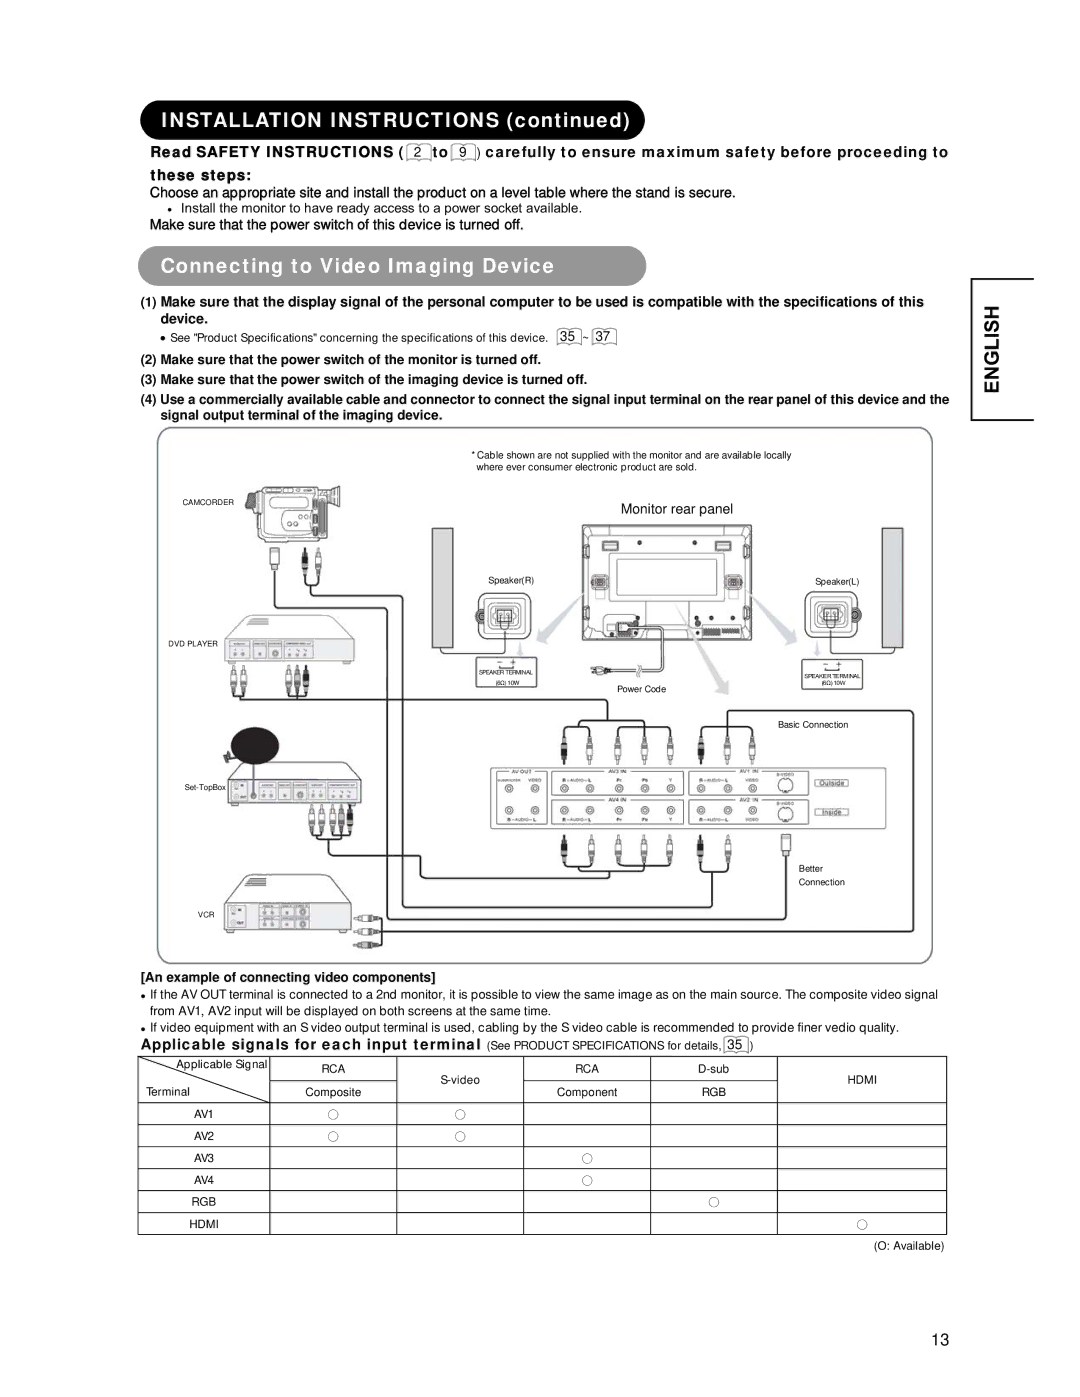
(4)Use a commercially available cable and connector to connect the signal input terminal on the rear panel of this device and the signal output terminal of the imaging device.
*Cable shown are not supplied with the monitor and are available locally where ever consumer electronic product are sold.
CAMCORDER
Monitor rear panel
Speaker(R) |
| Speaker(L) |
|
|
|
DVD PLAYER
SPEAKER TERMINAL | SPEAKER TERMINAL | |
(6ȍ) 10W | ||
(6ȍ) 10W |
Power Code
Basic Connection
Better
Connection
VCR
[An example of connecting video components]
zIf the AV OUT terminal is connected to a 2nd monitor, it is possible to view the same image as on the main source. The composite video signal from AV1, AV2 input will be displayed on both screens at the same time.
zIf video equipment with an S video output terminal is used, cabling by the S video cable is recommended to provide finer vedio quality.
Applicable signals for each input terminal (See PRODUCT SPECIFICATIONS for details, 35 )
Applicable Signal | RCA | RCA | |||
Terminal |
|
|
| HDMI | |
|
|
| |||
Composite | Component | RGB | |||
AV1
AV2
AV3
AV4
RGB
HDMI
(O: Available)
ENGLISH
13