
SRC-10H specifications
The Hoshizaki SRC-10H is a high-performance refrigeration unit specifically designed for commercial kitchens and food storage environments. Known for its reliability and efficiency, the SRC-10H offers several key features that make it an essential piece of equipment for businesses in the food service industry.One of the standout characteristics of the Hoshizaki SRC-10H is its impressive capacity. With ample storage space, the unit can accommodate a significant amount of food products, which is particularly beneficial for busy kitchens and restaurants. The design of the unit maximizes interior space while maintaining a compact exterior, making it suitable for various kitchen layouts.
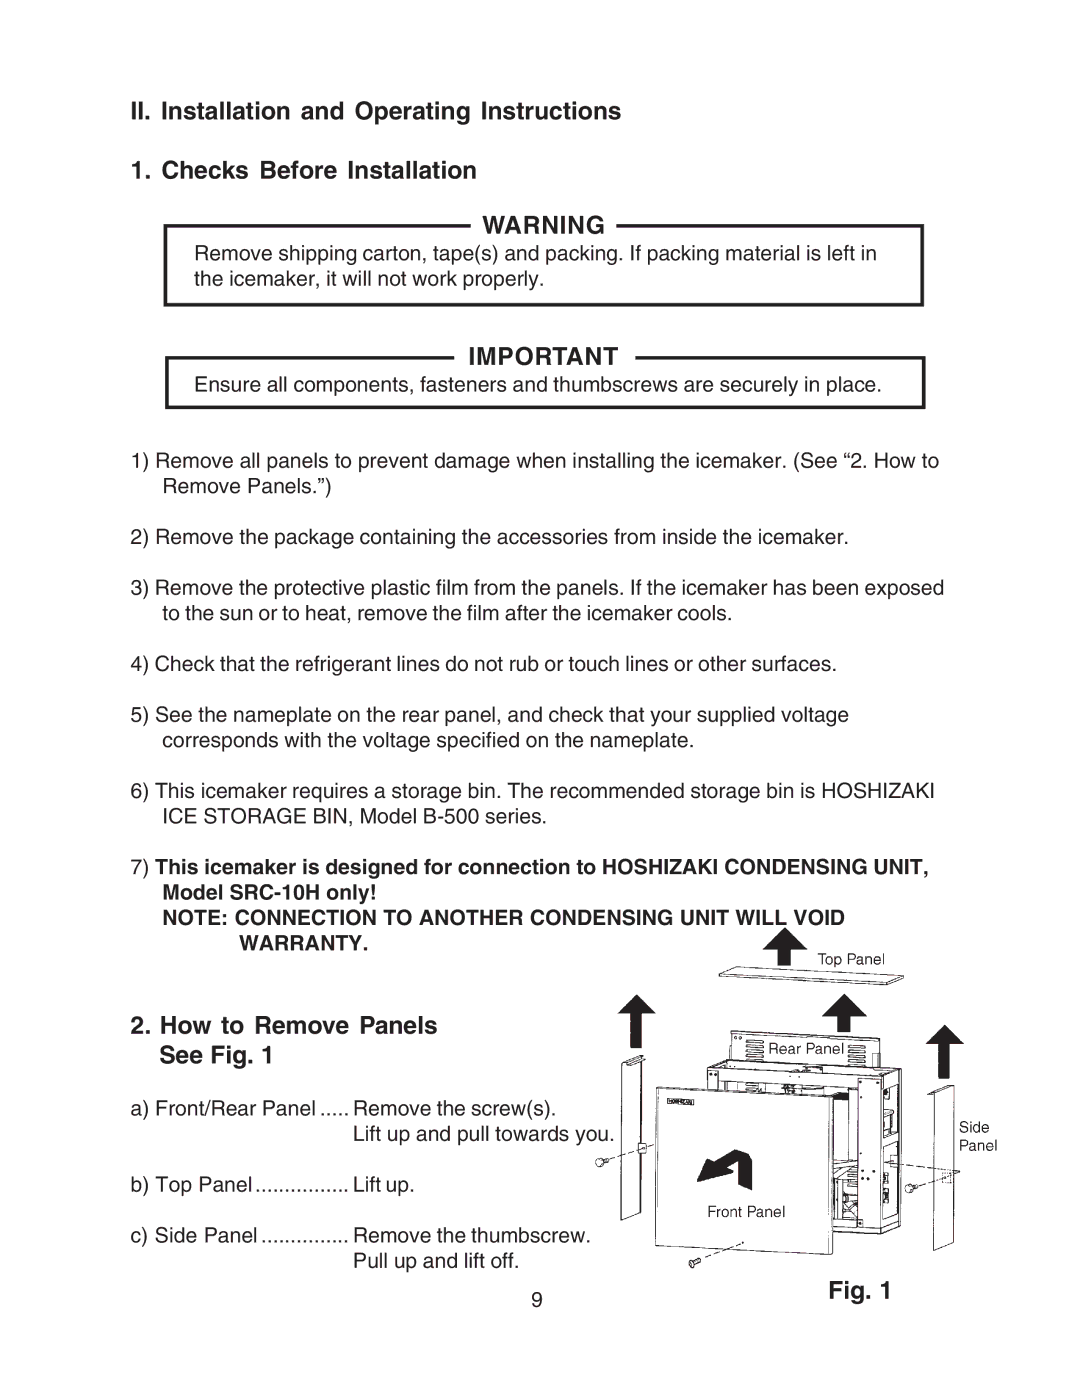
In terms of cooling technology, the SRC-10H utilizes a sophisticated refrigeration system that ensures consistent temperature control. This advanced system keeps food at the ideal temperature, thereby preserving freshness and quality for longer periods. The unit features a user-friendly digital temperature control display, allowing operators to easily monitor and adjust settings according to their specific needs.
Energy efficiency is another important aspect of the Hoshizaki SRC-10H. The refrigeration unit is designed with environmentally friendly technologies, reducing energy consumption and associated costs. This not only benefits the bottom line for businesses but also aligns with sustainability goals.
The construction of the SRC-10H emphasizes durability and hygiene. The exterior is made from stainless steel, which is resistant to rust and corrosion, ensuring a long lifespan. The interior is also designed for easy cleaning, featuring rounded corners and a smooth surface that minimizes grime buildup.
Another notable feature is the unit's noise level. It operates quietly, allowing kitchen staff to work without being distracted by excessive operational noise, which is especially important in busy environments.
In summary, the Hoshizaki SRC-10H is a highly efficient, reliable, and durable refrigeration solution that meets the demanding needs of commercial kitchens. With its advanced cooling technology, energy efficiency, and user-friendly features, it continues to be a top choice for professionals in the food service industry looking to enhance their food preservation capabilities.