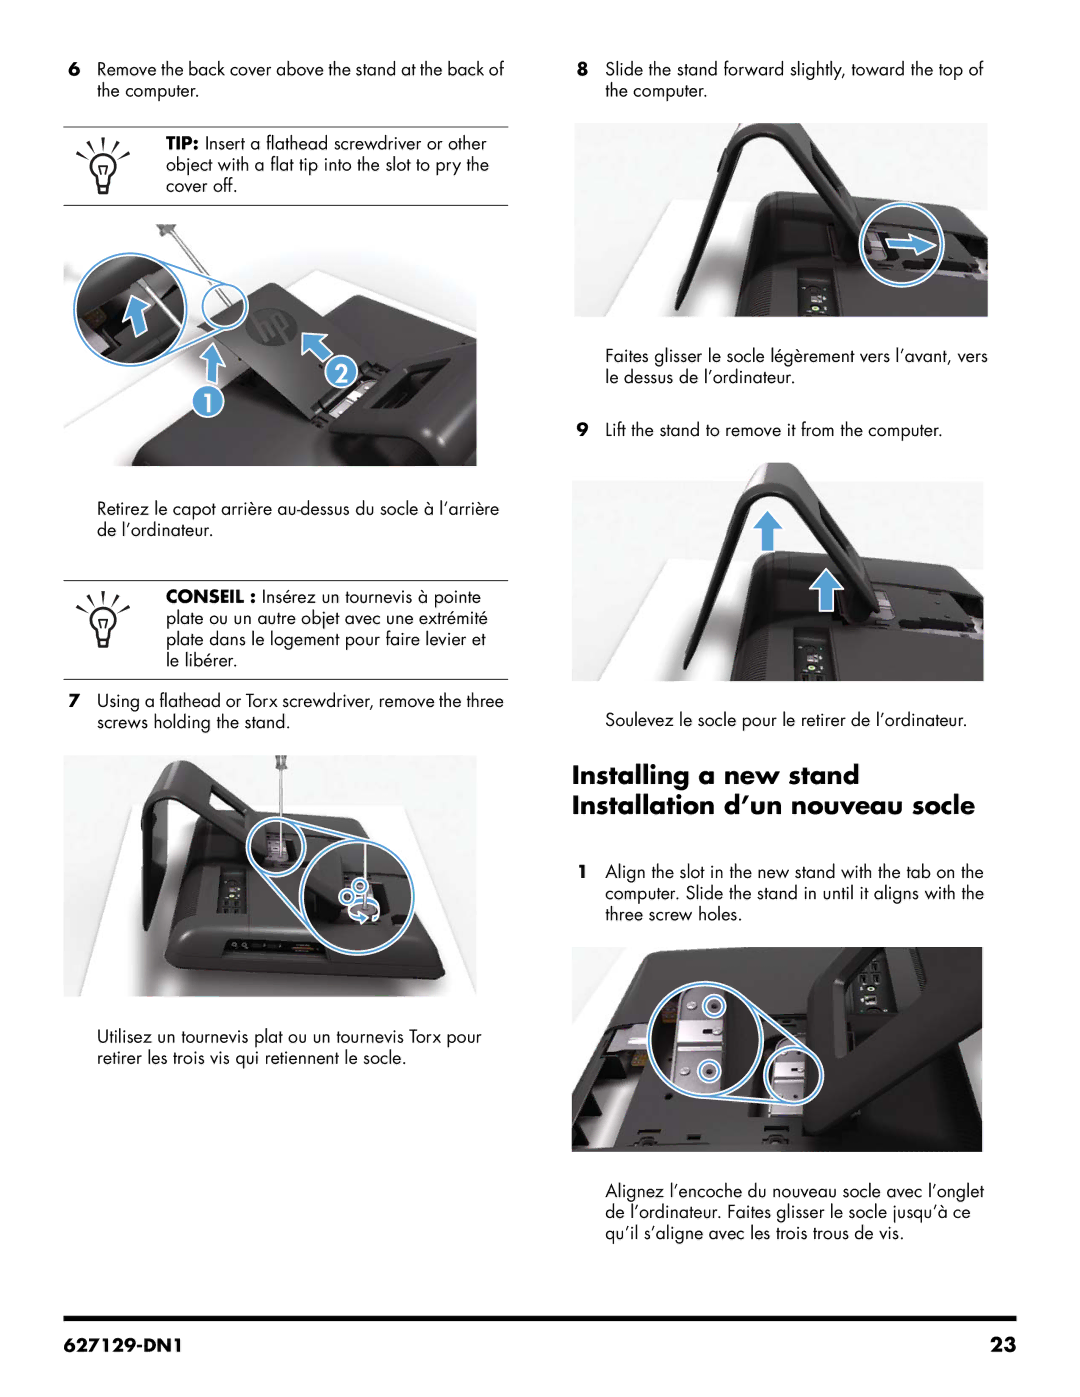
6Remove the back cover above the stand at the back of the computer.
TIP: Insert a flathead screwdriver or other object with a flat tip into the slot to pry the cover off.
2
1
Retirez le capot arrière
CONSEIL : Insérez un tournevis à pointe plate ou un autre objet avec une extrémité plate dans le logement pour faire levier et le libérer.
7Using a flathead or Torx screwdriver, remove the three screws holding the stand.
Utilisez un tournevis plat ou un tournevis Torx pour retirer les trois vis qui retiennent le socle.
8Slide the stand forward slightly, toward the top of the computer.
Faites glisser le socle légèrement vers l’avant, vers le dessus de l’ordinateur.
9Lift the stand to remove it from the computer.
Soulevez le socle pour le retirer de l’ordinateur.
Installing a new stand Installation d’un nouveau socle
1Align the slot in the new stand with the tab on the computer. Slide the stand in until it aligns with the three screw holes.
Alignez l’encoche du nouveau socle avec l’onglet de l’ordinateur. Faites glisser le socle jusqu’à ce qu’il s’aligne avec les trois trous de vis.
| 23 |
