Getting Started
Installing the Portable Sheet Feeder
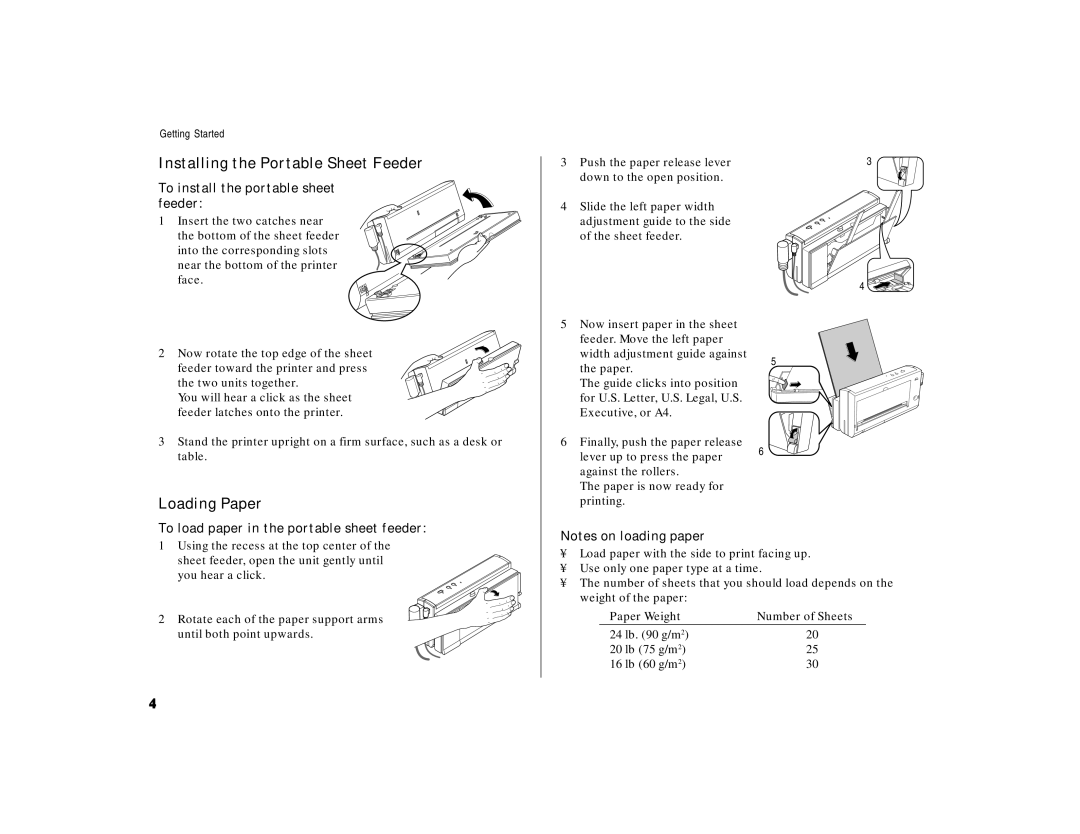
To install the portable sheet feeder:
1 Insert the two catches near the bottom of the sheet feeder into the corresponding slots near the bottom of the printer face.
2 Now rotate the top edge of the sheet feeder toward the printer and press the two units together.
You will hear a click as the sheet feeder latches onto the printer.
3Stand the printer upright on a firm surface, such as a desk or table.
Loading Paper
To load paper in the portable sheet feeder:
1 Using the recess at the top center of the sheet feeder, open the unit gently until you hear a click.
2 Rotate each of the paper support arms until both point upwards.
3 Push the paper release lever | 3 | |
down to the open position. |
| |
4 Slide the left paper width |
| |
adjustment guide to the side |
| |
of the sheet feeder. |
| |
| 4 | |
5 Now insert paper in the sheet |
| |
feeder. Move the left paper |
| |
width adjustment guide against | 5 | |
the paper. | ||
| ||
The guide clicks into position |
| |
for U.S. Letter, U.S. Legal, U.S. |
| |
Executive, or A4. |
| |
6 Finally, push the paper release | 6 | |
lever up to press the paper | ||
| ||
against the rollers. |
| |
The paper is now ready for |
| |
printing. |
|
Notes on loading paper
•Load paper with the side to print facing up.
•Use only one paper type at a time.
•The number of sheets that you should load depends on the weight of the paper:
Paper Weight | Number of Sheets |
24 lb. (90 g/m2) | 20 |
20 lb (75 g/m2) | 25 |
16 lb (60 g/m2) | 30 |
4